
Making kombucha at home is an affordable and fun project, that boasts many health benefits. However, instead of spending 5 minutes at the grocery store, you will need to spend much more time fermenting your own kombucha. Exactly how long does this process take?
Fermenting your own kombucha can take somewhere between 7 to 21 days. The number of days varies depending on the temperature, size of the vessel, & your own preference. It will also depend on if you are making a symbiotic culture of bacteria & yeast (known as SCOBY), or if you already have one.
There’s a lot to learn about kombucha fermentation! In this article find out all there is to know about fermenting kombucha at home, including
- how long to ferment it
- choosing the right tea
- how to make a SCOBY
- troubleshooting, and more.
How Long to Ferment Kombucha?
Happily, making kombucha is not a high-maintenance project. Although the whole process of making kombucha may take some time from start to finish, you will need to spare only 15 to 20 minutes to get it started. All you have to do is:
- Brew the tea
- Add the ingredients inside jars
- Store it in a shady spot for fermentation
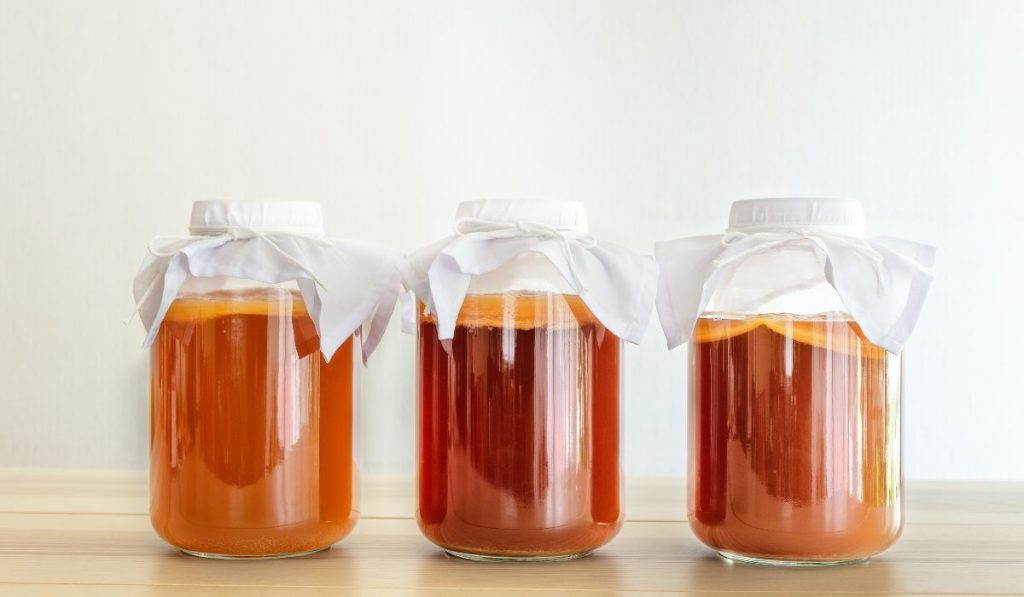
The time required to complete the first and second fermentation of 1-gallon of kombucha is between 7 to 21 days, but it can take more or fewer days depending on many factors. For example, if you are growing your own SCOBY, add 7/10 days more to the equation. Â
The number of days to ferment your kombucha depends on your taste and the environment. There are also other factors that can affect the fermentation of kombucha…
Temperature Affects Kombucha Fermentation
The speed of fermentation of kombucha is influenced by the temperature of the environment it is placed in. When the temperature is hot, the fermentation speeds up. When the temperature is cool, the fermentation slows down.
TIP: If the SCOBY is taking a long time to form, it could be because the temperature is too low. The ideal range of temperature for kombucha fermentation is 75 to 85 degrees Fahrenheit.
- In warm regions, the kombucha will ferment faster and could sour easily.
- In cold regions, kombucha will take a little longer to ferment than in warmer regions.
The Size of the Jar & Brewing Method Affects Kombucha Fermentation
The size and brewing method of kombucha affect the time required to ferment it. Kombucha produced with a continuous brewing system takes less time to ferment than the regular method.Â
| Batch Size & Method | Time to Ferment |
|---|---|
| One Gallon Regular Ferment | 10 Days |
| 2 Gallons Regular Ferment | 15 Days |
| 2.5 Gallons Continuous Brew | 15 Days |
The lid size of the jar also influences the speed of the fermentation since the SCOBY requires oxygen. The oxygen intake is more if the opening of the jar is larger.
Kombucha kept in a half-gallon jar with a 10-inch diameter will ferment faster than the one kept in a half-gallon jar with a 4-inch diameter.Â
Taste Preference Affects Kombucha Fermentation
How long you want to ferment kombucha depends on your own preference. You can ferment as long or as little time as you want, depending on how you like the taste of the brew. Your taste is the final decider of how long you let your kombucha sit and ferment!
For those new to making kombucha, I recommend tasting the kombucha on the 5th day. Use a ladle or a straw under the SCOBY and taste the brew. If it is too sweet, then let it continue to ferment and taste it again in a few days.
If you want your kombucha to taste more on the sour side, let it ferment for a few more days. However, don’t let it ferment too much after the SCOBY has been formed because then it might turn too sour.
Ingredients for Making Kombucha
You can customize and adjust the ingredients of homemade kombucha however you like. Every kombucha recipe has a few basic things in common, but it can vary, so take note of what is needed:
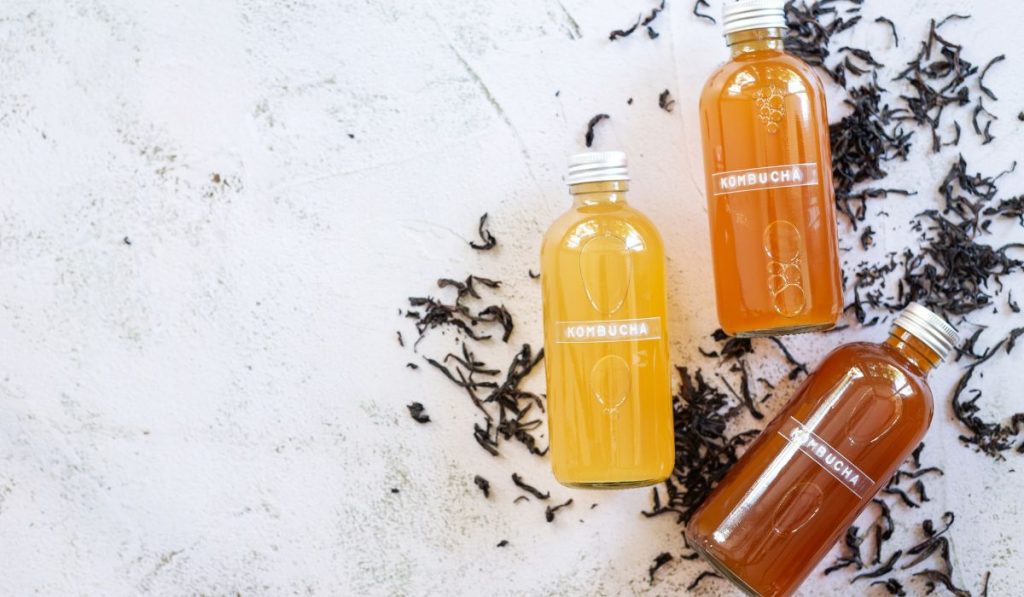
#1: The Right Tea for Kombucha
You can use almost any type of tea you want for making kombucha, and create a custom blend by mixing and matching teas. If you are just starting out, it is better to use plain black tea.Â
You should never use scented teas like earl grey or tea with added spice like chai while making kombucha. The chemical that goes into creating the scent of those teas may not react well with the SCOBY.
If you prefer, here are some herbal teas that can be used to make kombucha (with links to Amazon for buying):
Other than these, you cannot use most herbal teas in making kombucha because they do not have the nutrients that are required for fermentation to take place.
TIP: Both tea bags and loose tea leaves can be used to brew kombucha. For every 1 tablespoon of loose tea, use 4 tea bags.
#2: The Right Sweetener for Kombucha
Sugar and tea is the required fuel that feeds the fermentation process. The longer the fermentation process, the more sugar is used. So, if you decrease the amount of sugar used, you might end up starving the SCOBY and hampering the fermentation process.
Using the right type of sugar for the fermentation process is important. The best sweetener for making kombucha is organic cane juice crystals (I like this one from Amazon). It’s perfect for home brewers because of its affordability and availability.Â
Artificial sweeteners and other alternatives to sugar will only give you inconsistent results. However, if you cannot consume sugar for medical reasons, you can opt for honey. You may get inconsistent results while using raw honey so make sure to keep a backup SCOBY just in case.
#3: Water for Kombucha
An ample amount of water is needed during the fermentation process of kombucha. Make sure to use chlorine and fluoride-free water. Also, avoid pH-Adjusted or alkaline-rich water, and water that is rich in minerals, since they can harm the SCOBY during fermentation. Any inexpensive spring water is okay to use.
#4: SCOBY and Starter Kombucha
You need a SCOBY (Symbiotic Colony Of Bacteria and Yeast) and starter tea to make kombucha.
SCOBY is a pancake-like mother culture that hosts various bacteria and yeasts required in the fermentation process. You can either purchase a SCOBY (try this one from Amazon), get one from a friend, or grow one on your own.
If you purchase a SCOBY, make sure it is pathogen tested. Wherever you are getting your SCOBY from, you must make sure it’s from a trusted source.
You will need one SCOBY and a half cup of starter tea to make your first quart of kombucha tea.
NOTE: Starter tea is an acidic liquid that ensures the good health of your SCOBY. Usually, unflavoured kombucha from a previous batch acts as a starter tea. But if you don’t have an older batch of kombucha, you can opt for the regular store-bought, unflavoured kombucha tea. Â
#5: Materials for Making Kombucha
You will need a lead-free porcelain or glass vessel to ferment and store your kombucha. Do not use plastic containers. You can use glass jars, canisters, or even bowls. Generally, homebrewers use gallon-sized or quart-sized glass jars to ferment their kombucha (like this one on Amazon).
Other pieces of equipment you will need while making kombucha are:
- Measuring cups
- ThermometerÂ
- Plastic Mesh StrainerÂ
- Tight Weave Cloth to cover the jar
- Canning Jar Rings or Rubber BandsÂ
TIP: A starter kit like this one on Amazon is great for beginners as it has all the things that you might not already have in your kitchen for making your first batch of kombucha.
Making Kombucha At HomeÂ
To make this delicious and healthy fermented tea, you need to go through 2 phases:
- F1 (first fermentation)
- F2 (second fermentation).
- (To grow a SCOBY from scratch, you will need to go through 3 phases.)
Follow these steps to brew kombucha at home:
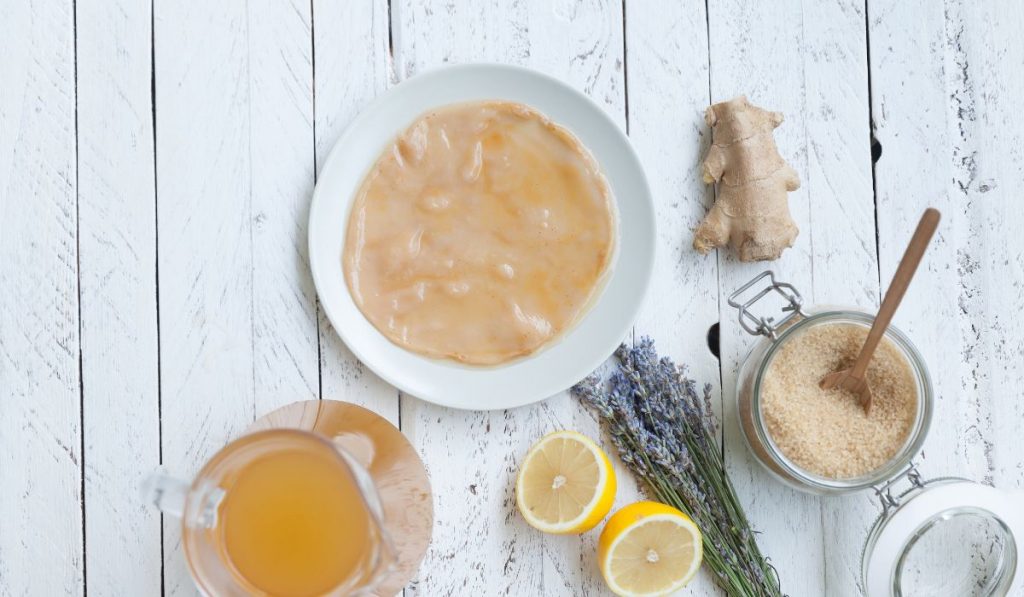
Step #1: Make a SCOBY
If you already have a SCOBY, you can miss this step out, but if you are making one from scratch, here are the main ingredients to make a SCOBY:
- unflavoured kombucha
- tea
- sugar
- water.
Making a SCOBY is a low-effort endeavor consisting mostly of waiting and watching it grow while the mixture of all the ingredients goes through fermentation. Let’s take a detailed look into making your own SCOBY at home:

Ingredient list:
- 1 tbsp. loose tea or 4 bags of black tea
- ½ cup of white sugar
- 7 cups of water
- 1 cup of raw, unflavoured, store-bought kombucha
- Tight weave cloth
- 1 1-gallon or 2 ½-gallon glass jars
- Rubber bands
How to Make a SCOBY:
- Boil water and add white sugar to it. Mix well till all the sugar is dissolved.
- Add black tea to the mixture and let it steep. Afterward, let the tea cool off at room temperature.
- When the sweetened tea is cooled to room temperature, pour it into a jar. Then pour store-bought unflavoured kombucha into the jar. If you are using two jars, pour half of the store-bought kombucha into each jar.
- Cover the jar with tightly a woven cloth and secure it with a rubber band. This will keep out bugs and debris.
- Place the jar in a dark place, out of direct sunlight. The room temperature should be between 70 to 75 degrees F. Keep it in a dark place like the cupboard and let it sit there for a week or more.
- After a while, you will notice that a ¼ -inch SCOBY is growing. The SCOBY will take around 1 to 4 weeks to form. When you take it out, toss out the tea if it is too sour.
Step #2: First Fermentation (F1)
The first fermentation is the phase where kombucha is actually made. After the first fermentation is over, you will have non-carbonated, unflavoured kombucha in your hands!
To complete the first phase of fermenting, you will need:
- Water
- Tea leaves
- Organic cane sugar
- SCOBY
- Glass jars (these are a good value on Amazon)
- Tight-weave cloth/cheesecloth (I love these ones from Amazon!)
- Strainer
- Rubber bands
How to Make 1-gallon Jar of Kombucha: First Ferment
- Boil 4 cups of water and add 2 tbsp. of loose black tea to it. Let the tea steep for around 15-minutes.
- Add ¾ cup organic cane sugar to the hot water. Stir until it dissolves. Non-organic sugar is ok to use, but artificial sweeteners will not do as cane sugar is food for yeast and bacteria. Make sure not to decrease the sugar, or you might starve the yeast and bacteria during the fermentation.
- After 15 minutes, when your tea is steeped, use a strainer to remove the tea leaves. Pour the hot tea into a 1-gallon glass jar.
- Cool down and dilute the hot tea inside the jar by pouring 8 cups of cold water inside the jar. The optimum temperature is between 70 to 90 degrees Fahrenheit.
- Add the SCOBY and pour 2 cups of the starter tea from a previous batch of kombucha.
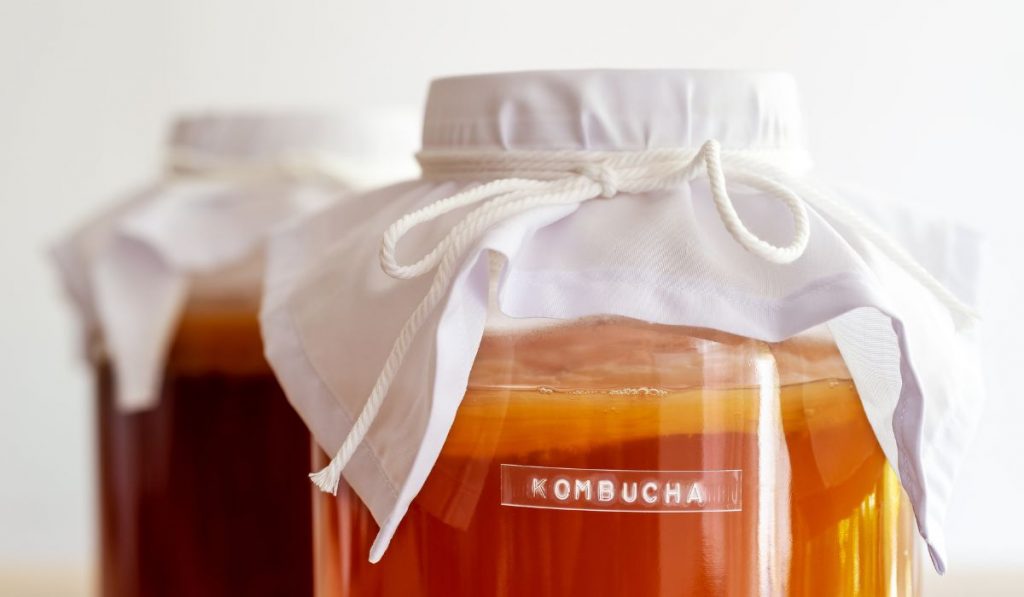
- With a clean tight-weave cloth, cover the lid of the jar. You can also use a clean T-shirt or coffee filter. Secure the cloth covering with rubber bands. The glass jar is not covered with an airtight lid because the brew needs airflow for fermentation.
- Place the jar in a shady spot out of direct sunlight at room temperature.
- Let the jar sit for a week before checking it. Do not move the glass jar or peek inside before a week. If you move around the glass jar or open the covering, you might disturb the growth of the SCOBY.
- Around the 5th day, you can start taste-checking the kombucha. Use a ladle or clean straw to take out some of the liquid and taste it. The kombucha should be acidic or sour tasting, but it should not have an overpowering smell.
- Depending on how you like your kombucha, sour or sweet, let it sit for longer. If you like your kombucha sourer, let it sit for another 2/3 days. After you think your kombucha is done, you can start the second fermentation by flavoring and bottling it.
Things to Look Out for During First Fermentation:
- Unlike while making the SCOBY, you can add other tea leaves besides black in F1. Experiment and make your own blend by mixing oolong, green or white tea. You can also use other teas on their own. Some may need to be mixed with black tea so that the mother SCOBY gets enough fuel.
- The SCOBY should not be added to the sweetened tea if it is too hot or cold. If it is too hot, it can kill the SCOBY and extreme cold can make it go dormant. If the SCOBY is dormant, it will not acidify the brew fast enough. If the brew is not acidified by the SCOBY at the proper time, it may get moldy.
- When the SCOBY is about an inch thick inside during F1, you can create a second SCOBY by peeling off a few layers.
- Around the third day, you will notice white dots form at the top of your brew. Do not mistake it for mold and remove it. The white specks are just your new SCOBY forming!
- If you see any brown stringy bits inside your jar, no need to panic, that’s just the yeast, making your kombucha nice and fizzy.
Step #3: Second Fermentation (F2)
The process of bottling and flavoring kombucha is called the second fermentation. Without this process, your brew will not be fizzy and flavourful enough. The airtight bottle traps the yeasts in your brew which turns the extra sugar into carbon dioxide for a lovely bubbly brew.
The trapped carbon dioxide makes the brew fizzy and the second fermentation also allows the added flavors to meld together and give the brew a more complex taste.
How to Bottle and Flavor Kombucha (F2):
- Remove the SCOBY from the gallon jar and set it aside for future use along with some of the unflavoured tea as a starter tea.Â
- Stir the remaining brew to distribute the bacteria and yeast all throughout the liquid. Stirring is a crucial step as it will ensure that the carbonation occurs consistently in all the bottles.Â
- The 1-gallon batch from the first fermentation will need approximately seven 16 oz. bottles (these ones from Amazon are great). In each bottle add 1/3 cup of pureed fruit or juice.
- Use a pitcher and funnel while pouring the brewed tea into the bottles. At the top of each bottle, leave half an inch of headspace.Â
- Wipe the top rim and lid of the bottles and make sure it is dry. Seal the jars tightly. If the lids are screw-on, use rubber grippers to seal them tightly.
- Place the bottles in a dark cupboard at room temperature. Let it sit and ferment for 2/3 days more.
- After a few days, place the bottles inside the fridge. The cold of the fridge will keep the drink carbonated. It also pauses the fermentation process and prevents over-carbonation.
Things to Look Out for During Second Fermentation:
- When the bottles are fermenting at room temperature, there is a risk of over-carbonation. That is, if you are using poor-quality bottles, they may explode. To be safe, you should keep your bottles in a closed cabinet to avoid any mess.
- Do not use beer bottles for the second fermentation. These are made of thin glass and thus are at more risk of exploding.
- Before placing the bottles in the fridge, “burp†them. This means opening the lid of each bottle to release some pressure and slow down the fermentation.
- Be careful while opening the bottles for the first time. If possible open it over the sink and keep a towel at hand.
- If you want the kombucha to be fizzier, you should take the bottles out of the fridge and let them ferment at room temperature for a few more days, and then put them back inside the fridge to chill.
Related: What Happens if Kombucha Ferments for Too Long?
What Flavors to Add to Kombucha?
From dried fruits to herbs you can add just about any flavor you want to your kombucha during the second fermentation. You just have to mind the added flavor to kombucha ratio while mixing:
| Flavoring | Kombucha |
|---|---|
| Fruit Juice: 10-20% | 80-90% |
| Dried fruits: 10-30% | 70-90% |
| Herbs: to taste | adjusted to taste |
If you plan on using almond or vanilla extract, add ¼ teaspoon per cup of kombucha. You can drink kombucha tea right after flavoring, or ferment it for longer to make it fizzy.
Kombucha Flavor Ideas and Combinations:
- Strawberries and Basil
- Apple Juice and Cinnamon
- Pineapple and Basil
- Vanilla Extract
- Ginger and Pepper
- Lime Juice and Ginger
- Blueberries and Cinnamon
- Lavender and Chamomile
- Chia Seeds
- Pumpkin Pie Spice
Continuous Brewing: Another Way to Make Kombucha
The continuous brewing technique allows you to brew a large amount of kombucha in a short period of time. Moreover, it ensures that you will have a steady supply of kombucha. But how does that work?
After the first fermentation of the kombucha inside the continuous brewing vessel, you can draw off 1/3rd of the brew through a spigot. Then you can add more sweetened tea to replace the previous volume. With this method, the fermenting process continues indefinitely.
The continuous brewing method of kombucha is generally used for commercial purposes. But, if you are a family of kombucha enthusiasts who drink it regularly, this method is perfect for you. If you are looking for a low-maintenance method of making kombucha, consider trying this!
The equipment you need to make kombucha through the continuous brewing method is a large glass vessel with an attached spigot (try this jar from Amazon) and cheesecloth. The vessel should have a capacity of keeping 2 to 5 gallons of kombucha.
TIP: The spigot can be made of plastic, wood, or high-quality steel and should not be made of poor-quality metal. The high acidity of the kombucha can cause the spigot to leach.
Try to purchase a vessel that has the spigot attached in the middle instead of the bottom. That way you will get the most bacteria and yeast-rich kombucha. If you cannot find a vessel like that, then make sure you stir the kombucha well before you bottle it.
Batch brewing kombucha at home can be a tedious, yet worth-it process. Here are some benefits of opting for continuous brewing over batch brewing kombucha:
- Continuous brewing takes less time to ferment. Since you can draw tea whenever you want, the fermenting process speeds up.
- Instead of using many quart-sized or gallon-sized jars, you can use one large vessel to brew your kombucha for the whole family.
- Continuous brewing has a lower chance of contamination than batch brewing kombucha. Since you will be taste-checking the brew and handling the SCOBY less in this method, there will be low chances of contamination by other microbes.
Frequently Asked Questions
1. What to do when the SCOBY sinks?
Nothing! There is nothing to worry about as it is quite normal for a SCOBY to sink or float around. It will most likely float up on its own or a baby SCOBY will form on top of it, which is also normal.
2. How to tell if kombucha is fermenting properly?
A healthy sign of your kombucha fermenting properly is when a new SCOBY forms near the opening of the jar. Another good sign of your kombucha fermenting properly is the formation of brown stringy yeast bits. You can also tell that your kombucha is fermenting properly when it tastes less sweet and more vinegar-like.
3. Is it necessary to strain the kombucha before drinking?
No, it is not necessary to strain kombucha before drinking it, although you can if preferred. Many people strain their finished kombucha before drinking to get rid of any yeast bits or baby SCOBY particles.
4. Does kombucha contain alcohol?
Alcohol is a by-product of the fermentation process. So, like most fermented food products, kombucha contains a small amount of alcohol. The amount varies from batch to batch, but most kombucha has less than 0.5% ABV, so it does not contain enough alcohol to get you drunk.

Conclusion
Kombucha is wonderful for a healthy gut and heart. Enjoy all the benefits of kombucha at home by brewing your own batch. Customizing the flavors of kombucha makes spending more time making it at home well worth the initial effort. Plus, you save money in the long run!
Fermenting kombucha at home can take a while but the whole process of making it is simple. While the kombucha ferments in 7-21 days, it is hands-off except for taste-checking it once in a while.
I hope you found this full guide to kombucha helpful, and have a happy fermentation experience!

Recent Posts
If you are trying to heal your gut naturally, fermented foods might be the answer. There is a diverse range of fermented foods available out there and you might be wondering which fermented food will...
Kimchi is the national food of South Korea. Almost every household in Korea has this spicy fermented vegetable dish stored in their kitchens. It is becoming popular in the West and is now available...