
Fermentation has always been a popular method of preserving food. Fermented foods are great for digestion and immunity. If you are interested in fermenting food, having the right tools and ingredients is an essential part of making fermented foods.
You likely have all the equipment in your kitchen for making fermented food. If you do not have them, you can easily buy them online or at a grocery store near you. Fermenting foods doesn’t always require special or expensive tools and equipment.
In this article, I am going to give a list of the essential equipment and ingredients for fermenting foods at home. There are special tools for fermentation but the common household items listed in this article are also used for making homemade fermented food. I will also briefly discuss how to safely use these items for fermentation.
Essential Equipment for Fermentation
People who are starting fermentation for the first time often have the misconception that fermenting at home is difficult and that they need special tools to do it. However, the truth is you do not need sophisticated tools for fermenting food.
Here is a list of common household items that you can use for fermenting any vegetables and foods easily at home:
#1: A Sharp Knife
Vegetables and other foods need to be prepared for fermentation. You need a sharp knife for food to be:
- sliced
- diced
- chopped
- grated
Stainless steel knives and ceramic knives (both are sold on Amazon) are best for cutting vegetables because they are sharp and handy. They are useful for chopping:
- cabbage
- root vegetables
- any food that requires pressure
Both knives are common kitchen items, so you do not need to buy extra knives to cut foods and vegetables for fermentation.
HOT TIP: If you do not want to use knives, you can use a mandolin slicer like this one on Amazon. It is pretty easy to use, and you can slice foods in different shapes and sizes without much trouble.
#2: A Food Processor
If you want to mix different vegetables for fermenting, a food processor (I like this one sold on Amazon) is useful for chopping vegetables, and you can also make pastes and sauces to add to the fermenting food.Â
For example, people use apple paste as a sweetener for sauerkraut. Put some apple slices in the food processor, add some water, and blend it to make a paste. Then pour the paste into the jar of cabbage slices.
#3: Bowls for Massaging Vegetables
After slicing or chopping the vegetables, massage them with salt. When salt and vegetables are mixed together it produces brine. Pick a suitable bowl large enough to massage the ingredients for your recipe.
People often prefer mashing the ingredients in a glass bowl or ceramic bowl. But you can also use a stainless steel bowl or a plastic bowl. All of these can be purchased on Amazon. If you want to make a lot of fermented vegetables, you can transfer the mixture of the bowl into large vessels like buckets.Â
HOT TIP: Avoid using wooden bowls because they will absorb the salt and the water produced after mashing.

#4: Pounding Tools
Another essential tool for fermenting food is a pounding tool, I like this one on Amazon. You can massage and mix the food by hand, but it is a tiring process. When you are making fermented vegetables like sauerkraut, they need to be submerged in their juice and the vegetables pushed down.Â
NOTE: To learn how to ferment cabbage for maximum probiotics, read my article with 10 easy steps!
Hence, a pounder is necessary. It can be wood, stainless steel, or whatever type you find handy. You can also buy a dual-sided pounder to use for different sizes of jars.
If you do not have a pounder and you do not want to spend extra money to buy one, use a metal or plastic potato masher or a soup ladle. All of these tools are great for getting juice from vegetables and fruits.
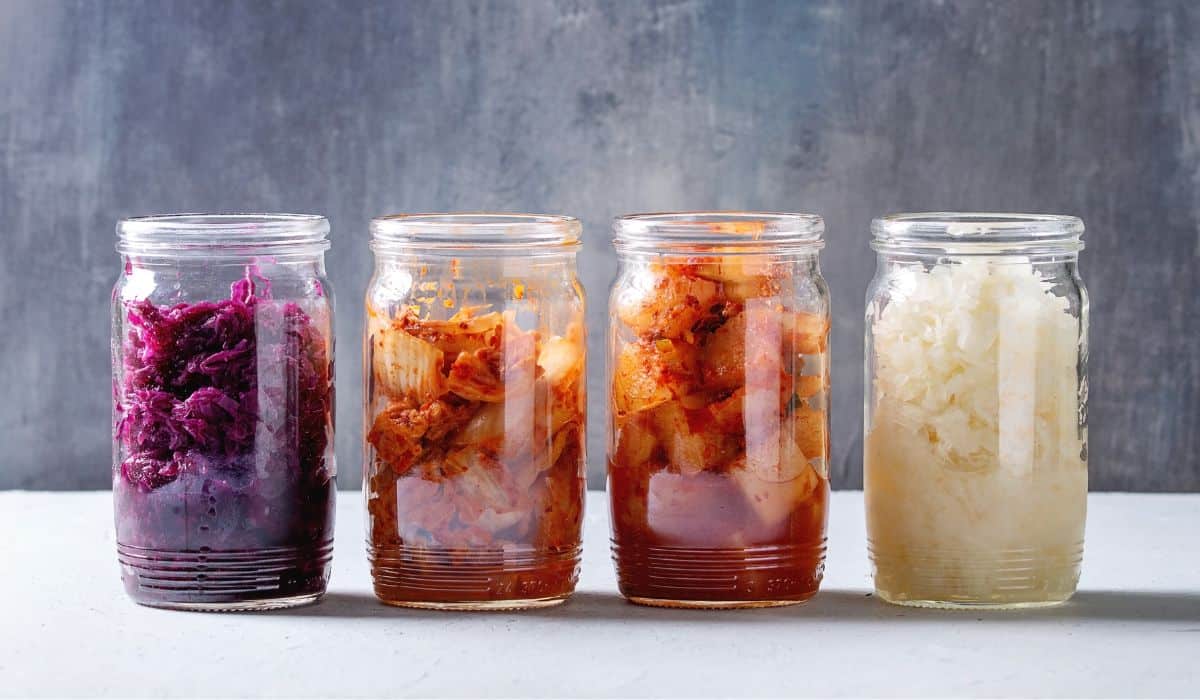
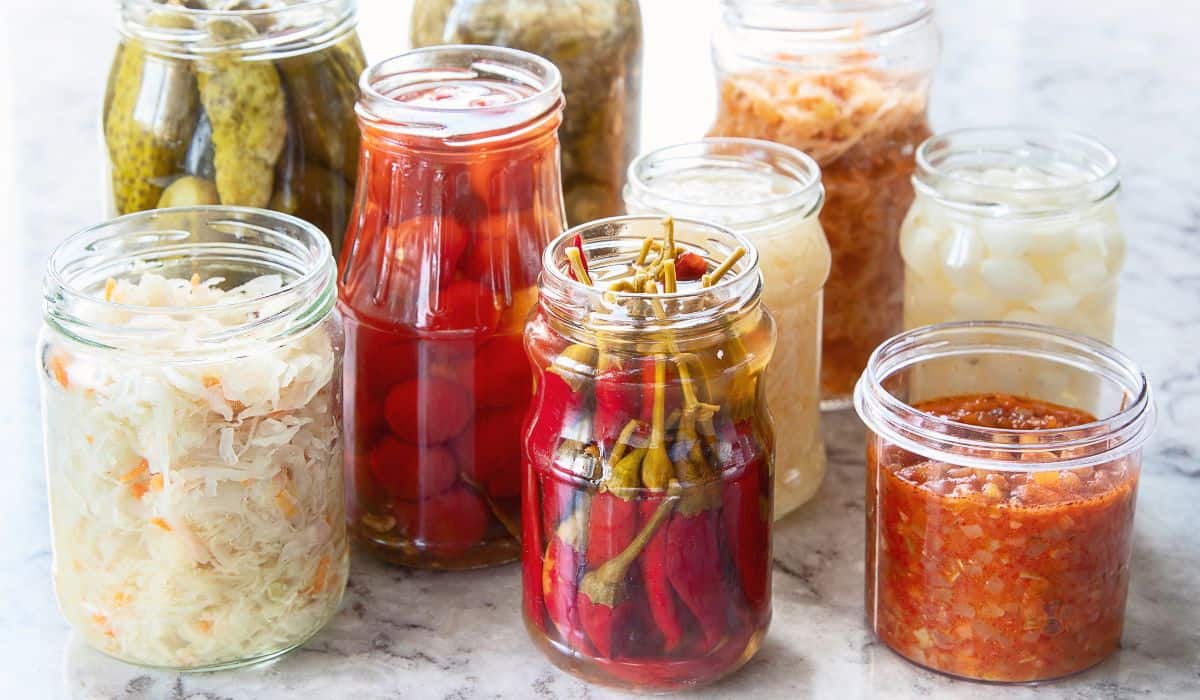
#5: Jar and Containers for Fermentation
Now, there are a lot of options for choosing jars and containers for fermenting your foods. The jars can be made of glass or ceramic, and there are different shapes and sizes depending on the type of food you are fermenting.
NOTE: Avoid using jars that are made of materials that can contaminate the food.
Here are some options for jars for fermenting food:
Glass Containers for Fermenting
Glass containers are the most popular choice for fermenting food. There are quite a few reasons why people prefer them.
First of all, they are cost-effective. If you buy them in bulk like these glass jars on Amazon, they are a good value.
HOT TIP: You can reuse glass containers from other foods, but make sure they are cleaned properly.
Secondly, they are transparent so you can see what is happening inside the jars. When transferring the food and brine to jars, it makes it easy to be sure that the food is completely submerged in the brine. It is also easier to check for mold or other contaminants through a glass jar.
Thirdly, glass jars do not contain any harmful chemicals that can hamper fermentation, so they are one of the safest containers to ferment and store food.
Ceramic Containers for Fermenting
When it comes to making and storing large batches of fermented food, ceramic containers are the better choice. Ceramic containers can be large like this 20-liter fermentation crock sold on Amazon. Ceramic fermenting crocks are as safe as glass jars.
Porcelain Containers for Fermenting
Food-safe porcelain containers are also good for fermenting, and this one is absolutely gorgeous! They are similar to ceramic containers but much heavier and more durable.Â
HOT TIP: Whether you’re using glass, ceramic, or porcelain, make sure that the jars have wide mouths so you can fit your hand inside to clean or push the food down.
Avoid Plastic Containers
Plastic containers can be used for fermentation but are best to avoid. The plastic may contain chemicals that can react with the food and brine. Plastic containers can be damaged and affected by germs and bacteria quite easily.
#6: Lids for Containers
Choosing the right lid is the most important step for food fermentation. An appropriate lid is important to keep oxygen out but allow the gas that is produced during fermentation to escape from the jar.
With the right lid, you will get crunchy vegetables. But if you use the wrong one, your ferment will get moldy and spoiled.
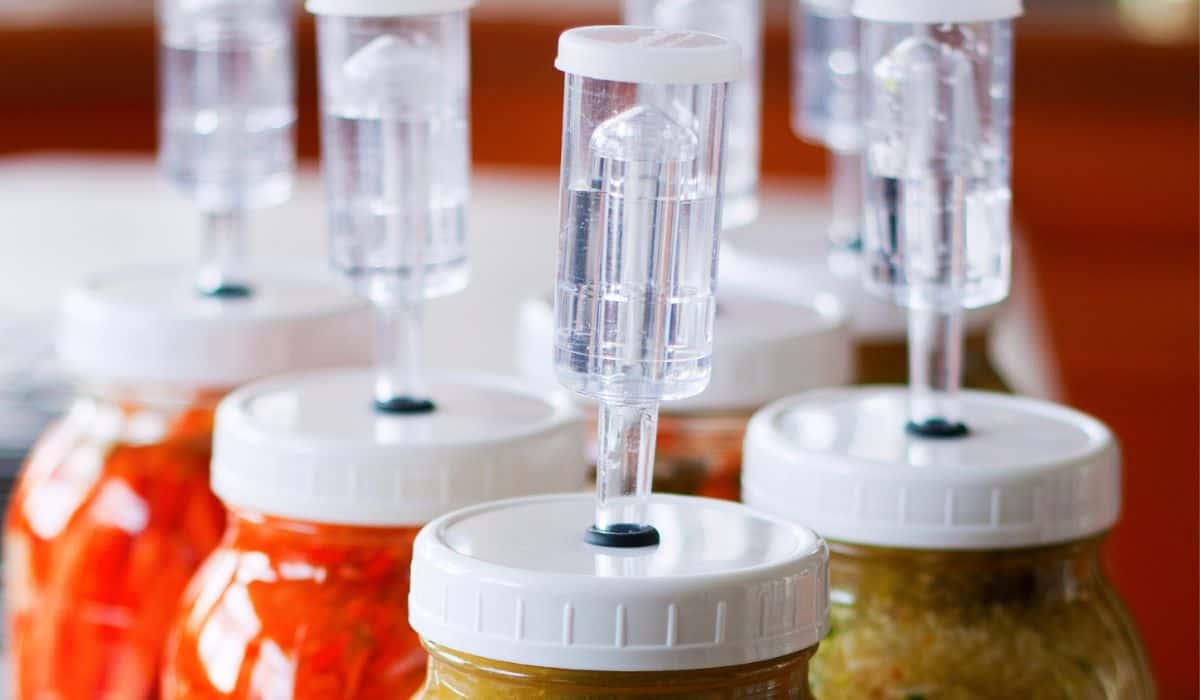
Fermenting With an Airlock Lid
Expert or beginner, food fermenting enthusiasts like to use airlock lids on their jars, like these. There are different styles and designs of airlock lids on Amazon, such as:
You can also buy this set of jars on Amazon that comes with:
- airlock lids
- storage lids
- fermentation weights
Airlock lids create an anaerobic fermentation environment inside the jar, meaning without oxygen. They reduce the possibility of mold or yeast and do not allow air to enter the jars. With airlocks, you do not need to burp the jars, and the food will smell less.
Using Tight Lids for Fermenting
Jars with tight lids are also useful for fermentation. Tight lids do not let much air get into the food, reducing the risk of mold on the ferment. Compared to airlock lids, there are a few disadvantages.
When using tight lids, the jars of fermenting food need to be burped regularly. The fermenting of vegetables or fruits produces carbon dioxide, so you have to monitor the jars with tight lids.
HOT TIP: Jars with tight lids are the best option for storing fermented foods in the refrigerator.
Cloths and Towels for Fermenting Lids
Cloths or towels are also used to cover smaller jars during fermentation. Paper coffee filters and butter muslins secured to the top of the jar with rubberbands are great options for covering jars for fermentation.
You can also use towels like tea towels and tight weave dish towels to cover the jars with a rubber band, each can be found on Amazon as well. The clothes and towels let the gas out of the jars during the fermenting process and protect the food from dust and bugs.Â
Unfortunately, there is a disadvantage to this type of jar cover. Mold and yeast can quickly grow in fermented food covered with cloths and towels. Fortunately, molds growing on the surface are harmless and can be removed. It is better to use cloths and towels over the jars of fermenting foods that you intend to use within a few days or weeks.
#7: Fermentation Weights
Keeping the foods submerged in the brine is crucial for fermentation. Use fermentation weights that can be purchased on Amazon.
You can also be creative and use things available around you to push down the foods in the brine so that they do not get exposed to the open air, like:
- river rocks
- small glass jars
- plastic bags
NOTE: Make sure not to use any object that can react with the ingredients inside the jar.
#8: Tongs For Fermentation Jars
Putting your hands inside jars or containers full of fermented food is not always a good idea. Germs and bacteria can easily affect fermentation.
Use tongs to get fermented food out of the jars. Tongs are handy for serving fermented foods from large-mouthed jars. This way, your hands will not come in contact with the food and disrupt the good bacteria balance of the ferment.
#9: A Brew Funnel
Homebrew funnels, sold on Amazon, are a great help for fermenting foods that require liquid, such as:
- brewing beers
- dairy fermentations
- kombucha
- wine
It is an essential item for every home brewer, and it is useful in many ways. You can use a brew funnel to pour foods inside narrow-mouthed jars.
Some funnels also have a removable screen attached. The screens are used for straining water or liquid from:
- fruits
- vegetables
- herbs
- starters
Common Ingredients for Fermentation
There are different types of fermentation. Each process requires some type of:
- foods
- vegetables
- fruits
You also need different starters to ferment your foods. Starters have good bacteria that boost our digestive system and can increase our immunity.
Although there are different ingredients for each fermentation recipe, there are still some common ingredients for fermenting any food, including:
- water
- salt
- sweeteners
- starter culture
#1: Water
The most important ingredient for any fermentation is water. The water used for fermentation has to be free from:
- contaminants
- chemicals
- minerals
The water used will affect how well the fermented foods turn out.
Tap waters are not safe for fermentation because they are usually treated with chlorine or chloramine to kill bacteria. Hence, if you use tap water, it will kill the microbes necessary for fermenting foods.
Boiling can remove chlorine, but chloramine is not that easy to get rid of. Another option is to use tablets of sodium thiosulfate to remove both of these chemicals.
Using well water is not a safe water source for fermenting. Well water or tube-well water can seriously harm the taste and quality of fermented food and can contain:
- minerals
- nitrates
- various contaminants
- arsenic
Well water minerals and contaminants can be removed by filtering, but the trace of chemicals and salt may still remain. If you still want to use well water, filter it with a charcoal filter.
So, what type of water is best for fermentation? Most home fermenting experts will agree that it is best to use distilled water. It is not expensive, and you can easily find it in stores. It does not contain any minerals or pollutants that can harm food fermentation.

#2: Salt
Most homemade fermented foods require salt for fermentation. You cannot pick just any salt to use on vegetables and fruits to create a brine. Common salts contain added iodine and chemicals to keep them fresh and dry. These elements are unsuitable for fermentation.
For fermenting, use one of these salts (all are available on Amazon):
Salt is important for fermentation because it helps draw the water out of the vegetables and fruits. Moreover, it kills bad microbes and helps to preserve food.
#3: Using Sweeteners
For healthy and nutritious fermented food, you need good microbes or bacteria. To feed the bacteria, almost every fermenting recipe instructs to add a sweetener which is normally sugar. Organic raw sugar or regular granulated sugar are both used for fermentation and are easily purchased on Amazon.
Honey is also a great sweetener for food fermentation, but make sure it is pure raw honey, sold on Amazon. Â
Besides honey and sugar, people sometimes use agave syrup which can be bought on Amazon.
HOT TIP: You can also add various fruits like apples to add flavor and sugar.
#4: Starter Culture
A starter culture is a batch of good bacteria that is added to food during fermentation. Most commercially produced fermented foods are produced using a starter culture.
Most fermented food can be made without a starter culture, but, you can also add starter culture in home ferments to speed up the fermentation process. Foods that are benefited by adding a starter culture:
- kombucha
- yogurt
- kefir
Precautions for Fermenting
Before you start fermenting any food, you have to clean and sanitize all tools and work area. To grow good bacteria, the number of harmful bacteria needs to be reduced.
Here is what to do before using the essential tools and ingredients:
- Use soap and hot water to clean the jars, tools, and weights you are going to use for making fermented food.
- If the recipe instructs you to serialize the tools, do so properly.
- If you have to dry or wipe anything, use a clean paper towel, or air-dry the tools in a clean space.
- Wash the vegetables and fruits before cutting them with a clean knife.
- Clean your hand thoroughly before touching the food to begin the fermenting process.
Conclusion
By now, you should have a good idea about what tools you need for fermentation. All the items and ingredients mentioned in the list are easy to find and use. Use these tools to make your first batch of fermented foods full of health benefits!
You might also be interested in:
Recent Posts
If you are trying to heal your gut naturally, fermented foods might be the answer. There is a diverse range of fermented foods available out there and you might be wondering which fermented food will...
Kimchi is the national food of South Korea. Almost every household in Korea has this spicy fermented vegetable dish stored in their kitchens. It is becoming popular in the West and is now available...