
Ever wish you didn’t need to follow a recipe every time you want to try fermenting something new? Me too! The truth is, once you know the principles of fermentation, you can pretty much ferment anything you want without following a recipe!
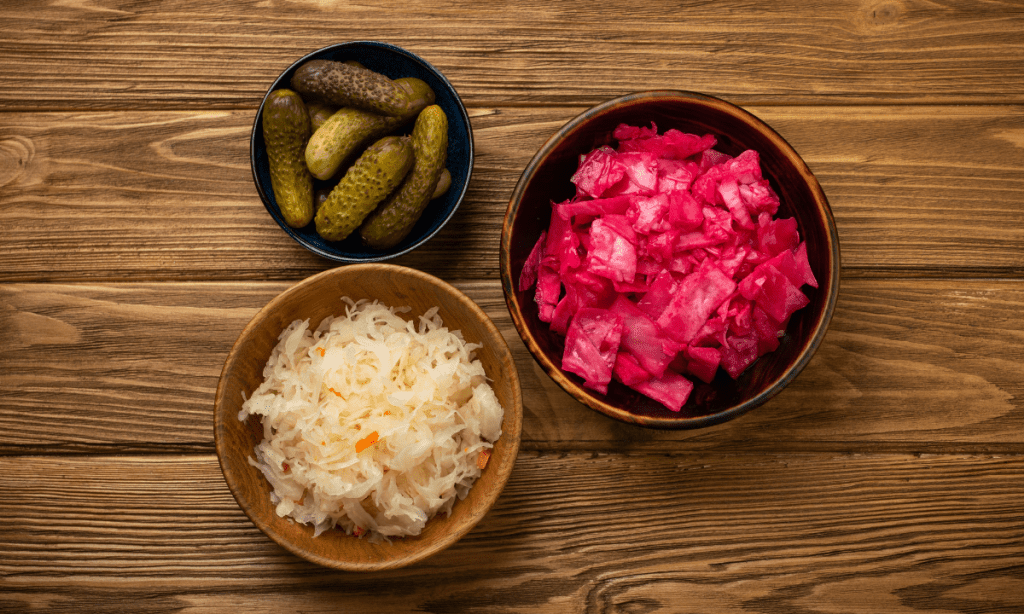
Fermented vegetables serve two purposes at once. They are ridiculously tasty and they are super nutritious. On top of that, you don’t have to worry about their preservation as they are rich in natural preservatives. Although it’s a simple process, there are some crucial things to pay attention to if you want to successfully ferment any vegetable.
The key to successful fermentation of any vegetable depends on a few things:
- The vegetables need to be chopped appropriately (shredded, grated, or diced)
- The correct fermentation method must be used
- The vegetable needs to be fermented for the right amount of time
Here’s a more detailed guide so that next time you wonder what a fermented version of that vegetable will taste like, you can simply try it for yourself!
How to Successfully Ferment Vegetables
Fermented vegetables last a very long time. Also, they taste great and are full of nutrition. They can be eaten on their own or as a side dish. You can slide them into burgers, wraps, and more!
Here, I am going to briefly discuss how to ferment vegetables properly, their benefits, and some popular fermenting methods. I recommend reading the entire article to grasp the process by heart.
Preparation and some basic knowledge are the precursors to successful fermentation. Although the steps I’m going to discuss are fairly simple, you have to be meticulous.
Related: Check out my article, “How to Ferment Cabbage in 10 Easy Steps”
Here are the steps for successfully fermenting any vegetable:
Gather All the Tools
What You’ll Need
The success of vegetable fermentation relies not only on the right method but also on the right tools. Here’s a list of what you might need depending on what you’re fermenting:
- a chopping board
- a sharp knife
- a large bowl for mixing
- a jar large enough to fit all your vegetables in AND some space on the top for air
How to Prepare the Vegetable for Fermentation
Properly preparing the vegetable is one of the key components to successful fermentation. Varying types of vegetables should be cut differently.
Some vegetables are fermented whole while some are shredded, grated, or cubed. It’s important to know which method is best for which vegetable beforehand so that you get a better fermentation result.
NOTE: The way the vegetable is prepared is not absolutely crucial to the ferment. In other words, shredding a vegetable instead of dicing it is not going to result in failed fermentation. However, certain vegetables are better suited to be prepared a certain way due to things like their sugar content, water content, and how hard or soft the vegetable is.

Here’s a handy table with a list of vegetables, and the most conventional way to chop the vegetable to ensure you get a great result the first time around! (You’re welcome to do your own thing too of course, but perhaps for the first go, you should stick to the traditional way until you get the hang of things!)
| Cucumbers | Spears or slices |
| Jalapenos | Sliced |
| Sweet Potatoes | Thinly sliced |
| Onions | Thinly sliced |
| Cauliflower | Cut into pieces that will fit in a jar |
| Beets | Spears or slices, peeled |
| Cabbage | Finely shredded |
| Carrots | Spears, peeled |
Select the Right Fermentation Method
There are different types of fermentation and it’s important to consider which vegetable you are fermenting before deciding on the method of fermentation.
Here are various fermenting techniques to consider:
- Dry salting – Also known as a dry cure which is a popular method to preserve seafood. It is also used to preserve some fruits and vegetables like lemons, tangerines, and cabbage.
- Pickling – Often used for fermenting cucumbers; this technique uses acidic brine (like vinegar) to add a sour flavor. Red onions, cauliflower, and jalapenos are popular examples.
- Salt brine – The most popular and easiest method of fermentation. Typically used for almost any vegetable.
We’ll discuss these other fermenting methods later on in this article, but for now, because it is the easiest and most popular, let’s discuss how to ferment your vegetable using the salt brine method.
Related: Want to know how to keep your fermented veggies crisp? Learn how here!
How to Ferment Using a Salt Brine
There are 2 primary ways in which you can salt brine vegetables:
- Adding water and salt – Some vegetables, such as cabbage, release their own ‘juices’ once the salt is added to the mix so there is usually no need to add extra brine.
- Adding salt only – Carrots, for example, don’t release any of their own liquids when salt is added. So in this case, a brine will need to be made (salt and water combined together) and added to make the ferment.
How to Make a Salt Brine
It’s always handy to know how to make a salt brine even if your vegetables produce enough juices of their own. This is because sometimes the juices are not enough to completely cover the vegetables and you need a salt brine to make sure they are submerged.
In both cases, one of the most important aspects of fermentation is to make sure all parts of the vegetable are submerged in the brine.
To be properly and entirely fermented, all the vegetables must be in contact with the brine. In fact, if any part of the vegetable is popping out over the brine, it is a surefire way to grow mold as the vegetable will be exposed to oxygen (which is a no-no for this type of fermentation!)

Weigh the Vegetables Down if Needed
If the vegetable you are fermenting is heavy and cut into cubes, then you shouldn’t worry about this. This step applies to some particular vegetables that are lightweight and usually shredded like cabbage, and cucumber. These vegetables that are likely to lift up and pop out over the brine.
You can place a clean, heavy weight on top of the vegetables to prevent them from escaping. You can use a number of things as weights, such as:
- cleaned rocks or pebbles
- a food-safe bag or cheesecloth full of baking beads
- fermentation weights (I use these ones from Amazon; they are super easy and fuss-free to use!)
After you have submerged the vegetables and weighed them down, place the lid tightly onto your jar. It’s important to do this to stop air going in and out. Again, this is to prevent mold. To make things easier, I like to use specialized jars for fermenting my vegetables.
This fermentation jar kit from Amazon comes with 3 airlock lids and fermentation weights. The airlock ensures much less chance of mold developing even if some of the vegetable pieces were to come to the top. They’re great to use for the piece of mind of not having to worry that the ferment will go wrong.
Release Gas Build-Up After 3 Days
Once your veggies have been fermenting for 3 days, it’s time to open the lid slightly. Just enough to let the build-up of gases out. Simply open the jar slightly for a few seconds (you’ll probably hear the gas releasing at this point!), and close it back up tightly again before any bacteria has a chance to get in.
If you are using airlock jars, (like the ones I mentioned here), this step is completely unnecessary, because the lids have special one-way valves that let excess gas out without having to open the lid and expose the ferment to potential bacteria.
After this, it’s just a matter of waiting!
How Long Should You Ferment Vegetables?
By the three-day mark, the fermenting process is already well underway, and if you like your veggies less sour (and/or you’re a little impatient!), then you can start eating them from day 3.
However, vegetables can ferment for seven days to a month or longer! The flavor continues to develop during this time, and so do all the beneficial bacteria!
I personally like to leave mine for a whole month to ensure that I am getting maximum health benefits and maximum flavor out of my ferments.
3 Different Fermentation Methods
Varying fermenting methods are best for different vegetables. Here are three of the most used fermentation methods used for vegetables:
#1. Dry salting
Also known as the dry cure method, dry salting is a very popular method for both vegetables and seafood. Just combine the vegetables with salt and mix properly.
The juice that is released from the vegetable and the salt mixed with it works as a brine solution. This process usually takes three to seven days and the most popular food made using this method is sauerkraut or fermented cabbage.
#2. Pickling
Pickling is commonly used with cucumbers but can also be used with other vegetables with delicious results!
Pickling is a simple process that involves submerging a veggie in a brine of salt, vinegar, and water. It takes five to seven days before the pickle is ready to eat. Its resulting vinegary flavor is one that is wildly popular for good reason.
#3. Salt Brine
Salt brining is another popular fermenting procedure. Salt brine is widely used for fermenting different kinds of vegetables. This method is similar to dry salting, except more brining solution is used.
A brining solution usually contains 25% salt. The vegetable is cut into pieces and soaked in the solution for a week or two. Sometimes, vinegar is also added.
NOTE: Adding vinegar changes the type of fermenting from lacto-fermentation to acetic fermentation. The latter is not as rich in probiotics as lacto-fermentation but is still nutritious and acts as a digestive aid.
Common Mistakes While Fermenting Vegetables
Some small oversights can make a huge difference in the fermentation process. Here’s what to look out for:
#1. Using Tap Water
While tap water is generally safe to drink and free of any harmful microbes, it is often chlorinated which can kill the bacteria needed for fermenting.
The key to fermentation is bacteria. So even if the fermentation process doesn’t fail completely, using chlorinated tap water will result in reduced nutritional value.
#2. Not Submerging Entirely
The vegetable must be submerged in brine for at least the first three days. Light vegetables like cabbage and carrots tend to float to the top of the solution.
Make sure all the vegetables are submerged in the brine, and if there isn’t enough brine to keep them all submerged, create more brine to add to the jar, and use a weight when necessary.
#3. Being Impatient
You can start eating three days into the fermenting process, but that’s not ideal. Complete fermentation takes around seven days, in some cases nearly a month.
TIP: Be patient to get the full fruits of your labor! Taste it after five or six days, keep checking it every day until you are satisfied with the taste.
Benefits of Fermented Vegetables
Vegetables have been fermented for thousands of years. This is how foods were preserved when there was no electricity or refrigerator to rely on. The reason it’s still popular to this day is that it yields great nutritional value with amazing taste. Here are some of the benefits:
#1. Natural Preservative
Fermented vegetables can be easily preserved for 3-4 months without refrigerating thanks to their natural preservatives.
Fermentation produces lactic acid which inhibits the growth of other harmful bacteria that facilitate the rotting process.
#2. Great Taste
Fermented vegetables as well as any fermented foods are unparalleled in taste. This process produces natural substances and probiotics that give the food its unique taste that can’t be achieved by any artificial flavor or additives.
#3. Good Nutrition Source
Vegetables are a great source of nutrition. When they are fermented, their nutritional values are increased and they are rich in vitamins, minerals, and probiotics. Probiotics are especially healthy for our gut.
FUN FACT: Two ounces of fermented cabbage have more probiotics than a hundred probiotic capsules!
Conclusion
Fermented vegetables are not only a great way to increase your daily vegetable intake, but they also help you get the essential nutrients that your body needs to function and perform, as well as give your immune system a boost.
The best part of fermenting is that it’s not rocket science. You can ferment all vegetables by the same process with slight variations. It’s easy, tasty, and healthy and is a likely reason fermenting vegetables is popular all over the world!
Are you interested in fermented drinks? Try these recipes:

Recent Posts
If you are trying to heal your gut naturally, fermented foods might be the answer. There is a diverse range of fermented foods available out there and you might be wondering which fermented food will...
Kimchi is the national food of South Korea. Almost every household in Korea has this spicy fermented vegetable dish stored in their kitchens. It is becoming popular in the West and is now available...