
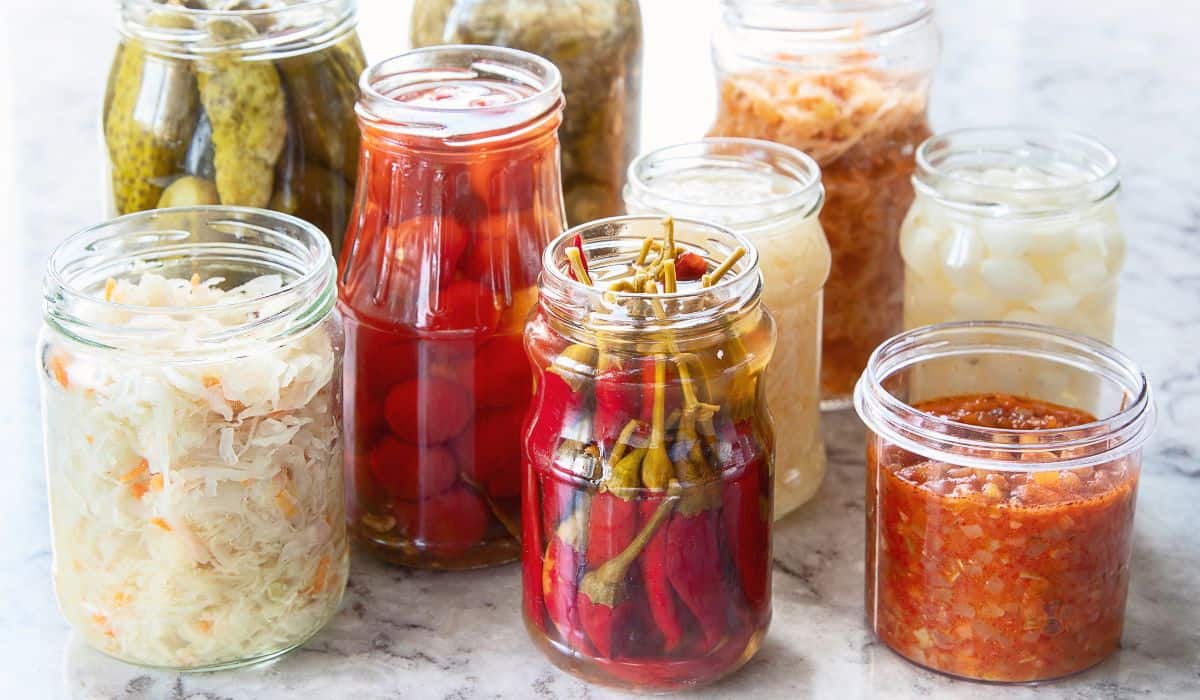
Fermentation is a method of preserving food that has been used by people since ancient times. As this is a food preservation method, you might be wondering how long fermented food lasts. Does fermented food go bad?
Fermented food can last 3 months or more if kept in a cool and dry area in sealed containers. This timeline can vary based on what type of food has been fermented. It is possible for over-fermentation to occur and spoil the food.
There is a lot to learn about fermentation before beginning. In this article, you’ll learn all you need to know about the:
- shelf-life of fermented foods
- signs fermented food has gone bad
- how to prevent food spoilage
The Shelf Life of Fermented Foods
The shelf-life of fermented foods varies depending on the type of fermentation and other factors that affect the fermentation process.
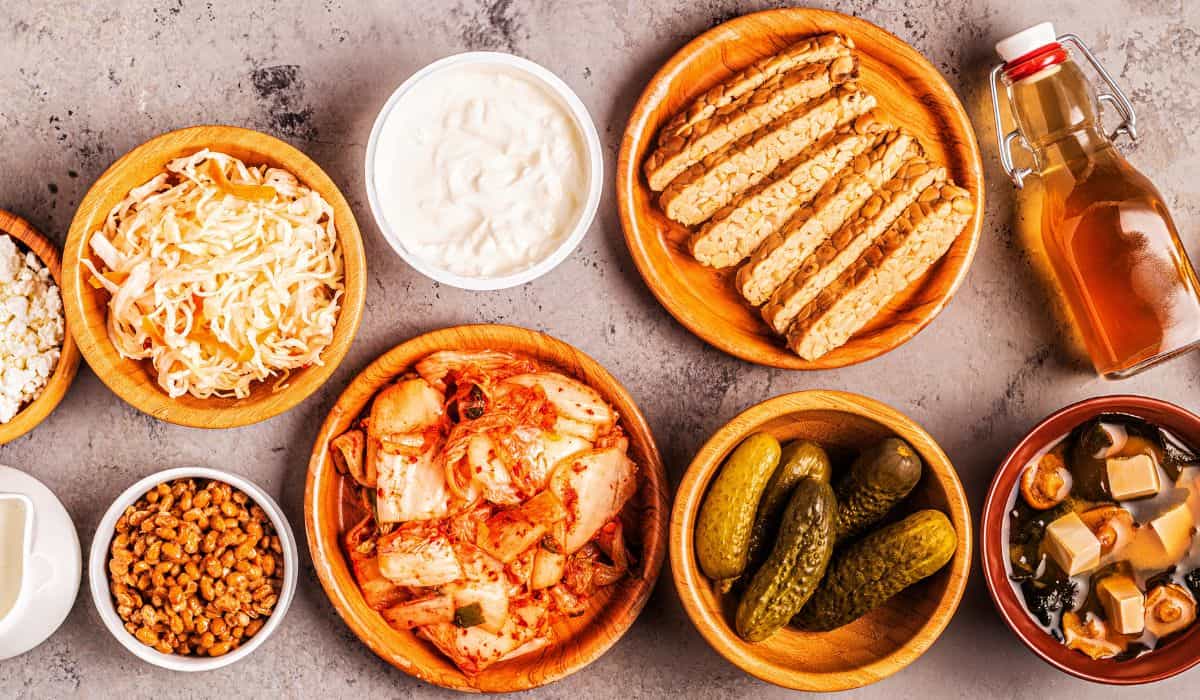
Fermentation is an age-old method to preserve foods that have been used by people for generations. In recent years, fermented foods have also become very popular, mainly due to the health benefits it offers.
To state the entire fermentation process in simple words, it is a process of preserving food by culturing specific strains of yeast or bacteria into the food in a controlled environment. Unwanted and harmful mold, yeast, or bacteria can’t grow in the food, and it will last longer as a result.
There are common ferments around you that you might not notice. For example, yogurt which is fermented milk. Milk will last a week at best after opening it for the first time. On the other hand, yogurt can last at least two weeks before it gets spoiled.
Predicting how long fermented foods will last before spoiling is a challenge. There are simply a lot of variables that control the outcome of fermented foods. If everything is in ideal condition, here are some examples of the shelf life of some fermented foods:
#1: Fermented Alcoholic Beverages
Homemade alcoholic beverages are fermented with a yeast-based culture. Examples:
- beer
- wine
- cider
Typically, they last longer than other fermented foods. The fermentation becomes alcoholic as they age, and bacteria and yeasts can’t survive in an alcoholic environment.
Homemade beers normally have a shelf life of around four months.

Ciders might need to be refrigerated immediately after bottling to slow down the carbonation process so it will last longer. Usually, homemade ciders are at their finest state during the first four weeks after bottling.
The longer a wine ages, the better its taste will be. Always store homemade wine in cold and dark places. It’s best to let the wine age at least one year before drinking. Usually, wines have a shelf life of five years if stored under ideal conditions.
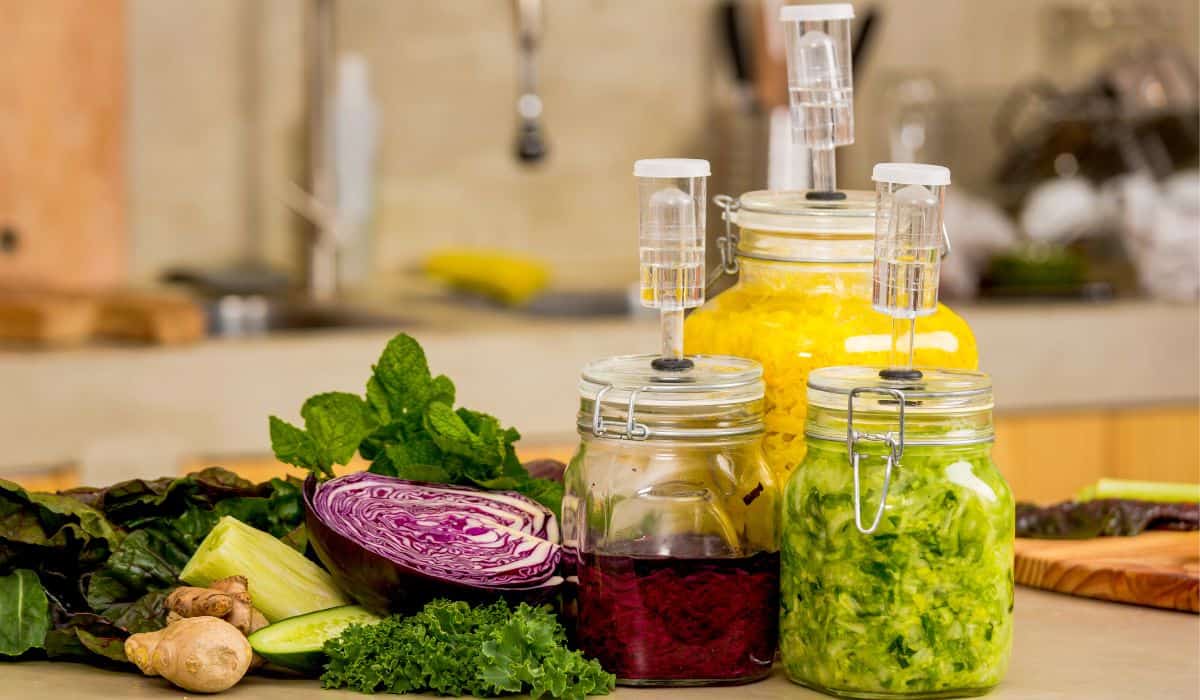
#2: Shelf-Life of Fermented Vegetables
Vegetables become very acidic as they ferment, and most of the harmful and unwanted bacteria can’t survive in an acidic environment. As the ferment ages, the vegetable will become much softer and more acidic.
Cucumber pickles and sauerkrauts are known for their long fermentation time. And if the fermentation is good and stored at the proper temperature and in a dark place, they can last up to one year before getting spoiled.
NOTE: Wondering what the difference is between fermenting and pickling, and which is better? Read my article to find out!
Pickled vegetables’ shelf life depends on how you want to eat them. As mentioned before, pickled vegetables become softer and more acidic as they age, and also have changed:
- color
- texture
- taste
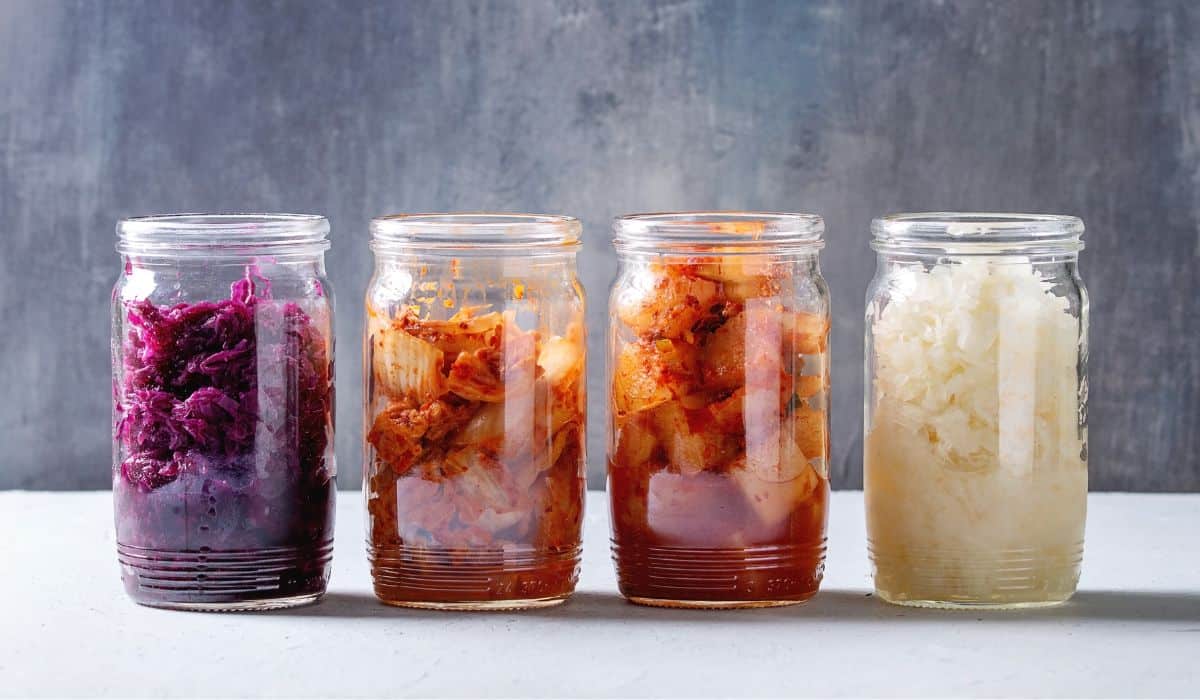
Most fermented vegetables can last six to twelve months, depending on the:
- vegetable type
- ingredient quality
- storage environment
Unlike sauerkraut, kimchi tastes best within three to five days of fermentation but can be stored for up to one year in the refrigerator.
These ferments can be stored for up to six months in the freezer before going bad:
- hot sauce
- salsa
- chutney
#3: How Long to Keep Miso
Miso is another fermented food that tastes better with age. Good miso is aged for at least one year and should be stored in the refrigerator once it’s opened to prevent it from spoiling.
#4: Naturally Fermented Drinks
Examples of homemade fermented beverages that have a decent shelf life are:
- water kefir
- kombucha
- Jun

If stored in a refrigerator, they can last up to six months. But as they age, they taste more sour so enjoy them while their taste is great.
Factors That Determine the Shelf Life of Fermented Foods
As mentioned before, there are many factors that directly affect the process of fermentation. Some of them are given below:
#1: Fermentation Temperature is Important
Temperature is the most important factor that influences and has a direct effect on the fermentation process.
If the weather is hot, it will speed up the fermentation and decomposition process. On the other hand, a colder environment slows down the fermentation and decomposition of foods. This is why it is extremely important to store fermented foods in cold and dark places to maximize their shelf life.
#2: Salt Level in The Brine
Another factor that determines how long fermented foods will last is the salt level in the brine. If it is too low, it might speed up the fermentation process, and shorten the shelf life of the ferment.
If the salt concentration in the brine is high, it can significantly slow down the decomposition process.
#3: The Acidity Level Of The Ferment
All types of fermented food become acidic as they ferment. The acid level keeps harmful and unwanted molds and bacteria from growing, helping to preserve the food.
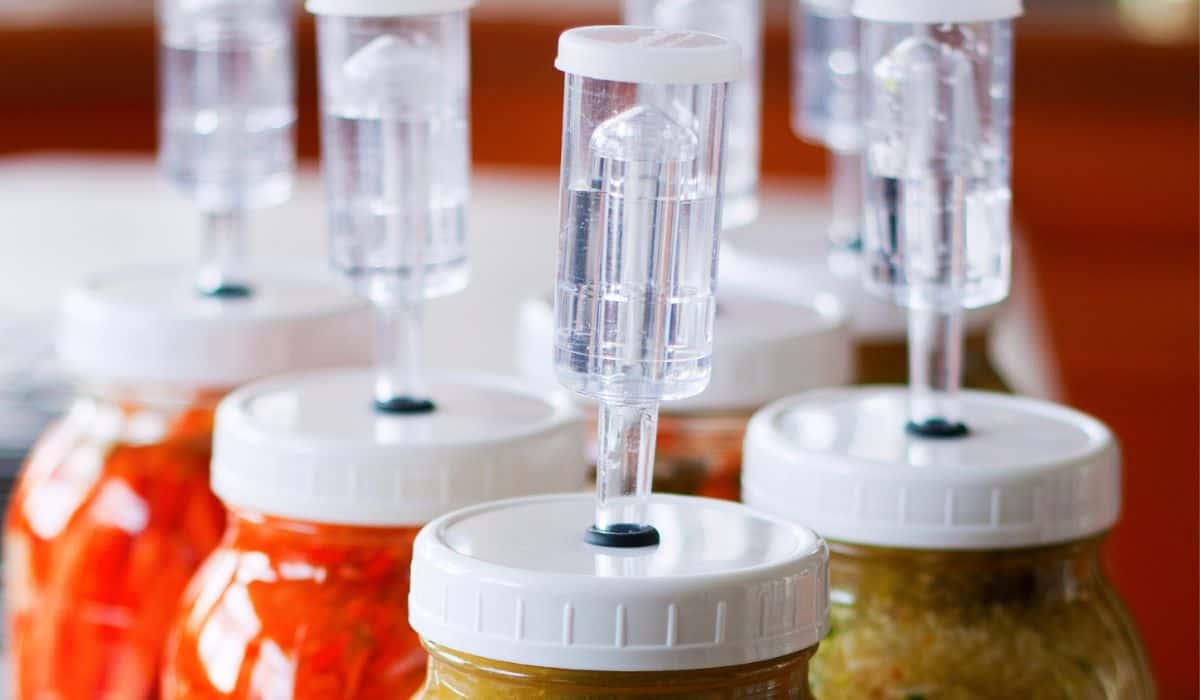
#4: Anaerobic Environment For Fermentation
Yeasts, molds, and bacteria grow rapidly in an oxygen-rich environment. The main point of fermentation is to inhibit the growth of harmful:
- yeasts
- molds
- bacteria
For good fermentation, keep oxygen away from fermented foods and keep them submerged in the brine solution.
HOT TIP: Airtight jars are best for fermentation.
How to Tell If Fermented Food Is Spoiled
Has your fermented food gone bad or not? It’s easy to identify by observing some common signs, some you can tell just by looking. Here are some common signs of spoiled fermented foods:
#1: Discoloration Of Fermented Food
To identify spoiled fermented food, first carefully visually inspect the color of the food. Older fermented foods might appear a bit cloudy but are still ok.
If you notice anything that is not normal like a bright green cucumber turning black or grey, then there is a good chance it has gone bad.
This type of discoloration indicates that the food became contaminated during the fermentation process, and should not be eaten.
#2: Check for Mold or Yeast Formation
During the entire fermentation period, make sure that the fermenting foods are submerged in the brine and stored in a jar with an airlock like this sold on Amazon. This prevents the fermented foods from coming in contact with oxygen, which can trigger the growth of toxic mold and bacteria in the ferment.
Any mold is a sign that your fermented food is contaminated. Typically, molds are spotted on top of the food or on the lid of the jar, because bacteria can survive on salt brine.
If you see mold, toss that batch of fermented food away and thoroughly clean and sanitize the jars before reusing them.
Sometimes you might notice a fuzzy white substance on fermented food that can be mistaken for mold, but is actually a yeast formation known as “Kahmâ€. They can be spotted on the surface of fermented foods and are not harmful to human health.
The Kahm yeast can be scraped off of the surface and the ferment can be eaten as normal. Although, you need to keep an eye on the ferment as it can come back easily.
#3: A Bad Smelling Ferment
Check if the fermented food is bad or not by the smell. Fermented foods go bad mainly because of harmful bacteria, which produce a very bad smell. In some cases, the smell will be so foul that you won’t be able to withstand it.
The harmful bacteria release gases which is the source of the foul smell in your fermented food. If the smell lasts long even after keeping the jar open for a while, the food might be contaminated.
Over-fermented foods can stink, but it doesn’t mean that they are bad. If you notice that the smell is different than normal, then there is a problem with the food, and throwing it away is a good idea.
#4: Foul or Weird Tasting Ferment
The last sign of bad fermented food is a foul taste. If the taste is somewhat off or is not the usual taste, then there is a good chance that the ferment has spoiled. In this case, it is not a good idea to eat it.
Is it Safe to Eat Spoiled Fermented Food?
It is not safe to eat fermented food that has spoiled. The main reason for eating fermented food is the health benefit it provides. Fermented foods can help improve digestion and boost immunity.
It is not recommended to consume spoiled fermented food since it can cause health issues. Fermented foods go bad mainly due to harmful bacteria growth and when consumed can cause food poisoning.
How to Prevent Fermented Food From Going Bad
Below are some things that you can do to prevent fermented food from going bad:
#1: Properly Clean and Sanitize Fermenting Equipment
It is essential to clean and sanitize the jars thoroughly before starting any sort of fermentation, especially when preparing to brew beer or wine.
First, wash the jar thoroughly with hot water and dish soap. Use a brush to get rid of any particles inside the jar, then rinse it with tap water. This is enough cleaning to ferment vegetables.
For brewing alcoholic fermented drinks, some extra cleaning and sanitizing is necessary. Once the jar is cleaned using the method mentioned above, soak it in bleach water. To do that, pour one tablespoon of bleach into a large bowl and fill it with water.
Then simply submerge the jar entirely into the bleach water and soak it for a few minutes. Then, rinse it with tap water. Bleach will kill all the bacteria in the jar.

#2: Use Good Quality Ingredients
Always use the best quality ingredients. If there is anything wrong with the ingredient like a portion of the vegetable is bad, then cut out the bad portion and get rid of it.
Store-bought vegetables can contain preservatives like chlorine. Supermarkets do this to keep the food fresh for a longer period. Avoid supermarket foods for fermentation, because the preservatives will hinder the growth of good bacteria during fermentation and lead to spoilage.
This is why you have to be very selective about the ingredients used to ferment. The best way is to buy organic ingredients directly from farms. Also, wash and clean the vegetables thoroughly before fermenting.
#3: Maintain The Right Fermentation Temperature
While fermenting, keep a close eye on the temperature. If it is too warm, it can speed up the fermentation process, and the ferment will be slimy.
On the other hand, if the temperature is too cool, it can slow down the fermentation process significantly. What usually takes seven days will take more than ten days if the temperature is too low.
The ideal temperature for fermentation is between 65-72 degrees Fahrenheit. During summertime, maintaining this temperature might be a bit tough. Keep your fermentation jar in a cold and dark place, like in the basement at that time.
#4: Brine Strength is Important
The strength of the brine is also one of the factors that affect the shelf life of fermented foods. The salt brine strength should be such that no harmful bacteria can grow in the jar. Most fermentation recipes recommend a 2-3% brine solution relative to the weight of the ingredients.
For some vegetables, the required salt concentration for successful fermentation can increase up to 5%. So, whatever recipe you are following for your fermentation, make sure that the salt concentration is within the recommended limit.
NOTE: Always keep your ingredients submerged under the brine. This will significantly decrease the chance of spoilage.
#5: Avoid Chlorinated Water
Chlorine is used as a cleaning agent that kills almost all types of bacteria strains in water. This is what makes chlorinated water unsuitable for fermentation purposes.
If you use chlorinated water for fermentation, it will kill all the bacteria during the fermentation process, whether good or bad.
Also, chemically treated water contains strains of bacteria that can withstand chlorine. If this type of water is used, then harmful bacteria will grow during fermentation, and the fermented food will go bad.
This is why you should always use filtered water that is free from any type of chemical or contamination during the entire fermentation process. By doing so, you will be able to create a high-quality brine solution that will be able to keep your fermented food safe for a long time.

Conclusion
Fermentation is an easy way to preserve various types of food. To prevent spoilage, before fermenting make sure to:
- clean and sterilize everything properly
- avoid chlorine-treated water
- maintain a suitable temperature
You might also be interested in:

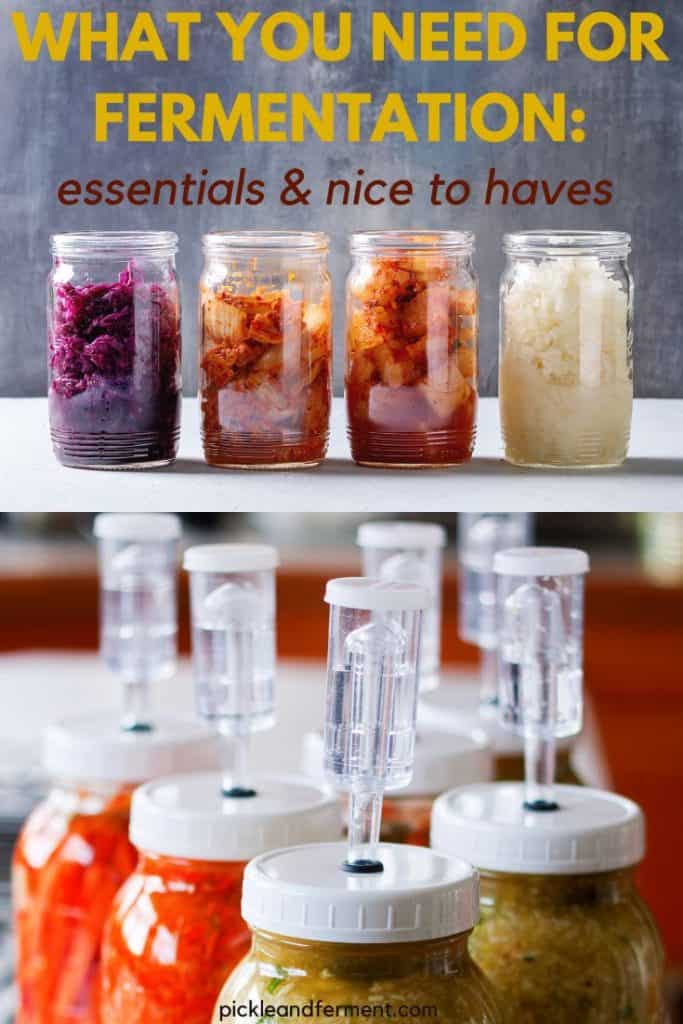
What You Need for Fermentation: Essentials & Nice to Haves
Fermentation has always been a popular method of preserving food. Fermented foods are great for digestion and immunity. If you are interested in fermenting food, having the right tools and ingredients is an essential part of making fermented foods.
You likely have all the equipment in your kitchen for making fermented food. If you do not have them, you can easily buy them online or at a grocery store near you. Fermenting foods doesn’t always require special or expensive tools and equipment.
In this article, I am going to give a list of the essential equipment and ingredients for fermenting foods at home. There are special tools for fermentation but the common household items listed in this article are also used for making homemade fermented food. I will also briefly discuss how to safely use these items for fermentation.
Essential Equipment for Fermentation
People who are starting fermentation for the first time often have the misconception that fermenting at home is difficult and that they need special tools to do it. However, the truth is you do not need sophisticated tools for fermenting food.
Here is a list of common household items that you can use for fermenting any vegetables and foods easily at home:
#1: A Sharp Knife
Vegetables and other foods need to be prepared for fermentation. You need a sharp knife for food to be:
- sliced
- diced
- chopped
- grated
Stainless steel knives and ceramic knives (both are sold on Amazon) are best for cutting vegetables because they are sharp and handy. They are useful for chopping:
- cabbage
- root vegetables
- any food that requires pressure
Both knives are common kitchen items, so you do not need to buy extra knives to cut foods and vegetables for fermentation.
HOT TIP: If you do not want to use knives, you can use a mandolin slicer like this one on Amazon. It is pretty easy to use, and you can slice foods in different shapes and sizes without much trouble.
#2: A Food Processor
If you want to mix different vegetables for fermenting, a food processor (I like this one sold on Amazon) is useful for chopping vegetables, and you can also make pastes and sauces to add to the fermenting food.Â
For example, people use apple paste as a sweetener for sauerkraut. Put some apple slices in the food processor, add some water, and blend it to make a paste. Then pour the paste into the jar of cabbage slices.
#3: Bowls for Massaging Vegetables
After slicing or chopping the vegetables, massage them with salt. When salt and vegetables are mixed together it produces brine. Pick a suitable bowl large enough to massage the ingredients for your recipe.
People often prefer mashing the ingredients in a glass bowl or ceramic bowl. But you can also use a stainless steel bowl or a plastic bowl. All of these can be purchased on Amazon. If you want to make a lot of fermented vegetables, you can transfer the mixture of the bowl into large vessels like buckets.Â
HOT TIP: Avoid using wooden bowls because they will absorb the salt and the water produced after mashing.

#4: Pounding Tools
Another essential tool for fermenting food is a pounding tool, I like this one on Amazon. You can massage and mix the food by hand, but it is a tiring process. When you are making fermented vegetables like sauerkraut, they need to be submerged in their juice and the vegetables pushed down.Â
NOTE: To learn how to ferment cabbage for maximum probiotics, read my article with 10 easy steps!
Hence, a pounder is necessary. It can be wood, stainless steel, or whatever type you find handy. You can also buy a dual-sided pounder to use for different sizes of jars.
If you do not have a pounder and you do not want to spend extra money to buy one, use a metal or plastic potato masher or a soup ladle. All of these tools are great for getting juice from vegetables and fruits.
#5: Jar and Containers for Fermentation
Now, there are a lot of options for choosing jars and containers for fermenting your foods. The jars can be made of glass or ceramic, and there are different shapes and sizes depending on the type of food you are fermenting.
NOTE: Avoid using jars that are made of materials that can contaminate the food.
Here are some options for jars for fermenting food:
Glass Containers for Fermenting
Glass containers are the most popular choice for fermenting food. There are quite a few reasons why people prefer them.
First of all, they are cost-effective. If you buy them in bulk like these glass jars on Amazon, they are a good value.
HOT TIP: You can reuse glass containers from other foods, but make sure they are cleaned properly.
Secondly, they are transparent so you can see what is happening inside the jars. When transferring the food and brine to jars, it makes it easy to be sure that the food is completely submerged in the brine. It is also easier to check for mold or other contaminants through a glass jar.
Thirdly, glass jars do not contain any harmful chemicals that can hamper fermentation, so they are one of the safest containers to ferment and store food.
Ceramic Containers for Fermenting
When it comes to making and storing large batches of fermented food, ceramic containers are the better choice. Ceramic containers can be large like this 20-liter fermentation crock sold on Amazon. Ceramic fermenting crocks are as safe as glass jars.
Porcelain Containers for Fermenting
Food-safe porcelain containers are also good for fermenting, and this one is absolutely gorgeous! They are similar to ceramic containers but much heavier and more durable.Â
HOT TIP: Whether you’re using glass, ceramic, or porcelain, make sure that the jars have wide mouths so you can fit your hand inside to clean or push the food down.
Avoid Plastic Containers
Plastic containers can be used for fermentation but are best to avoid. The plastic may contain chemicals that can react with the food and brine. Plastic containers can be damaged and affected by germs and bacteria quite easily.
#6: Lids for Containers
Choosing the right lid is the most important step for food fermentation. An appropriate lid is important to keep oxygen out but allow the gas that is produced during fermentation to escape from the jar.
With the right lid, you will get crunchy vegetables. But if you use the wrong one, your ferment will get moldy and spoiled.
Fermenting With an Airlock Lid
Expert or beginner, food fermenting enthusiasts like to use airlock lids on their jars, like these. There are different styles and designs of airlock lids on Amazon, such as:
You can also buy this set of jars on Amazon that comes with:
- airlock lids
- storage lids
- fermentation weights
Airlock lids create an anaerobic fermentation environment inside the jar, meaning without oxygen. They reduce the possibility of mold or yeast and do not allow air to enter the jars. With airlocks, you do not need to burp the jars, and the food will smell less.
Using Tight Lids for Fermenting
Jars with tight lids are also useful for fermentation. Tight lids do not let much air get into the food, reducing the risk of mold on the ferment. Compared to airlock lids, there are a few disadvantages.
When using tight lids, the jars of fermenting food need to be burped regularly. The fermenting of vegetables or fruits produces carbon dioxide, so you have to monitor the jars with tight lids.
HOT TIP: Jars with tight lids are the best option for storing fermented foods in the refrigerator.
Cloths and Towels for Fermenting Lids
Cloths or towels are also used to cover smaller jars during fermentation. Paper coffee filters and butter muslins secured to the top of the jar with rubberbands are great options for covering jars for fermentation.
You can also use towels like tea towels and tight weave dish towels to cover the jars with a rubber band, each can be found on Amazon as well. The clothes and towels let the gas out of the jars during the fermenting process and protect the food from dust and bugs.Â
Unfortunately, there is a disadvantage to this type of jar cover. Mold and yeast can quickly grow in fermented food covered with cloths and towels. Fortunately, molds growing on the surface are harmless and can be removed. It is better to use cloths and towels over the jars of fermenting foods that you intend to use within a few days or weeks.
#7: Fermentation Weights
Keeping the foods submerged in the brine is crucial for fermentation. Use fermentation weights that can be purchased on Amazon.
You can also be creative and use things available around you to push down the foods in the brine so that they do not get exposed to the open air, like:
- river rocks
- small glass jars
- plastic bags
NOTE: Make sure not to use any object that can react with the ingredients inside the jar.
#8: Tongs For Fermentation Jars
Putting your hands inside jars or containers full of fermented food is not always a good idea. Germs and bacteria can easily affect fermentation.
Use tongs to get fermented food out of the jars. Tongs are handy for serving fermented foods from large-mouthed jars. This way, your hands will not come in contact with the food and disrupt the good bacteria balance of the ferment.
#9: A Brew Funnel
Homebrew funnels, sold on Amazon, are a great help for fermenting foods that require liquid, such as:
- brewing beers
- dairy fermentations
- kombucha
- wine
It is an essential item for every home brewer, and it is useful in many ways. You can use a brew funnel to pour foods inside narrow-mouthed jars.
Some funnels also have a removable screen attached. The screens are used for straining water or liquid from:
- fruits
- vegetables
- herbs
- starters
Common Ingredients for Fermentation
There are different types of fermentation. Each process requires some type of:
- foods
- vegetables
- fruits
You also need different starters to ferment your foods. Starters have good bacteria that boost our digestive system and can increase our immunity.
Although there are different ingredients for each fermentation recipe, there are still some common ingredients for fermenting any food, including:
- water
- salt
- sweeteners
- starter culture
#1: Water
The most important ingredient for any fermentation is water. The water used for fermentation has to be free from:
- contaminants
- chemicals
- minerals
The water used will affect how well the fermented foods turn out.
Tap waters are not safe for fermentation because they are usually treated with chlorine or chloramine to kill bacteria. Hence, if you use tap water, it will kill the microbes necessary for fermenting foods.
Boiling can remove chlorine, but chloramine is not that easy to get rid of. Another option is to use tablets of sodium thiosulfate to remove both of these chemicals.
Using well water is not a safe water source for fermenting. Well water or tube-well water can seriously harm the taste and quality of fermented food and can contain:
- minerals
- nitrates
- various contaminants
- arsenic
Well water minerals and contaminants can be removed by filtering, but the trace of chemicals and salt may still remain. If you still want to use well water, filter it with a charcoal filter.
So, what type of water is best for fermentation? Most home fermenting experts will agree that it is best to use distilled water. It is not expensive, and you can easily find it in stores. It does not contain any minerals or pollutants that can harm food fermentation.

#2: Salt
Most homemade fermented foods require salt for fermentation. You cannot pick just any salt to use on vegetables and fruits to create a brine. Common salts contain added iodine and chemicals to keep them fresh and dry. These elements are unsuitable for fermentation.
For fermenting, use one of these salts (all are available on Amazon):
Salt is important for fermentation because it helps draw the water out of the vegetables and fruits. Moreover, it kills bad microbes and helps to preserve food.
#3: Using Sweeteners
For healthy and nutritious fermented food, you need good microbes or bacteria. To feed the bacteria, almost every fermenting recipe instructs to add a sweetener which is normally sugar. Organic raw sugar or regular granulated sugar are both used for fermentation and are easily purchased on Amazon.
Honey is also a great sweetener for food fermentation, but make sure it is pure raw honey, sold on Amazon. Â
Besides honey and sugar, people sometimes use agave syrup which can be bought on Amazon.
HOT TIP: You can also add various fruits like apples to add flavor and sugar.
#4: Starter Culture
A starter culture is a batch of good bacteria that is added to food during fermentation. Most commercially produced fermented foods are produced using a starter culture.
Most fermented food can be made without a starter culture, but, you can also add starter culture in home ferments to speed up the fermentation process. Foods that are benefited by adding a starter culture:
- kombucha
- yogurt
- kefir
Precautions for Fermenting
Before you start fermenting any food, you have to clean and sanitize all tools and work area. To grow good bacteria, the number of harmful bacteria needs to be reduced.
Here is what to do before using the essential tools and ingredients:
- Use soap and hot water to clean the jars, tools, and weights you are going to use for making fermented food.
- If the recipe instructs you to serialize the tools, do so properly.
- If you have to dry or wipe anything, use a clean paper towel, or air-dry the tools in a clean space.
- Wash the vegetables and fruits before cutting them with a clean knife.
- Clean your hand thoroughly before touching the food to begin the fermenting process.
Conclusion
By now, you should have a good idea about what tools you need for fermentation. All the items and ingredients mentioned in the list are easy to find and use. Use these tools to make your first batch of fermented foods full of health benefits!
You might also be interested in:
Can Kombucha Explode In The Fridge?

If you just started your kombucha journey, but have heard some horror stories about its potential to explode, understandably you might be a bit nervous about it! Is there a way to prevent a kombucha explosion in your kitchen? What makes kombucha explode in the first place?
Kombucha is not likely to explode in the fridge as cool temperatures slow down or even completely stop the fermenting process. The only way kombucha will explode in the fridge is if the brewer does not take a few factors into account, like the quality of the bottles used.
Kombucha goes through an extensive fermentation process in order for it to get to a place where it’s ready to consume and enjoy. Are there dangers to be concerned about when making homemade kombucha?
Can Kombucha Explode?
You might be surprised to hear that kombucha can actually explode. Sugar and yeast fermentation builds up so much more pressure than standard fermented vegetables, which can be dangerous.
NOTE: To learn more about fermenting vegetables, read my article on how to ferment ANY vegetable with success!
The bacteria and yeast in the kombucha culture convert the sugars in the sweet tea into a mixture of:
- lactic acid
- a tiny amount of alcohol
- a large amount of carbon dioxide (CO2)
Sometimes the amount of carbon dioxide is a bit too much, and this can cause a kombucha explosion.
Once the fermentation has begun, it does not stop on its own without outside help from you. Unless you slow down the fermentation process, it will simply continue. This means that the kombucha fermentation will keep producing carbon dioxide nonstop until the sugar is exhausted.
Carbon dioxide can cause a considerable amount of pressure on the kombucha container. If you do not take a few proper precautions, the pressure can cause an explosion as the gas has nowhere to go.
Can Kombucha Explode In The Fridge?
Kombucha will most likely not explode in the fridge as it is quite sensitive to colder temperatures. The fermentation process usually slows down or completely stops as the temperature drops.
However, still keep an eye on the kombucha when it is in the fridge, especially if you haven’t released the carbon dioxide from the bottles before placing them in the refrigerator.
As the fermentation process slows down, it does still produce some carbon dioxide in a lesser amount until the process stops completely.
The new carbon dioxide will join the rest of the bottle and can even cause a significant amount of pressure on the bottle, which could still cause the bottle to explode in the fridge.
Although kombucha exploding in the fridge is usually caused by factors that the maker did not take into account, it must be treated on a case-by-case basis.

How To Prevent Kombucha From Exploding
There are some ways to prevent kombucha from exploding during the fermentation process. These few tips are useful in ensuring that you get the full harvest of kombucha tea and keep all your bottles intact at the same time.
Tip #1: Burping The Bottles
One good way to help prevent an explosion is to do something that is called burping the bottles. This allows some gas to escape from the bottle, which in turn releases a noticeable amount of pressure from the bottles too. This can prevent an explosion from occurring.
To burp kombucha bottles, loosen the caps of the bottles just enough to let air come out. This will release the pressure in the bottles while allowing for the fermentation process to continue at the same time.
HOT TIP: Most seasoned kombucha makers will advise that you burp your bottles every day or every other day while your kombucha is fermenting.
Tip #2: Refregerate the Kombucha
Refrigerating kombucha can also prevent the bottles from exploding. As mentioned above, kombucha will stop the fermentation process when it is kept at a cold temperature. This stops the fermentation process from making too much carbon dioxide.
If you like a specific amount of flavor to your kombucha, refrigeration will also prevent the flavor from changing so it will turn out just the way you like it.
Tip #3: Use Quality Fermenting Equipment
Use quality glass fermenting bottles (I like these ones on Amazon) or containers to ferment kombucha. If the bottles are strong enough and you leave enough space at the top of the bottle, then this will help prevent the bottles from exploding.
Tip #4: Keep Kombucha in Ideal Temperature
Just as cold temperatures can slow down or even stop the fermentation process, on the other side of the scale, warm-to-hot temperatures can speed up the fermentation process. This causes excess pressure on the bottles and could cause an explosion.
The ideal temperature to ferment kombucha is between 75 to 78 degrees Fahrenheit. This will ensure that the fermentation process does not go too fast or too slow, keeping it at a manageable pace so the brewer can keep up.
Tip #5: Don’t Add Too Much Sugar
Do not add too much sugar to the kombucha, especially during the second ferment. Adding too much sugar will make the yeast work double time. This will produce more carbon dioxide, and put pressure on the bottles, even if you put the bottles in the fridge.
Tip #6: Leave Headspace in The Bottles
When bottling kombucha, make sure to leave one to two inches at the top of the bottle. This will leave some space for carbon dioxide to be stored without putting pressure on the bottle.
NOTE: If you follow these tips, they will help prevent exploding kombucha bottles and the sticky mess that comes with them!

Is Your Kombucha Carbonated Enough?
To carbonate kombucha, you will need to do what is called a second ferment. This involves placing the kombucha into airtight bottles and adding sugar to them, in the form of:
- fresh fruit pieces
- fresh fruit puree
- regular plain sugar
Then seal the bottles and let the fermentation begin.
NOTE: Some carbonation can occur in the first fermentation. However, most of the carbonation happens in the second fermentation.
If you do not want to go through the whole fermentation process again to carbonate the kombucha, then the good news is you don’t have to! Flat kombucha has the same health benefits as fizzy kombucha so you won’t miss anything if it’s not carbonated.
Is there such a thing as getting too much fizz, though? The answer is not really as long as you use the right amount of sugar during the second ferment, then you do not need to worry about over-carbonating your kombucha. The fermentation process will stop naturally once the food source (the sugar) is finished.
If you are having trouble with your kombucha not being carbonated enough, then there are a few things that can help get it bubbling.
Stir the kombucha before you bottle it to loosen the yeast from the bottom of the container. This will help evenly distribute the yeast in the bottles to ferment them properly.
Also, ensure that you dry the bottles properly once you have cleaned them, as this will ensure that there is a good seal on your bottles.
Do not burp your bottles too often, as this will release the carbonation from the bottle and could cause the kombucha to be more on the flat side.
These few tips should help you get the kombucha carbonated just how you like it.

Conclusion
Kombucha can explode due to many causes, and it is necessary to watch out for this phenomenon when making kombucha since an exploding bottle can be messy and dangerous.
In some cases, refrigeration may help the kombucha to not explode and can be beneficial in keeping the flavor to your liking.
If you are careful and use the right equipment, and follow a recipe from an expert to the tee, then you should be able to avoid an explosion in your kitchen or fridge.
You might also be interested in:

Can You Ferment Kombucha In Plastic?

It is exciting and fun to experiment and make homemade kombucha. It only takes two essential pieces of equipment to make it, a brewing container and a cover. The material of the container chosen to ferment the kombucha can impact its quality.
It is not recommended to use plastic containers to make kombucha, because plastic is easily damaged. Scratches or marks on the container can house bacteria, and plastic can release harmful chemicals that can sabotage the kombucha SCOBY.
There are two fermentation processes to make kombucha, and plastic containers can only be used temporarily for one of the processes. When choosing a container, consider the size of the opening and the jar’s capacity. There are other pieces of equipment that can be purchased to make kombucha, but it is not essential.
Is It Safe To Make Kombucha In Plastic Containers?
It is highly recommended not to use plastic containers to make your kombucha, mostly during the first fermentation process. There are many reasons why plastic should not be used, which include:
- The plastic releases chemicals, like BPA, into the mixture that can destroy the kombucha. The Symbiotic Culture of Bacteria and Yeast (SCOBY) can be damaged by the chemicals released from the plastic because they are very sensitive. This is very important in the first fermentation.
- Plastic can be damaged easily with scratches and marks where bacteria can easily sit and grow.
- The amount of time the kombucha sits in the plastic container and how often the plastic is used will also have an impact. During primary fermentation, the container will be used for 6-10 days.
Over an extended period, the plastic will get damaged from the acidity and release harmful chemicals. This increases the more it is used so it should be avoided.
If you really prefer plastic containers, it’s best to use one meant to brew wine, you can purchase one on Amazon. The plastic used in these containers can handle acidity better.
HOT TIP: It is highly recommended to never use cheap plastics when brewing kombucha.
You can consider using plastic containers temporarily for the second fermentation period only. It is not as harmful due to the change in acidity and SCOBY concentration in the kombucha during this stage.
TOP TIP: Learn all you need to know about flavoring kombucha in my full guide!
What Containers Should Be Used To Make Kombucha?
When making kombucha, it is imperative to select the right material for the container you use because it can impact the brew’s quality and flavor. It can also affect the person’s health who will be drinking it because chemicals or harmful bacteria may leach into it.
These are the best materials to use to make kombucha:

#1: Glass Containers
Glass is the best material to make kombucha because it can’t get damaged easily or scratched where bacteria can live. Glass does not release harmful chemicals that damage the kombucha, or react to the acidity of the blend, which is why it doesn’t wear and tear as quickly.
These glass containers are well-priced on Amazon and are simple to purchase. You can also find them in many different shapes and colors. With these glass jars, you can see the process of fermentation nicely as the kombucha brews.Â
For a continuous brew system, it’s best to get a larger jar with a spigot with a tap on the jar used to pour the kombucha, like this one from Amazon. It is vital to get a spigot made from:Â
- food-grade plastic
- stainless steel
- wood
HOT TIP: Avoid containers made of cheap plastic or metal as this can destroy the Kombucha SCOBY.
#2: Ceramic Containers
To ferment kombucha in a ceramic container, choose one made with a food-grade glaze inside the jar, like this one from Amazon. It is essential to have a glaze that doesn’t contain lead that can damage the kombucha and be unsafe for consumption.
A ceramic jar is an excellent choice if you would like to use a continuous brewing method. This type of container also looks really nice on the kitchen counter!
#3: Porcelain Containers
Porcelain jars are safe to use for making kombucha. It is crucial to make sure the glaze is food-grade to prevent any contact with lead. Porcelain containers that are not food-grade, such as vases and decorative pottery, should be avoided.

#4: Oak Barrel
An oak barrel like this one on Amazon can be a lovely container to use as it looks quite fancy! Using an oak barrel impacts the flavor profile of kombucha with a unique woody flavor, which is very tasty.Â
What Should Not Be Used to Make Kombucha
Some types of containers are not recommended for brewing kombucha, as they can damage it. It is useful to know what these are to make sure they are avoided. These include:
- Plastic should not be used at all for the first fermentation, as discussed above.
- Crystal jars should not be used as they contain lead that can be harmful to the kombucha.
- Jars made of metal should be avoided because metal containers can be detrimental to kombucha.
NOTE: The only metal that could sometimes be considered for brewing kombucha is stainless steel jars since they are strong and cannot be damaged easily. They are expensive but easy to clean and safe to use. Glass is still preferred.
Can Plastic Containers Be Used In The Second Fermentation?
During the second fermentation process, there are a few containers that you can consider to store your kombucha. In this stage, it is crucial to choose an airtight container that can close properly to ensure that the brew will maintain its carbonation.
The best kind of container to use for the second process is glass, as it is the most resilient and reliable for both stages. I recommend glass flip-top bottles with a plastic lid, like these sold on Amazon. If you cannot purchase glass bottles or do not get them in time, you can also try leftover store-bought kombucha bottles or bottles that have already been used for other drinks.Â
What Containers Can Be Used For Second Fermentation?
Sometimes we are not able to get the correct containers in time, or they are just too expensive. Here is a list of different bottles (some found on Amazon) you can use as a second option:
- Wine bottles: a cork or wine stopper is needed to seal them correctly.Â
- Already used store-bought kombucha bottles.Â
- Plastic soda or water bottles.Â
- Beer bottles that have been cleaned and a lid will be needed for these.Â
- Beer growlers.Â
- Mason jars with plastic lids. If they do not have plastic lids, then wax paper can be used between the lid and jar.Â
Before using any second-hand or already used jars, it is crucial to ensure all jars or bottles are cleaned and dried correctly and not damaged. Make sure the lids close adequately to ensure it is airtight to facilitate carbonation.
You can use plastic jars if you need to in the second fermentation process, but remember they are still not the best option. Plastic bottles can be used for a short period in the second fermentation. Since the SCOBY is removed it reduces the damage to the plastic that releases harmful chemicals.
If you decide to use plastic, it should only be used for a short period until you can purchase the correct bottles. It would be best to use plastic bottles only once because the more they are used, the more damage occurs.

Conclusion
Kombucha is a healthy drink with probiotics. The type of container used to make it can impact its contents, glass is best used for both primary and secondary fermentation.
Other important things to consider are the size of the container and its volume because these impact the rate of fermentation.
A container cover is also needed when making kombucha for the first fermentation as it helps protect it and the SCOBY. There are many options to use as a cover, and other supplies can be purchased but are not vital to have.
You might also be interested in:

Can You Second Ferment Kombucha With Jam?

Even though you can drink kombucha after the first fermentation, most people generally opt for a second ferment. Why do people second ferment their kombucha, and does jam work to flavor the kombucha during the second fermentation?
You can use jam to flavor your kombucha during the second fermentation process. You will need to know the sugar content of the jam to make sure that there is enough to feed the yeast so the kombucha can ferment adequately.
Kombucha is a very healthy drink filled with minerals and probiotics. Filled with health benefits, some people drink kombucha in place of sugar-filled sodas. To replace soda in your diet, it is recommended to second ferment your kombucha, but why is this the case?
Second Fermenting Kombucha With Jam
You can most definitely use jam as a flavoring to second ferment kombucha. Use your favorite jam, or if you have multiple bottles of kombucha to second ferment, use a different jam for each bottle to have a variety of flavors to choose from.
HOT TIP: If you are using a brewer’s bottle like these on Amazon, make sure that the jam is not so chunky that it can not fit through the opening of the bottle as they tend to have small bottlenecks.
If your jam is chunky, use a fork to mash it up a bit to make it smoother. Make sure there is enough sugar in the jam to feed the yeast. This ensures that the kombucha can ferment adequately and make the right amount of carbon dioxide that is essential for fermenting and carbonation.
If you are not sure about the sugar content in your jam, put a little bit of extra sugar into the jam and mix it around so it is evenly spread. Then add the jam to your kombucha.

Method To Second Ferment Kombucha
You have completed the first fermentation of your kombucha, and it tastes good, but you decide that you want to experiment and try your hand at a second ferment. Where do you start?
NOTE: If you’re wondering how long to ferment kombucha, read my guide.
Make sure you have all the equipment and ingredients you need for the second fermentation process. These can all be found on Amazon, and include:
- good quality glass bottles
- coffee filters or cheesecloth
If you are flavoring the kombucha, then make sure to have your flavoring close by. If not, then make sure you have some sugar close by.
First, filter the kombucha with a coffee filter or a cheesecloth to remove any dead yeast that is floating around from the first fermentation. Some yeast will die during the second fermentation too, but filtering before the second ferment will reduce the amount of dead yeast in the final product.
Secondly, fill the glass bottles with filtered kombucha. If you are flavoring your kombucha with anything, then leave some room in the bottle. If you are not flavoring your kombucha, then you can fill the glass bottle, leaving about one inch of space between the lid of the bottle and the kombucha.
Leaving this space will help prevent the kombucha from exploding as there is enough room in the bottle for the extra carbon dioxide produced during fermentation.
Once the kombucha is in the glass bottles, add flavoring to the kombucha. If you are not flavoring your kombucha, then at this stage add in some sugar. Stir the kombucha to spread the sugar or flavor throughout the liquid.
Then close the bottle as tight as you can and let the kombucha ferment. This should take about three to seven days at room temperature. However, this timeframe may vary depending on the temperature of your kitchen, keep an eye on it.
You can burp your kombucha every few days if you feel the need to. This can help prevent the kombucha from exploding, but it could also affect the carbonation, so the kombucha may not be as fizzy.
Once the second fermentation is done, move the bottles into a cold storage place, you can place like the fridge or a basement. The sole thing that is left to do is enjoy your kombucha!

Why Second Ferment Kombucha?
Now that you know how to second ferment kombucha, here is why you might want to and if it is really necessary.
It is not necessary to ferment your kombucha a second time. You can drink it and get the same benefits from it after only one fermentation. Some people choose to second ferment their kombucha as this carbonates the drink, making it nice and fizzy.
You can also flavor kombucha without fermenting it a second time. So, if you aren’t a fan of carbonated drinks, you can still enjoy flavored kombucha.
Kombucha that has been through a second ferment can satisfy those trying to replace soda with a healthier drink. It has a lovely fizz and taste with added health benefits and way less sugar.
Can You Second Ferment Kombucha With Honey?
If you don’t want your kombucha flavored or don’t want to use regular sugar, you can use honey in the second fermentation process.
Honey has more than enough sugar in it to feed the yeast in the kombucha properly to begin the second fermentation.
You can also add in other flavors that go with honey, such as mint and lemon, to make a delicious kombucha without any extra sugar.
Other Flavours You Can Second Ferment With
We have spoken about jams and honey, but there are many other flavorings you can put into kombucha in the second ferment.
These are some other flavorings you can use to flavor your kombucha with:
- Fruit juice, freshly squeezed or store-bought (will need extra sugar or honey)
- Fresh fruit
- Frozen fruit
- Syrups, like maple syrup
- Vanilla beans (will need extra sugar or honey)
- Dried fruit (will need extra sugar or honey)
- Coffee (will need extra sugar or honey)
These flavor combinations work well together in kombucha:
- Lemon and lime
- Triple Berry – usually strawberry, raspberry, and blueberry, but any berries work
- Lemon and ginger
- Cranberry and ginger
- Apple and cinnamon
- Strawberries and basil
- Lavender and chamomile
- Pineapple and coconut

Conclusion
You can make kombucha with jam and honey as well as with a whole lot of other flavors. Kombucha is a very versatile drink that can be flavored or not, and carbonated or not, and can be made to suit everyone’s tastes.
Kombucha is:
- an excellent alternative to sodas
- really good for you
- packed with minerals and probiotics
Plus, it tastes good!
You might also be interested in:

Do Canned Biscuits Go Bad? Can You Still Eat Them?

One can generally keep unopened tins of canned biscuits for extensive time periods before they go bad. Naturally, you do not want to consume canned biscuits that have gone bad. It is important to determine if canned biscuits have gone bad so you know whether or not they are safe to eat.
Unopened canned biscuits can go bad depending on how much time has passed since the expiry date. You can still eat the canned biscuits if it has only been a few months since the expiry date. Prepared canned biscuits generally last 3-5 days after being baked. However, if the biscuits have changed color or texture or have a funny smell, it is best not to eat them.
It is pertinent that you are able to tell if canned biscuits have gone bad as this will help prevent illness from consuming expired food. Exploring ways to prevent canned biscuits from going bad can be beneficial in enjoying the biscuits for longer and minimizing the risk of falling ill from consuming expired biscuits.
Wondering if miso soup can go bad? Check out this post I wrote on how you can tell!
Signs That Baked Canned Biscuits Have Gone Bad
Here are some spoilage indicators to look out for when determining if the canned biscuits you have prepared have gone bad or if they are still safe to eat.
Sign #1: The Biscuit Color
Once the canned biscuits are prepared, they are likely to be a golden color.
Due to the fact that canned biscuits are pastries, you can expect the mold that grows on canned biscuits to be similar to that found on expired bread, which is generally green and white in color.
If you find that the biscuits have changed color or have any hint of mold, then it is likely that your canned biscuits have gone bad.
Sign #2: Check The Biscuit Texture
Canned biscuits are known for their fluffy, light texture. If you find that your biscuit texture has changed to the point where it is extremely hard, then the biscuits are stale.
While this may not be as pleasant to consume, it does not mean the biscuits have gone bad. Stale biscuits can still be eaten without concern that you will fall ill, but they are likely to be a lot less tasty than fresh, canned biscuits.
Alternatively, you may find that your canned biscuits have become soft and soggy, which is an indication they have gone bad. It is best to throw away the canned biscuits if they have become soft and soggy.
Sign #3: The Biscuit Shape
When you prepare canned biscuits, they are likely to come out round and raised in the oven. However, if they are extremely flat, it might be a sign that they have gone bad. However, if the biscuits have only flattened slightly, it is not a cause for concern and they are likely still suitable for consumption.
It is advisable to take caution if the biscuits were originally round and tall and have now become rather flat. When determining this, it’s important to factor in how the canned biscuits were stored and for how long.

Signs Your Tin of Canned Biscuits Have Gone Bad
Here are some spoilage considerations for when you are determining if your canned biscuits have gone bad or whether you can still eat them.
Sign #1: The Color of Biscuit Dough
When opening a fresh tin of canned biscuits, you can expect to find a dough that looks:
- white
- smooth
- creamy
Take caution if the canned biscuits have any brown or pink tones that do not resemble their usual color.
If you notice any unusual color or detect any hints of discoloring, it is quite likely that the canned biscuits have gone bad and are not safe to consume.
Sign #2: Look for Mold
A fresh tin of canned biscuits will generally have a smooth texture. Any changes to the texture of the biscuits could indicate that they have gone bad.
Additionally, it is also possible that the canned biscuits have mold, which usually presents as green and white in color. If you see any mold, it is best to throw the can of biscuits out.
Sign #3: Smell The Biscuits
While unprepared canned biscuits do not have a distinct smell, the presence of an unfamiliar or strange smell is a good indicator that something is off.
If the canned biscuits give off a rancid odor when you open them, it is best to not risk eating them and throw them away.
Important Considerations When Determining If Canned Biscuits Are Ok to Eat
Here are some things to keep in mind before consuming canned biscuits that are expired or you suspect have gone bad.
#1: How The Biscuits Were Stored
The canned biscuits label generally indicates that they should be stored in a place that is:
- cool
- clean
- dry
If the unopened canned biscuits were stored in extremely hot or cold temperatures, they are likely to go bad in a short period of time.
Once prepared, the biscuits should be stored in an air-tight container (this one is a good value on Amazon) to maintain freshness. Keep them out of the sun, in a cool, dry place like a cupboard or in a kitchen countertop corner.
The container should not be stored in the fridge since it can make the biscuits soggy. However, if you freeze and defrost the biscuits, they can be eaten for 3-5 days as long as they are stored properly afterward.
#2: The Condition of The Tin of Canned Biscuits
Tins can easily be damaged. Sometimes they get damaged on the car trip home or are handled within the house. If the canned biscuits tin has been dented or severely damaged, the biscuits could be damaged too.
Be sure to assess the biscuits upon opening to determine if the biscuits appear ok to eat despite any damage displayed on the exterior of the can.

#3: Biscuits That Were Frozen, Defrosted, and Reheated
If the biscuits were initially prepared, frozen, defrosted, and subsequently reheated, It is likely that the biscuits will only be suitable to eat for 3-5 days after:
- initial preparation
- freezing
- defrosting
- reheating
While freezing the biscuits allows you to store them for long periods, the same principles apply as if you had just made them and they will only be edible for a few days before they start:
- flattening
- growing mold
- smelling bad
#4: Number of Days Since the Biscuits Were Baked
Once canned biscuits are baked, they become perishable goods. This means that they are only suitable to eat for approximately one week after being prepared, provided they have been stored properly.
NOTE: If not properly stored, they are likely to go bad in less than a week.
How to Store Canned Biscuits
Here are some guidelines and tips regarding how to store canned biscuits to keep them fresh and useable for as long as possible.
Tip #1: Store in a Cool, Dry Place
Store canned biscuits in a cool, dry place in your cupboard or pantry. Keep them out of direct sunlight as it can cause the canned food to go bad, or even explode as a result of the excessive heat.
Similarly, storing your cans in extremely cold places like the freezer can cause the can to swell. The damp conditions of fridges and freezers can result in the seal breaking or the metal lid corroding, resulting in contamination and spoilage. Freezing canned biscuits may result in the can rusting or bursting.
NOTE: If the can bursts, it is important to safely dispose of it in a manner where no one, including animals, will be able to access it as it can be quite harmful if consumed.
Tip #2: Store Cans According to Expiry Date
You may purchase new canned goods without consuming the canned food you already have in your cupboard.
A great way to prevent having expired cans of food is to pack your cupboard shelves so that the oldest cans are in front and the new cans are behind them. This way, the oldest can be used up first, and the newer cans will be stored for later.
This storage approach is a great solution if you like to buy canned goods so you don’t end up with a bunch of expired cans.
Tip #3: Freeze Raw Canned Biscuits
It is advisable to freeze and store the biscuits separately. Here are the steps:
- open the can
- separate the raw biscuits
- lay them out on a baking sheet
- freeze
When freezing your canned biscuits on the baking sheet, ensure that the biscuits do not touch each other so they don’t stick together.
Once the biscuits are frozen, transfer them to an air-tight freezer bag (I like these reusable ones on Amazon) and store them in the freezer.Â
Tip #4: Defrosting Frozen Canned Biscuit Dough
It is important to thaw frozen biscuit dough in the refrigerator to keep them chilled while they return to its original state. Avoid thawing canned biscuits on the countertop, as the drastic change in temperature negatively impacts the dough.
Unfortunately, it is possible that you may find that the thawed dough is sticky and does not have the same quality texture as the dough would fresh out of a can.

Potential outcomes when eating foods that have gone bad
Here are a few potential outcomes that may occur when eating foods that have gone bad.
- Stomach Bug: Eating foods that have gone bad can potentially lead to you experiencing an upset stomach as the mold or bacteria in the food does not agree with your body, and your body is trying to get rid of it urgently.
- Nausea and Vomiting: Apart from experiencing an upset stomach, it is also possible that consuming foods that have gone bad may result in nausea and vomiting. Check the expiry date and inspect the biscuits once prepared to ensure that there are no signs of spoilage, as these are indicators that your biscuits have gone bad.
- Perfect Health: It is entirely possible that you can eat something that has gone bad without having any adverse side effects. Everyone’s body is different. One person’s tolerance to a meal may be entirely different from another’s.
Conclusion
Canned biscuits can generally be consumed within a week after they have been baked. However, if the biscuits were not stored suitably, they could go bad in less than a week. Signs of spoilage include:
- mold
- strange smells
- odd colors
If you detect any signs of spoilage, the biscuits should not be eaten.
The storage time indicated on the can reflects the date until which the canned biscuits will remain top quality. If the expiry date has passed, the biscuit may change:
- flavor
- color
- texture
Nonetheless, canned biscuits are likely to be safe to consume if, stored properly, and the package is undamaged with no signs of spoilage.
You might also be interested in:
- What to Do With Over Fermented Kefir: 11 Uses
- Should Yogurt Have Lumps?