

If you are looking for some sauerkraut, you may have discovered that it can be packaged in different ways: canned in a jar or tin and bagged. So, does the way sauerkraut is packaged affect it in any way, and which one is best?
Canned sauerkraut is overall far better than bagged. It’s better for:
- your health
- taste
- hygiene of the product
Although buying bagged sauerkraut may be more convenient for a small portion, canned sauerkraut is a better product.
To understand what would make one way of packaging a product better than another, let us look at how those different packages may affect the product inside.
TIP: If you want to make your own sauerkraut at home for maximum probiotics, read this how-to article I wrote!
Are There Pros And Cons To Canned And Bagged Sauerkraut?
So, which sauerkraut is the best? Canned or bagged? Is there a difference between the two? Before we can confidently say that one type of sauerkraut is better than another, we should take a closer look at the pros and cons of both types.
About Bagged Sauerkraut
Bagged sauerkraut may be a good option for you if you don’t care about the health benefits of sauerkraut, and you just need enough sauerkraut to go as a topping on two hotdogs. You can buy much smaller quantities of bagged sauerkraut than you can if they are canned.
Other than small quantities, though, are there any other pros to buying bagged sauerkraut?
Pros Of Buying Bagged Sauerkraut
- As was mentioned above, being able to buy a much smaller portion of sauerkraut at a time may be very convenient, especially for a single serving.
- Bagged sauerkraut is easy to travel with if you are taking it to a friend or family member’s house for lunch or dinner.
- If you do not enjoy the strong taste of sauerkraut, bagged sauerkraut may be a good option. The bagging process takes away a lot of the sauerkraut’s taste – it definitely still tastes like sauerkraut, just not as strong.
Cons Of Buying Bagged Sauerkraut
- Bagged sauerkraut has very little beneficial bacteria left in it. Due to the process of bagging the sauerkraut, most of the probiotics are killed.
- There are preservatives in bagged sauerkraut – unlike canned sauerkraut, which usually only contains cabbage and salt.
- The plastic bags leak small amounts of air into the bag over time. This is the main reason that the sauerkraut is less strong, and for the use of so many preservatives since it also creates a risk for microorganisms growing.
- Bagged sauerkraut is often more tough and crunchy, instead of the preferred soft and tender texture of traditional sauerkraut.
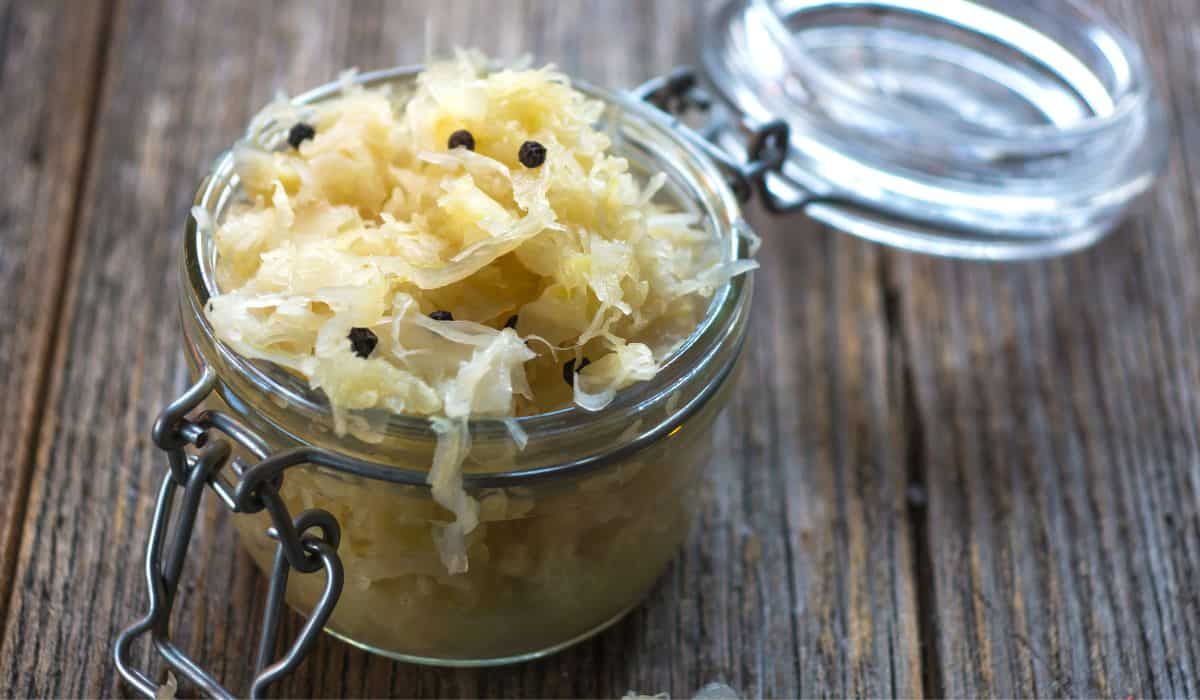
About Canned Sauerkraut
Traditionally, canned sauerkraut is made with only two ingredients, cabbage, and salt.
The cabbage is finely chopped and crushed in a bowl with salt, which releases the cabbage juices. The mixture is then put aside in a sterilized jar to ferment. The fermentation process creates probiotics, making sauerkraut one of the best foods for gut health.
Traditionally made sauerkraut is a healthy food that is good for your:
- gut health
- overall health
- immune system
So, does canning make a difference in how good sauerkraut is for you like bagging does? Here are some of the pros and cons of canned sauerkraut.
Pros Of Buying Canned Sauerkraut
- If the canned sauerkraut is made the traditional way, it will contain all of the great health benefits mentioned above.
- Canned sauerkraut comes in a much larger quantity, so if you eat it regularly you can purchase one large tin or jar of it.
- Canned sauerkraut has the perfect traditional texture which is soft and tender, not hard or crunchy.
- There is low to no risk of microorganisms getting into a canned jar or tin of sauerkraut. If the jar or tin is sterilized and sealed correctly, the sauerkraut will last perfectly without any problems.
- It depends on the brand of sauerkraut, but most canned sauerkraut does not have any preservatives.
- Canned sauerkraut will have a full sauerkraut taste. If made and packaged correctly, canned sauerkraut will keep the full taste of sauerkraut in all its sour goodness.
Cons To Buying Canned Sauerkraut
- Canned sauerkraut comes in a large quantity, so if you only eat it occasionally it may feel like you are buying too much.
- Because there are so much good live bacteria in canned sauerkraut, once it is opened and used it grows mold easily.
- If you do not really enjoy the strong taste of sauerkraut, you may not enjoy canned sauerkraut as it is very pungent and strong in flavor.
So now that we have covered those bases, you can see that there are far more pros to buying canned sauerkraut than there are to buying bagged sauerkraut, which means that canned sauerkraut is the best sauerkraut to buy.

Can You Eat Canned Or Bagged Sauerkraut Cold?
Although most people eat sauerkraut heated up as a side dish to a meal with pork or as a topping on a hotdog or Rueben sandwich, sauerkraut is perfectly safe to eat cold.
You can eat sauerkraut just as-is out of the bag, jar, or tin. In fact, it is actually better for you when eaten cold. When the sauerkraut is heated up it kills most of the bacteria, including all of the health-beneficial bacteria.
Since eating sauerkraut right out of the bag or jar involves no heat, you will still get all of those good probiotics in your system.
NOTE: There are much fewer, if any, probiotics left in bagged sauerkraut by the time it is sold.
So, if you want to buy and eat sauerkraut cold, specifically for health reasons, it is better to buy canned sauerkraut instead of bagged sauerkraut.
Once opened, make sure to keep the sauerkraut in the fridge to keep it cold. You can simply put a serving of sauerkraut on your plate with dinner at night just as is – straight out of the jar just like a pickle!
What Should I Look For When Buying Canned Sauerkraut?
Since canned sauerkraut is overall better than bagged sauerkraut, is there anything specific to look for when buying canned sauerkraut from the store? There are so many different kinds of sauerkraut available that it may be confusing to find which is “the best”.
The best type of sauerkraut will completely depend on what you are looking to get out of your sauerkraut.
If you are mostly looking for a good topper for your hotdog and aren’t super picky about it, it doesn’t really matter what kind of sauerkraut you go with. A simple type of sauerkraut will work just fine.
But, if you want sauerkraut for the health benefits, it is important to read the ingredients.
Naturally-fermented sauerkraut is what to look for when it comes to the health benefits. Ideally, get a brand of sauerkraut where the only ingredients are cabbage and salt, without:
- vinegar
- wine
- any kind of preservatives
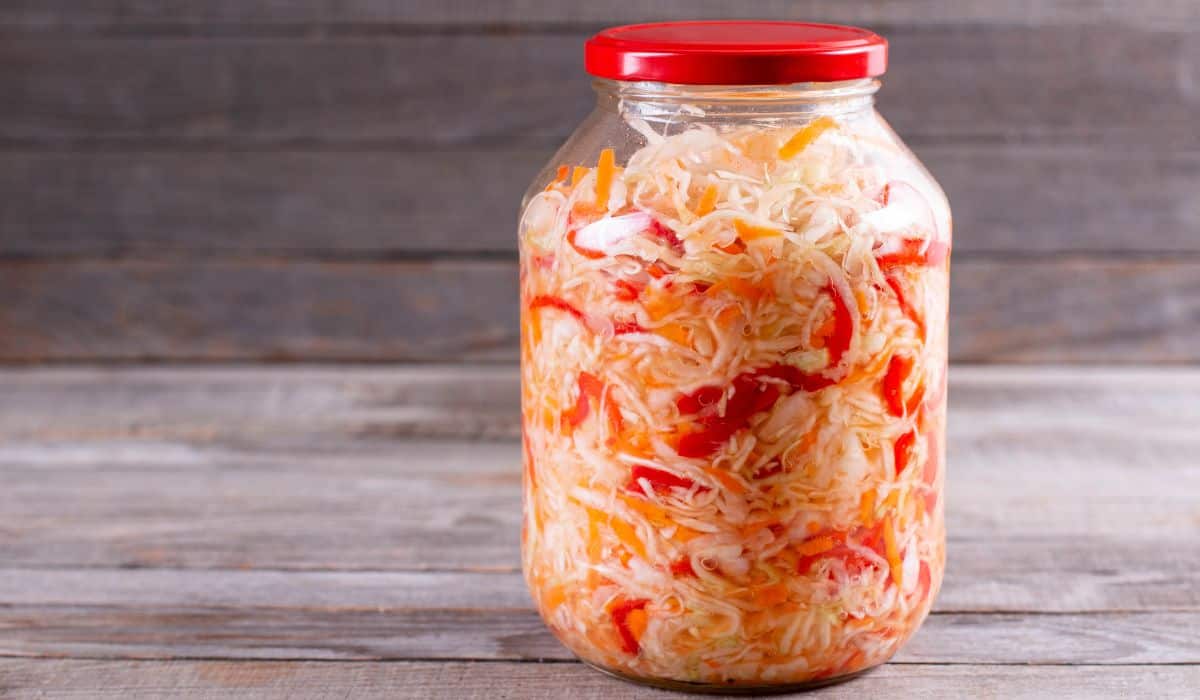
If you want sauerkraut with a unique flavor, there are many sauerkrauts mixed with other vegetables. Some examples of this are sauerkraut blended with:
- beets and ginger
- caraway and dill
- dukkah (an Egyptian mix of herbs and nuts)
- fennel
- lemon and ginger
- carrots and caraway
- beets and garlic
- pumpkin and cranberries
- rhubarb, lime, and ginger
These are just a few examples of the many different kinds of sauerkraut that you can find to buy.
Is Bagged Sauerkraut Bad For You?
Even though sauerkraut can be very beneficial and healthy, it loses all of its health benefits when it sits in preservatives. However, this is not what makes bagged sauerkraut unhealthy.
Any food item that is left in plastic for extended periods of time will eventually contain microplastics, due to the plastic packaging beginning to break down and slowly leaking into the product.
When humans ingest microplastics, it can negatively impact health. Bagged sauerkraut is already less beneficial, and the bag it is in is also not good for you.
Does Canned Sauerkraut Have A Longer Shelf-Life Than Bagged Sauerkraut?
Canned sauerkraut has a much longer shelf-life than bagged sauerkraut.
Bagged sauerkraut also needs to be kept in a refrigerator and has a much shorter expiration date than canned sauerkraut does. Canned sauerkraut generally has an expiration date of a year or longer and can be kept on a shelf.
Bagged sauerkraut might seem like better quality and fresher than canned sauerkraut, however, this is misguided. Bagged sauerkraut does not keep as well and needs to be refrigerated to prolong its shelf life. It also needs a lot of preservatives, which seems to defeat the purpose.
Canned sauerkraut is actually the fresher product of the two. Most brands of canned sauerkraut only contain cabbage and salt, and occasionally other natural ingredients like:
- carrots
- herbs
- spices
Since canned sauerkraut is fermented and is therefore well preserved. When stored in an airtight container, it does not need to be kept in a high-maintenance manner.
So even though bagged sauerkraut needs to be stored in a way that suggests that it is fresher than canned sauerkraut, it is actually the opposite. Bagged sauerkraut needs to be stored that way because it is not a well-packaged product.
Conclusion
When it comes to which packaging of sauerkraut is the best: canned vs. bagged, it seems that the benefits of canned sauerkraut outweigh the benefits of bagged sauerkraut. If there is the best store-bought sauerkraut, it is definitely canned!
Bagged sauerkraut can lose its taste making it a far less flavorful version of sauerkraut, expires very easily, and is bagged in plastic leaving room for microplastics to enter your food. It also tends to be a far less healthy version of sauerkraut, as it loses most of the probiotics and nutrients in the process of being bagged.
As long as you are buying a naturally fermented recipe, canned sauerkraut will not only last far longer before expiring but it is also packed full of probiotics and other nutrients that will benefit your health.
If you love naturally fermented sauerkraut and buy it often, try canned sauerkrauts that come with other ingredients, such as:
- carrots
- ginger
- garlic
- herbs and spices
Most people who eat sauerkraut on a regular basis tend to agree that canned sauerkraut is the way to go. So if you have been wondering what the best sauerkraut to buy is, go with canned!
You might also be interested in:

Fermenting vs Pickling: Which is Better?

Fermentation and pickling are two of the most common food preservation processes. Fermentation and pickling might seem similar, yet they are very different and the taste of pickled food differs from the fermented ones. Both methods have some significant similarities and at the same time have some distinct differences.
Both of these methods of food preservation have some merits and demerits in different situations. For example, if you need to preserve a portion of food in a short time, then pickling is the best choice. But if you want to preserve food for longer periods, then fermenting is the better option.
In this article, I will extensively discuss some of the major differences between fermenting and pickling. Both methods are effective in different scenarios. Read this article to know the basic variations between fermentation and pickling.
The Basic Difference Between Fermenting and Pickling
Although pickling and fermentation processes are quite different, they share the same purpose. These two food preservation methods are used for different foods in various situations. Here, I will try to address some of the basic distinctions between them.
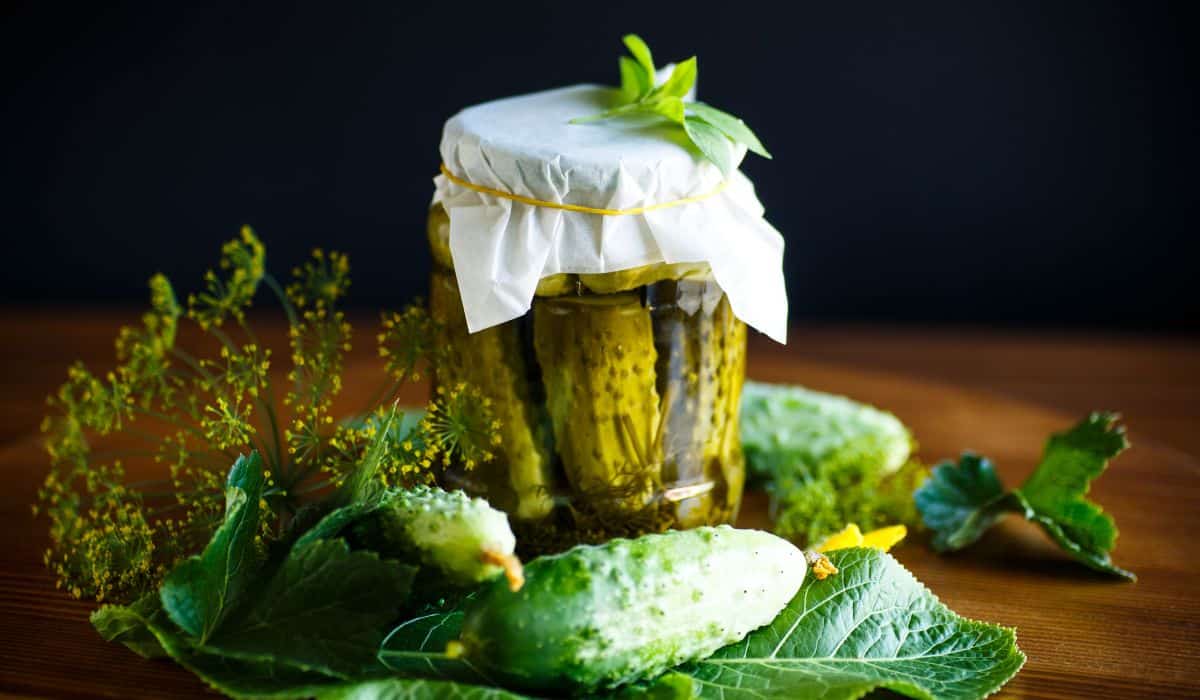
The Pickling Process
Pickling is a very old food preservation method. Usually, the food is soaked in lemon or vinegar and preserved in a jar. Using this method, the food can stay edible for quite some time. Although, pickling will change the taste of the food.
This method generally makes food taste more sour. Furthermore, the food becomes much softer than its natural state since it will be cooked if you can it. The vinegar destroys all the bacteria in the food. Contrary to fermentation, this process has the drawback of also destroying some beneficial bacteria due to the boiling liquid.
Not only that, but the pickling process will also destroy the enzymes of the food. Vinegar produces an acidic environment, which prevents dangerous microorganisms from developing. In the refrigerator, properly pickled food lasts about 3 months. However, you have to finish it within two weeks if you plan to keep it at room temperature.
NOTE: If you are wondering what foods can and can’t be pickled, read my article for the details!
Pros of Pickling
- This preservation process can be done fast.
- Can be applied to a wide range of food.
- Sour taste that many people love.
Cons of Pickling
- Not that healthy.
- Sour taste that some may not appreciate.
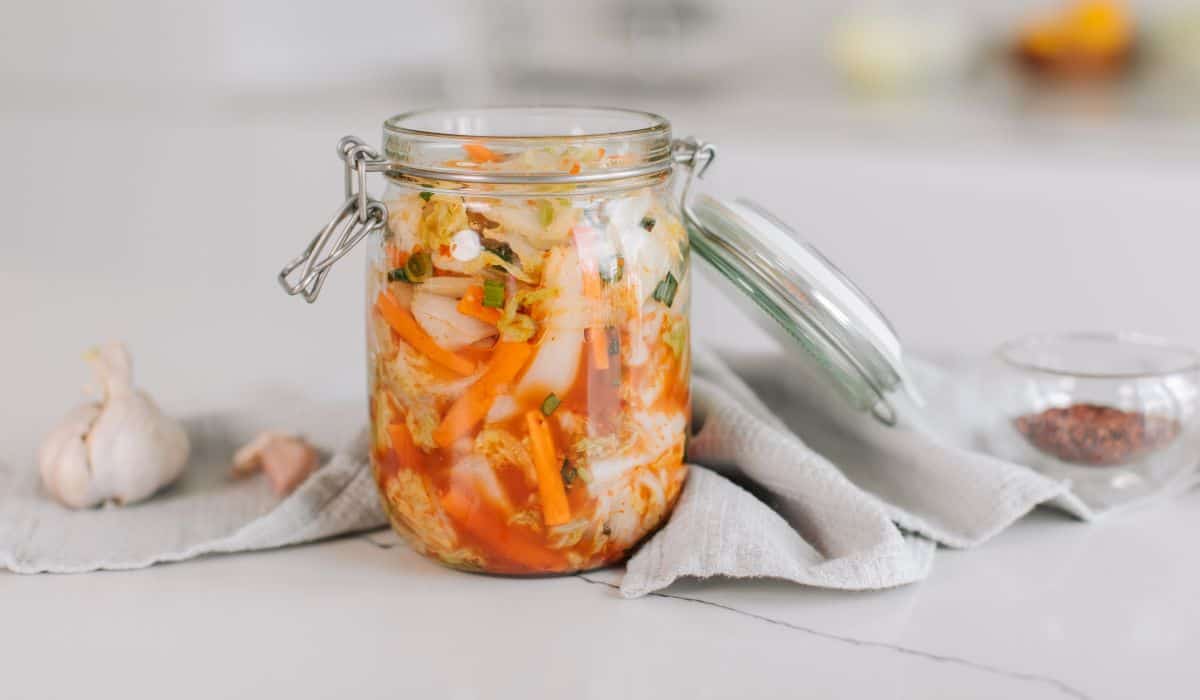
The Fermentation Process
On the other hand, fermentation is a food preservation process in which the PH level of the food is lowered. In this method, the harmful bacteria are killed by creating an adverse environment for them, and the healthy bacteria take over. Unlike pickling, fermentation makes food more nutritious and healthy.
The sole goal of this method is to increase the number of good bacteria and prevent harmful bacteria from taking over. In harsh conditions, healthy bacteria have the ability to survive better, bad bacteria will be destroyed and soon the good bacteria will take control.
With the advancement in the field of science and technology, fermented food tastes great and is widely popular in regions like:
- China
- South Korea
- Europe
NOTE: Some foods are fermented after the pickling process and some of them are fermented directly.
Fermented food typically lasts much longer than pickled foods. Moreover, it is far more nutritious and delicious.
Pros of Fermenting
- The preserved food is nourishing.
- It has a unique taste.
- The food stays edible for a long time.
Cons of Fermenting
- It can smell funky.
After this description, you might have realized that fermented food practically has no downside except the odor. On the other hand, pickled food smells like fresh lemon or vinegar. But in terms of nutrition, no other food can beat fermentation.
This table summarizes the basic distinctions between pickling and fermenting:
| Fermenting Method | Pickling Method |
|---|---|
| In this method, the processed food becomes very nutritious. | Here, the processed food is much less nutritious. |
| Fermented foods taste great. | Pickled foods taste sour and soft. |
| Food lasts for a longer period of time. | Food lasts for a shorter period of time. |
| It is quite a long process. | This process can be finished pretty quickly. |
| Fermented food can smell bad. | Pickled food smells like lemon or vinegar. |
How to Know if You Should Ferment or Pickle
If you have some food that will go bad soon, then using one of the preservation processes would be wise. If you are confused between fermentation and pickling, here is how to know when to use each method.
When Should You Choose Pickling?
If you don’t want to spend a lot of time on the food preservation process, then pickling is an ideal choice for you. It can be finished within an hour or less depending on the food. If you have food that is starting to go bad and you don’t have a lot of time, then pickling can enhance its lifespan for 2 weeks or more.
In the pickling method, for proper preservation of the food, it needs to be boiled in lemon or vinegar for a substantial amount of time, which leaves a bitter taste. I know many people who enjoy the sour and soft taste of pickled food. In some cases, food is pickled solely for making it bitter.
When Should You Choose Fermentation?
Fermentation is the best process of food preservation. As I mentioned earlier, it is one of the most nutritious food items on the market (or made at home). So, if you want to keep your food edible for a long period of time and eat food that will benefit your health, then fermenting it is probably the best option for you.
Fermenting is the best choice if you have:
- more than a few hours
- the appropriate amount of ingredients
- proper knowledge about the process
In some cases, pickled food is fermented to further enhance its lifespan. Food that is fermented after finishing the pickling process can last for as long as 6 months.

Conclusion
As you can see, pickling is quite different than fermenting. In this article, I have extensively discussed some of the major differences between fermenting and pickling methods. Also, I have vastly explained how these two food preservation methods are better in different conditions and scenarios.
Hopefully, you will understand the distinction between fermentation and pickling and feel confident choosing which is right for you in each situation!
You might also be interested in:

Kombucha Vs. Beer – Do You Know The Difference?

Everybody likes a refreshing cold beverage on a hot summer day, and nowadays, there are so many different drinks to choose from. Some prefer a nice strong beer, and others might enjoy a lighter, healthier drink like kombucha. So, which one will you choose? Both are fermented; both contain alcohol, and you can use each one in other ways than the purpose it is intended for. So, what is the difference between kombucha and beer?
Kombucha is made from sweet tea fermented with a SCOBY (symbiotic colony of bacteria and yeast). Beer is made from barley or malt. When beer is made, the yeast is used to consume the sugar and convert it into an alcoholic beverage. Kombucha is a drink better known for its health benefits.
When kombucha is made, the yeast consumes the cane sugar, but it is a fermented drink that contains little to no alcohol. This article will discuss the differences between beer and kombucha in detail, from their properties to how they are made.
What Is Kombucha?
Kombucha is a beverage made using a symbiotic colony of bacteria and yeast (SCOBY) to ferment sweet tea. The Latin name Medusomyces gisevii refers to a sweetened fermented green or black tea that is slightly effervescent and makes for a delicious and refreshing drink.
Kombucha is a beverage that has been available for centuries and is mainly consumed for its many health benefits. To achieve different flavors and promote various benefits, kombucha can have different types of:
- tea
- fruit
- spices
Kombucha ferments at between 60 to 85 degrees Fahrenheit. Fermenting kombucha at lower temperatures is a slower process because it takes longer to form the necessary organic acids. A warmer environment will make it ferment faster and makes a stronger brew.
To produce kombucha, the yeast in the SCOBY breaks down the sugar that is in the tea, and this reaction produces probiotic-friendly bacteria. The probiotics in kombucha can enhance a person’s immune system and health.
Once the fermentation process is complete, the tea is a beverage that is:
- probiotic
- delicious
- fizzy
The Origin of Kombucha
The exact origin of kombucha is unknown. However, archeological evidence of fermentation using clay pots 9000 years ago has been found.
Another origin theory dates back to Qin Dynasty, 221BCE, China. It is believed that the emperor Qin Shi Huangdi was the first person to make kombucha. Teas and fermentation were very popular in China at that time.
Kombucha Ingredients
Basic Kombucha requires five primary ingredients:
- A SCOBY: can be purchased on Amazon, get one from a friend, or grow your own.
- Water: must be filtered unchlorinated water, I like to use a Berkey filter which you can buy on Amazon.
- Starter tea: unpasteurized, unflavored, kombucha from a store, a previous batch, or a friend.
- Black tea: I opt for organic, it’s easy to find on Amazon.
- Sugar: I like to use organic cane juice crystals, but any white cane sugar works. Both can be easily purchased on Amazon.
Optional ingredients that you can add for different flavors are:
- Other variations of tea: green, black, black currant
- Spices: cinnamon, nutmeg
- Fruit or fruit juice: any kind you prefer

The Fermentation Process for Kombucha
Kombucha goes through two fermentation phases. The first phase takes between 7-12 days, and the second phase is when it has been flavored and bottled for 2-4 days at room temperature for the carbonation process. To learn more about how to flavor kombucha during the second ferment, read my full guide to flavoring kombucha.
Level Of Alcohol in Kombucha
Store-bough Kombucha is labeled as “non-alcoholic” because it contains less than 0.5% alcohol. Homebrewed Kombucha could have much higher alcohol levels, but it is hard to know for sure.
Kombucha can also be made into a ‘hard kombucha.’ If you manipulate the sugar and yeast levels and extend the brewing time, kombucha can achieve much higher alcohol levels of between 4.5-8% ABV.
Health Benefits Of Kombucha
Most people make and consume kombucha because of its many health benefits. Here are some of the many ways kombucha can give you a health boost.
#1: Kombucha Can Benefit Gut Health
Diarrhea caused by antibiotics, irritable bowel syndrome (IBS), and inflammatory bowel disease are stomach-related ailments caused by bad gut health. During the fermentation process, acetic acid with antimicrobial properties is produced. It kills microbes and harmful bacteria before the body can absorb them, helping to boost your immune system.
NOTE: Even though it is believed to be accurate, the probiotics in kombucha have not been proven 100% scientifically as of yet.
#2: Kombucha for Mental Health
The anti-inflammatory properties present in kombucha can alleviate some of the symptoms of depression and can help to boost your mood.
#3: Kombucha is Antioxidant
Kombucha can help promote good liver health with its antioxidant nature. There are molecules in the body that can damage cells, but the antioxidants in kombucha can help:
- fight damage
- protect the cells
- detoxify the liver
Kombucha can aid in promoting good liver health and reducing the risk of liver inflammation.
#4: Kombucha Has Good Bacteria
The beverage can also help to lower the risk of bacterial infections. The probiotic properties in kombucha help the body keep its good bacteria. It is not antibacterial, but it does add and help maintain the healthy bacteria in your body that is essential for a strong immune system.
HOT TIP: Drinking kombucha daily gives a plentiful supply of B vitamins!

Different Flavors Of Kombucha
Kombucha does not have different styles, but it can have different flavors, depending on what you add to your batch of kombucha. There are, however, four types of SCOBYs used to make kombucha including:
- Heirloom or Vintage
- Homegrown
- Island Girl
- Tibetan
How Kombucha Is Made In 4 Steps
Step #1: Prepare the Tea
Boil 10 cups of water and turn off the heat. Add 8-10 tea bags and 1 cup of sugar to the water and stir until the sugar is dissolved. Let the tea steep for the recommended amount of time (usually 3-5 min), then allow it to cool down to room temperature.
Step #2: Add More Teas
In a gallon jug made for brewing kombucha (sold on Amazon), add:
- the cooled tea
- 2 cups of kombucha starter
- SCOBY
Step #3: Ferment the Kombucha
Cover the jug with a thin cloth like this jar cover set from Amazon, so air to can flow. Let the kombucha ferment on the countertop for 7-30 days.
Start taste testing the kombucha after seven days. If it is left to ferment for an extended period, it will have more probiotics. Be careful you don’t leave it for too long or it will turn to vinegar!
Step #4: Bottle and Second Ferment Option
The kombucha is now ready to be bottled (I like these flip-top ones sold on Amazon) and placed in the refrigerator. If you leave it for a while longer at room temperature, the kombucha will become more carbonated.Â
Alternative Uses For Kombucha
As we now know, kombucha is used not only for its delicious taste but also for its many health benefits. However, kombucha vinegar has use for many other purposes.
If kombucha is left to ferment for 30-60 days longer, it becomes more acidic until it is too sour to drink and is classified as vinegar. Let’s take a look at some of the alternative uses for kombucha vinegar:
- When diluted 50% with water, kombucha vinegar can be used as a hair tonic, wash or rinse. The acetic acid in the vinegar is gentle on the hair, helps to strip any gunk from previous treatments, and gives the hair a natural sheen.
- Kombucha vinegar can be used as a face toner because it stimulates the capillaries under the skin, assisting cells in regenerating.
- Use kombucha vinegar as a cleaning agent alternative. It works well to reduce soap residue in the bathtub or the shower.
- A mixture of kombucha vinegar and a few drops of lavender or tea tree oil makes an effective surface spray for your kitchen.
- Adding ½ cup of kombucha vinegar to your laundry will soften your clothes and brighten the colors.
- Kombucha vinegar is also a lovely addition to salads as a dressing or in a marinade.
Side Effects Of Kombucha
People who have a compromised immune system should drink kombucha in moderation. Since it contains bacteria, there is always some risk.
Homebrewed versions of kombucha hold a higher risk for contamination. Store-bought versions are believed to be very safe for a pregnant woman or anyone with immune system problems.
The fermentation process also creates alcohol. If you are sensitive to alcohol or don’t drink any alcohol altogether, then drinking kombucha should be avoided.
Global Kombucha Consumption Statistics
In 2020, the global market for Hard Kombucha was valued at $99,030 million. In 2026 the value is expected to increase to $120,385 million. This is a significant growth at a CAGR of 42.4% after Forbes Magazine estimated kombucha to reach sales of $1.8 billion by 2020. It has also been called the fastest-growing beverage in the world.

What Is Beer?
Beer is an alcoholic beverage made from malted barley and is produced through the process of:
- extracting raw materials
- boiling water
- fermentation
The Origin of Beer
There have been plenty of artifacts that prove that beer is one of the oldest drinks consumed by humans. Ancient Chinese artifacts show that in 7000BC, people brewed beer with:
- hawthorns
- honey
- rice
- grapes
In the 5th millennium BC, in Godin Tepe, Central Zagros Mountains of Iran, the first barley beer was chemically confirmed. This was documented in the writing of Mesopotamia and ancient Egypt.
Ingredients for Brewing Beer
The most common ingredients for brewing beer can be found on Amazon, they are:
- A starch, usually malted barley
- Water
- Brewer’s yeast
- Hops, for flavoring and bringing out the sweetness of the malt.
Additional ingredients that you can easily purchase most of on Amazon and use include:
How to Ferment Beer
It takes 2-6 hours to brew beer. Afterward, the beer goes through various fermentation phases and is ready for consumption after six weeks.
If beer is fermented at the same temperature as kombucha, you will have a beer that smells like acetone due to the high ethyl acetate and alcohol levels.
Brewing tanks used to make beer are fitted with cooling jackets to control the temperatures from getting too high during the fermentation process.
Level Of Alcohol
Even though there are non-alcoholic beers on the market, a beer typically has an alchol by volume between 4-7% depending on beer style.

Different Styles Of Beer
There are various styles of beer available shown in the table below:
| Style of Beer | Description | Color & Taste | Brand Name |
|---|---|---|---|
| Lager | Primarily an American, European or German drink | Light amber-hued, delicate hops, nut, chocolate, coffee and bread flavors, bitter | American: Heroes European: Mythos-Hellenic Lager German: Weihenstephaner |
| Pilsner | Slightly effervescent | Pale, bitter, dry | Pilsner, Urquell, Grolsch |
| Wheat Beer | Germany, America and Belgium are well known for their wheat beers | German: Sweet-tart, full-bodied, with spicy notes American: Golden hued and straightforward Belgian: Slightly spicy, fruity, and refreshing | German: Hefeweizen American: Deschutes Belgian: Hoegaarden |
| Belgian Ale | Difficult to generalize because they are unique and complex | Yeasty, sweet, strong | Saison Dupont Farmhouse Ale |
| Porter | Known for their dark color due to the brown malt used | Dark, malty, roasted, flavors of nuts and coffee | Sierra Nevada Imperial Porter |
| Pale Ale | Intense flavors and bitter hops | American: Citrus notes, amber-hued Indian: Hoppier, drier and higher in alcohol, amber-hued | American: Sierra Nevada Pale Ale Indian: Fullers Pale Ale |
| Stout | Coffee-like and low in alcohol, they come in various types, such as milk stout, oatmeal stout, dry stout and imperial stout | Regular Stout: Coffee-like flavors, creamy, bitter and dry Imperial Stout: Higher levels of alcohol, an intensely bitter, dark taste, robust | Guinness, Black Swan Imperial Stout, Kalamazoo Stout |
| Brown & Amber Ale | Known for their dark brown and amber hues | Brown Ale: Slightly sweet, nutty, malty flavor Amber Ale: Red hue, somewhat sweet, nutty | Brown Ale: Newcastle Amber Ale: Okanagan Spring Cloudy |
How Is Beer Made?
Beer Making Equipment
All equipment that is used for brewing beer at a commercial standard needs to be FDA approved. Metal tanks such as copper and stainless steel are used. It would be best to avoid brass, as it contains lead.
For tubing, the types of food-grade plastics that are acceptable are:
- High-temperature silicone rubber
- Polyethylene plastic
- Neoprene rubber
- Polysulfone plastic
Any vinyl or PVC tubing must have “FDA Approved†printed on it. The fermentation process requires the equipment to be sterilized before a new batch is started.
Different types of chemicals and acids are used to sterilize and maintain the equipment. A powered brewery washer, sold on Amazon, is used to wash the machines clean before sterilization.Â
Step #1: Mashing the Malted Barley
Malted barley, also known as malt, is placed in a mash tun with hot water and soaked for 1 hour. This process called “mashing” is where sugars are released from the grains.
During the fermentation process the yeast consumes the sugar to produce alcohol. Without sugar, there will be no alcohol. Malt is also the ingredient responsible for the beer’s:
- flavor
- body
- aroma
Step #2: Sparging the Grains
The grains are rinsed in hot water, which helps to extract the remainder of the sugar. Next, the hot water and the grains are separated, mashed and sparged in a lauter tun.
The liquid that is produced is called wort, which is sent to the final brewing stages. The grains are discarded as they are no longer needed.
Step #3: Boiling the Wort and Hops
The wort is placed in a boil kettle to get rid of all microorganisms. Boiling takes 1 hour, and during this process, hops are added to the mixture. The boiling water helps to release the flavor in the hops.
Step #4: Cool and Add Yeast
After boiling, the wort is cooled down to 80 degrees or less before the yeast is added. If the liquid is still hot, it will kill the yeast, and you will need to start the whole process over.
Step #5: Ferment the Beer
In this step, the yeast eats the sugars released from the grains and converts them into carbon dioxide and alcohol. This process takes about 1-2 weeks, and this is where the alcohol remains in the beer, and the carbon dioxide is released into the air.
Step #6: Carbonating the Beer
The beer is almost ready, but it is still flat. In this step, carbon dioxide is injected into the beer to create those lovely tiny bubbles that make a beer refreshing.
Step #7: Packaging the Finished Beer
Finally, the beer is ready for the masses to enjoy and are packaged and distributed to liquor stores and wholesalers in:
- bottles
- kegs
- cans

Alternative Uses For Beer
Beer is a refreshing cold beverage for after you’ve had a long, stressful day, or if you are hosting a dinner party for some friends. There are many more things that you can use beer for, such as:
- People claim to have used beer to wash their hair and reported that it makes their hair voluminous and shiny.
- You can use beer to remove stains instead of using chemical products.
- Thanks to the acidity in beer, it is often used to polish metal, such as copper.
- Beer is proven to be a brilliant meat tenderizer.
- Chefs prefer to use beer in their marinades because it does not alter the taste of wine or vinegar.
- Beer removes rust from bolts that are stiff and hard to unscrew. Letting the bolts sit in the beer for a while allows the beer’s acidity to dissolve the rust.
- The antioxidants in beer smooth the skin; therefore, it can be used as a soak in the bathtub. You only need to add a few bottles to the water.
- You can use it to make a delicious beer-battered fish.
- Replacing either the milk or water in your pancakes with beer makes them fluffier.
- Hoppier, darker ales contain a high amount of silicon, adding to the health of bone and collective tissue, which ultimately fights against osteoporosis.
Global Beer Consumption Statistics
In 2020, the global beer market achieved an amount of almost $189 billion. It has been reduced by 1.4% since 2015. However, it is predicted to rise at an 8.2% rate in 2025 and a further CAGR of 5.7% ($370 billion) in 2030.
Can You Combine Beer And Kombucha?
Kombucha and beer combined have also been referred to as a “happy marriage.”
If you blend the suitable types of yeast, which are similar to those in kombucha, then beer and kombucha can be “married” into one drink. Goose Island, a brewery in Chicago, has created one of the first kombucha beers called Fleur.
“Kombucha offers a sourness to balance the natural sweetness of the beer as well as adding fruitiness from the hibiscus.”
John Laffler, kombucha master brewer at Goose Island
The table below summarizes all the differences between beer and Kombucha:
| Beer | Kombucha | |
|---|---|---|
| Origin | Exact origin unknown. Suggested origin: 5th millennium BC, in Godin Tepe, Central Zagros Mountains of Iran: first barley beer chemically confirmed | The exact origin is unknown. Suggested origin: Qin Dynasty, 221BCE, China |
| Ingredients | A starch sort (malted barley), water, brewer’s yeast, hops | Black tea, starter tea, SCOBY, water, sugar |
| Fermentation Time | 2-6 hours brewing time, after various fermentation phases, it is ready for consumption after ~ 6 weeks | Phase 1: 7-12 days Phase 2: 2-4 days after bottled and flavored (carbonation phase) |
| Level Of Alcohol | Between 4-7% (depending on the style of beer) | Store-bought: 0.5% Homebrewed: can be higher |
| Styles/Types | Lager, Pilsner, Pale Ale, Belgian Ale, Brown & Amber Ale, Porter, Stout, Wheat Beer | None – only different flavors |
| Statistics | Predicted to increase 8.2% in 2025 | Predicted to increase $120,385 million in 2026 |

In Conclusion
There are similarities when it comes to brewing beer or kombucha. The main priority is to make sure that the yeast in both beer and kombucha are happy. The equipment needs to be:
- clean and sanitized
- free of any old product buildup
- temperatures need to be correct
Although both kombucha and beer ferment sugar, the types of sugar they ferment are different. Kombucha can ferment only simple sugars such as sucrose and glucose. Beer ferments wort (a malt-sugar solution), a combination of simple and complex sugars such as maltose.
However, if we look at who the winner is, beer takes the cake! It is, and has been a massive market for centuries and although kombucha has become extremely popular, it has some catching up to do. But whichever one you choose, both will be equally satisfying. So, kick off your shoes and enjoy a cold one!
You might also be interested in:

Here’s What To Do If Your Brine Is Too Salty

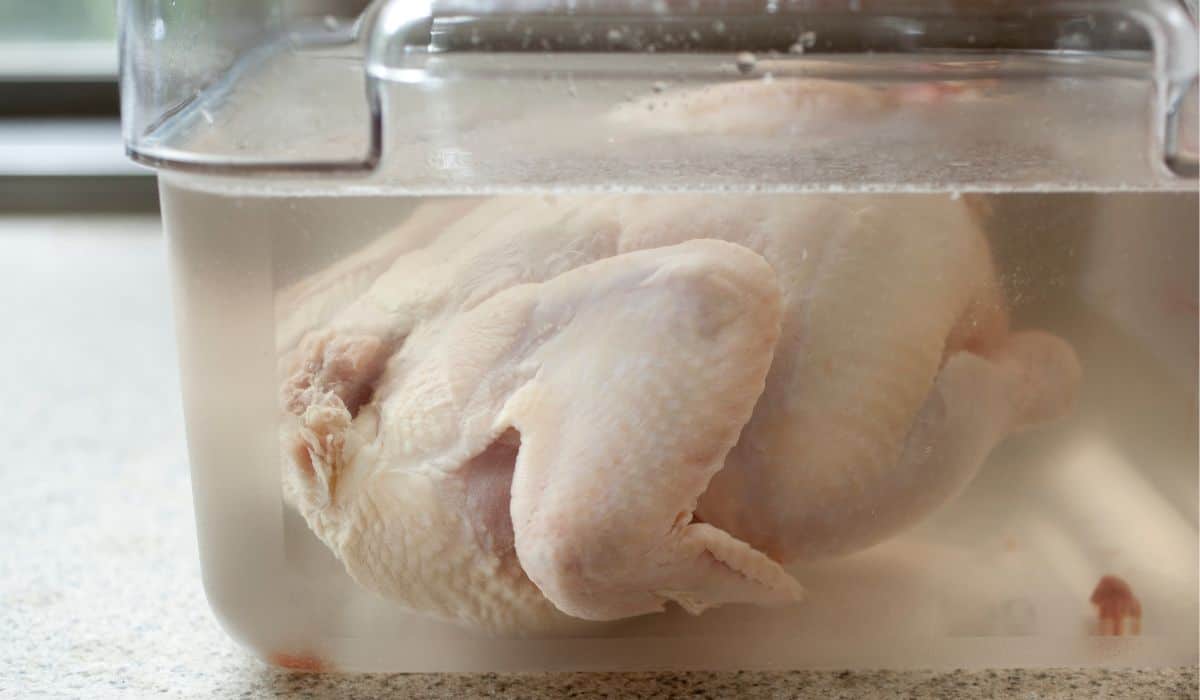
Brining is a common way to treat meat, poultry, and fish before cooking to enhance the flavor and juiciness of the meat. Brine is a salt solution with other herbs and spices to add flavor, but the active ingredient is salt. So, what happens if you make your brine too salty? Is there anything you can do about it, or is it ruined?
If your brine is too salty, you can reduce the salt content by adding more liquid to the brine. Also, the meat can soak for a shorter amount of time in oversalted brine, or you can soak the meat in clean, cold water after the brining time to reduce the salt content in the meat.
Many homesteaders use brining as a way of preparing meat, especially tough cuts of meat that benefit from the tenderizing effect of brining. A brine that is too salty, or food that is left in the brine too long, could result in the food being too salty to eat. There are some ways to salvage the food and get some of the excess salt out of it so it will still taste good!
NOTE: If you are wondering if you can brine two different types of meat together, read my article here!
Is Brine Supposed To Be Salty?
Brining was originally used as a preservation method for meats before refrigeration was an option. It still has relevance in the kitchen today because the piece of meat being brined has added:
- flavor
- tenderness
- texture
Brine is supposed to be salty because salt is necessary to have the outcome of flavor and texture of the meat. If the salt content in the brine is too low, it will not absorb properly or deeply into the meat, and it will not complete the brining process.
Brine that is too salty will have the opposite effect in that too much salt will be absorbed into the meat, and the meat will remain salty when you cook it. This may make the meat unpalatable and completely inedible!
For the meat to be brined correctly it is very important to get the right:
- ratio of salt
- volume of liquid
- weight of the meat
If you are new to brining, look for a tried and tested recipe, and stick to the quantities religiously to make sure you have success on your first attempt. Once you have some experience with the brining process, you can experiment and change things up a bit.
How To Fix Salty Brine Before You Put Food In It
Let’s visit the scenario where you have started making brine, it has been cooked and cooled down, and you decide to do a taste test. To your horror, you discover that you have accidentally put too much salt in the brine.
We have all made the mistake where we have misread a recipe and accidentally added too much of an ingredient. In the case of brine, is there any way it can be rescued, or does it need to be thrown out and remade?
Fortunately, fixing a brine that is too salty is a fairly simple affair, and you will be able to save the mixture. You can simply mix up an appropriate amount of the liquid ingredients of the brine to add to your salty brine and balance out the saltiness.
Some brine recipes only use water as the liquid ingredient, while others use a mixture of water and vinegar. You would need to add appropriate amounts of the liquids according to what was recommended in the original recipe.
This would, in effect, double the recipe, and you will have more brine on hand. Reheat the brine to make sure all the ingredients combine properly and then let it cool down.
Now that you have too much brine for the cut of meat that you wanted to treat, you can simply put the excess brine into tubs or freezer bags and freeze it for later use.
What To Do With Food Soaked In Salty Brine
There are two aspects to this particular briny problem. The first is that you have soaked your food in a brine that is too salty, and the second is that you have soaked your food in the brine too long.
Brine Is Too Salty
If you have soaked the meat in the brine for the prescribed amount of time, but your brine solution was too salty, the cooked meat may be too salty to eat.
If you have already cooked the food, there is nothing you can do except discard the food. If you have not yet cooked the meat and the brine is too salty, then soak the meat in some clean, cold water to extract some of the salt content from the meat.
NOTE: The amount of soak time in the cold water depends on how over-salted the brine was, so this will be a bit of a hit-and-miss affair to know how long to soak the meat.
Another method is to soak the meat in the very salty brine for a much shorter length of time and then still give it a clean cold water soak for about 15 minutes before cooking it.
Soak Time In The Brine Was Too Long
Brining is a method that requires precise adherence to the brine recipe and to the recommended soaking times for the weight and type of meat.
Deviations from the recipe and the process can have undesirable results. If you have soaked the meat for too long in the brine, the consequence may be that it is too salty, or the meat will have a mushy, unpleasant texture.
The degree to which the meat is affected depends on how long the meat was over-brined. If you were supposed to brine the cut of meat for four hours and you brine for five, you can reduce the saltiness by soaking the meat in cold, clean water for 30 minutes or so.
If, on the other hand, the cut of meat called for a 4-hour brine and you soaked it for 8 hours or more, the meat will probably be inedible and would need to be thrown out.
The soaking time for brining can vary from 30 minutes to several days, depending on the type of meat and the weight of the cut of meat. Thus, it is of crucial importance to pay close attention to brining times.
HOT TIP: Set a notification alarm on your phone to let you know when the brining cycle should be complete. Don’t rely on your memory; forgetting to take your meat out of the brine could result in you throwing it away.

Here are some guidelines for the brining times you can expect for some types of meat.
| Meat | Brine Time |
|---|---|
| Fish fillet | 10 to 30 Minutes |
| Skinless chicken breast | 30 minutes |
| Skin-on chicken breast | 30 minutes to 1 hour |
| Chicken drumsticks | 2 to 4 hours |
| Whole chicken | 4 to 12 hours |
| Whole turkey | 12 to 24 hours |
| Pork chop with bone | 30 minutes to 1 hour |
| Whole pork loin | 2 to 12 hours |
These are merely guidelines for brining times, and the time will vary depending on the weight of the meat and the amount of salt in your brine. This is why it is important to follow the recommended brine time for the recipe that you are using.
For most meats, you can also use a rule-of-thumb brining time of 1 hour per pound of meat.
Conclusion
Brining meat is a delicate balance of:
- salt
- size
- cut of meat
- time
If the brine is too salty, the problem is easily remedied if you have not put any meat in it. Simply add additional liquid to balance out the salt content.
If the brine is too salty and you have already placed the meat in the brine, you can reduce the time limit that you soak the meat. Or, draw some of the saltiness out of the meat by soaking it in cold, fresh water.
You might also be interested in:

Should Brine Be Refrigerated?

Brine is the perfect thing to keep most meats juicy and flavourful, and it is used to preserve meats and other foods. It is the perfect mixture between salty and a bit of sweetness with a few fresh herbs added in to jazz up the taste. Some brine recipes may require making at least one gallon, which can be too much for certain meat cuts. Can you keep the unused leftover brine? If so, should it be refrigerated to be stored correctly?
You should definitely refrigerate your brine. This will allow your brine to last longer, giving you time to use the whole batch instead of throwing half of it away. This will also ensure that the brine does not grow mold or other things that could potentially contaminate the brine and make you sick.
There are many brine recipes out there in the world. Some brines last longer than others, and some are only single-use brines. How do you make sure the brine is ok to save and use later?
How To Store Unused Brine Correctly
If you want your brine to keep and remain unspoiled, then it should be refrigerated. Some brines are still useable if left on the kitchen counter overnight for one night. However, all the experts recommend refrigerating brine as soon as you can after making it.
If your brine contains any fresh herbs and spices, then refrigerating the brine is best as they can spoil the brine faster if it is not stored properly. If the brine is fully saturated with salt, then the brine with fresh ingredients can last at room temperature overnight as the salt will preserve them.
If the brine is not fully saturated with salt, then the fresh ingredients may spoil if unrefrigerated overnight and the brine will have to be thrown out. To store brine correctly, ensure that it has not come into contact with anything else that could cause spoilage.
First, let the brine completely cool down to room temperature. Then place the brine into an airtight container, like this one on Amazon, and place it in the fridge.
The refrigeration of the brine can prolong its freshness and usability for quite some time. Brine that does not have any fresh ingredients in it can last almost indefinitely in the fridge. Brine that does have fresh ingredients in it will only last about two weeks in the fridge, so make sure you will be able to use the leftover brine before this time is up.

Should You Keep Used Brine?
You may have used all of the brine already and are wondering what to do with it now that the brining process is complete for your cut of meat.
If you have used brine at all, especially on meat, then it is highly recommended to throw out the brine that was used. If it is used on another food, it could contaminate the new food that you put into the brine. This could lead to food poisoning.
If the brine was used for vegetables, then it may be possible to reuse the brine with caution. Make sure that the brine is still saturated with salt and that nothing has started to grow in the brine. Also, be sure that it was stored correctly in the refrigerator before you use it again.
A lot of people do still believe that no matter how the brine was used, it should be thrown out after use. This is a personal preference; use your own discretion in this decision.
What about reusing pickled onion brine? Read my article about how, when you can, and when you shouldn’t!
Things To Consider Before Storing Unused Brine
The following are a few things to keep in mind if you are deciding on whether you should or should not store your unused leftover brine.
Brine can take up a fair amount of space in your refrigerator. Make sure you are willing to give up this fridge space until you have the opportunity to use the leftover brine.
Brine can also be quite heavy so make sure your fridge shelves are structurally sound before putting a large quantity of brine into your refrigerator. The last thing you want to happen is for the shelf to collapse due to the weight of the brine, with the brine and everything else in your fridge spilling everywhere.
The ingredients to make brine are also quite cheap, so if you are not willing to give up fridge space or do not have enough fridge space to begin with, then you may want to throw out leftover brine. You can always make more at a later stage if you need to, with very little expense.
How To Tell If Your Brine Is Off
You accidentally leave brine out overnight while it is cooling, and don’t remember until later the next afternoon. Now what? Is the brine still okay to use, or is it spoiled?
The following are steps to follow to determine if your brine has indeed spoiled.
Step #1: Check for Mold in the Brine
Take a close look at the brine. Is the color uneven, or is there any indication of mold in the brine? If the color is uneven or you spot some mold in the brine, then this is a good indication that the brine is spoiled.
Step #2: Check The Smell of the Brine
Check the surface of the brine and smell it. If there is a foul smell or mold on the surface, then it needs to be thrown out, and you need to start the brine-making process from scratch.
Step #3: Check the Herbs
If you added whole fresh herbs to your brine, then fish a bit of them out. If the herbs feel slimy to the touch, this could also indicate that the brine is off and needs to be thrown out.
These three indications do not need to all be present together. If one or the other is present, then the brine is spoiled. Remember that a useable brine needs to have a pleasantly sour smell and a cloudy, dull color.
To make sure brine does not spoil, place it in the fridge to keep cool as soon as you can. This way it can be used at a later date. Set a reminder or alarm so you don’t forget about your brine.
One way is to make brine earlier in the day, so it has enough time to cool off and go in the refrigerator before you go to bed. Another way is to set an alarm on your phone to notify you when it is time to check on your brine.
Conclusion
Refrigerate brine to make it last longer and to ensure that you do not get sick from it spoiling. If you refrigerate your brine, then you will probably be able to use the entire batch without issue.
Refrigerating brine gives you quick access to a good, homemade brine that you know you can enjoy whenever you want. This is the best way to store brine to get the most out of it!
You might also be interested in:
- 5 Best and Worst Salts for Making Brine
- Here’s What to Do If Your Brine is Too Salty
- Do Canned Biscuits Go Bad? Can You Still Eat Them?

5 Best And Worst Salts For Making Brine
The best way to keep a piece of meat or poultry tender and juicy is to brine or marinate the meat before cooking it. Adding liquids to the cut of meat will ensure that the meat does not dry out and that you will not have to eat flavorless, dry, or rubbery meat! Also, preserving or pickling your surplus vegetables in brine makes their shelf life longer and keeps them fresh and tasty for eating later.
Table salt should not be used for the brining method. The best salt to use for brine is coarse salt. This is our recommended list of the top five salts to use for making brine:
- Morton kosher salt
- Diamond Crystal kosher salt
- Light grey Celtic sea salt
- Sherpa pink authentic Himalayan salt
- Pickling salt
Certain leaner types of meats don’t contain much fat or marbling to protect them, so they can overcook and burn very quickly, like:
- pork
- poultry
- shrimp
Adding moisture and different flavors to the meat adds a beautiful tenderness and a very different taste to your usual homemade meat dish. Many vegetables are pickled using a brine solution of:
- salt
- water
- various spices to add to the taste
Why Do We Use Salt For Brining Meat And Poultry?
A traditional brining method used to preserve and flavor of food uses:
- salt
- water
- an acid such as vinegar
Salt and water are the two main ingredients used for brining:
- meat
- poultry
- seafood
In contrast, salt and acid are the two main ingredients used when marinating meat.
Brining not only retains moisture in the meat but also adds moisture to the meat, resulting in a very juicy cut! Generally, unsalted meat will lose about 20% of its moisture during the cooking process. However, this amount reduces by half when adding salt to the meat.
Thicker, fattier cuts of meat don’t need to be placed into a brine solution before cooking, but they could be marinaded to add flavor, for example:
- beef
- lamb
- pork shoulder
- chicken thighs
Leaner cuts of raw meat like chicken breasts and pork chops would benefit from being placed in a brine solution to add tenderness and moisture to the meat.
NOTE: Read my article about if you can brine different meats together to learn everything you need to know about meat brining!

Why Do We Use Salt For Brining Or Pickling Vegetables?
A classic brine mixture of salt and water can be used to preserve any vegetables and fruit. Therefore, the term “pickling†refers to any vegetables or fruit preserved using the brine solution and not just flavored by using a marinade before cooking.
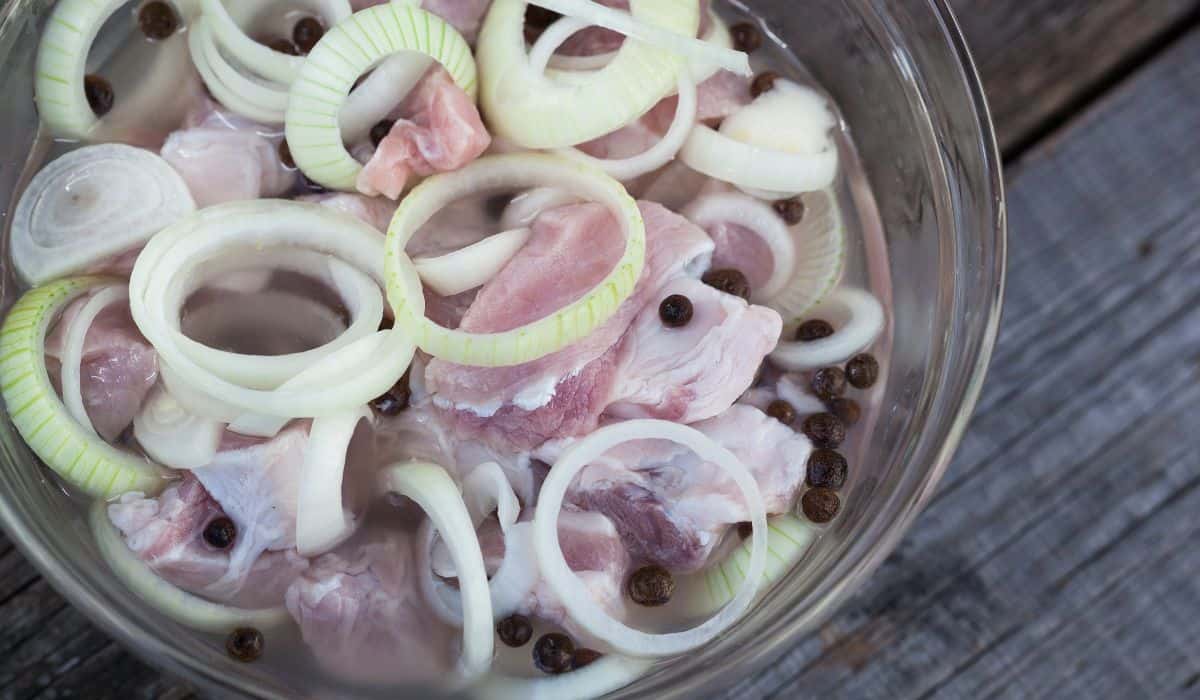
Onions and cucumbers are ideal vegetables for the brining method. They are generally submerged in brine with an acid, usually vinegar, added to the solution. The vinegar contributes to the flavor of the vegetables without causing the food to ferment and prevents bacteria from growing on and destroying the food.
Fermented vegetables such as sauerkraut and olives do not have an acid added to the brine mixture. Salt in the solution encourages good bacteria to flourish and prevents harmful bacteria from causing the food to go bad. Fermenting and preserving is a great way to use up surplus vegetables.
5 Best And Worst Salts For Making Brine
Salt matters when it comes to brining meat. A great brine recipe involves a solution that correctly balances the ratio of water to salt. When choosing salt for your brining solution, it really is the size that matters! Coarse salt is the best salt to use for your brining solution.
Salt comes in different crystal sizes. The larger the salt crystal, the quicker it will dissolve in the water and the slower it will dissolve on the surface of the meat. The smaller the salt crystal, the heavier it is by volume. One cup of common table salt can weigh twice as much as kosher salt.
The trick to using salt in a brine solution is to weigh the salt instead of measuring it by volume as coarse salts and brands differ in their saltiness. For example, one tablespoon of common table salt is much saltier than one tablespoon of Kosher salt.
Here Are Our Recommended Top 5 Salts For Making Brine
The only salt which should never be used to make a brine solution is common table salt, as the salt particles are tiny, resulting in a heavier salt that will not adhere to the meat!

#1: Morton Kosher Salt
Kosher salt is pure salt that has no iodine or additives. Using kosher salt in a brine solution is the best option for at-home chefs. Morton Kosher salt (Amazon link), is made by rolling salt in rollers, and flattening the salt granules into large thin flakes. This means that you only need to use half the amount of salt in a brine solution as you would using other kosher salt brands.
Pros of Using Morton Kosher Salt for Brine:
- A coarse salt with smaller particles than other brands.
- Larger flakes, perfect for use in brine, either wet or dry.
- Dissolves quickly in water.
- A very potent salty flavor.
- Contains an anti-caking agent, perfect for brining.
Cons of using Morton kosher salt for Brine:
- Not suitable for use as table salt or when baking.
#2: Diamond Crystal Kosher Salt
This product is very different from Morton kosher salt as the production method is different. Diamond Crystal kosher salt, is created using an evaporation process that stacks upside-down pyramid-shaped crystals over each other. The end result is a salt grain that is:
- hollow
- light
- pyramid-shaped
Diamond Crystal kosher salt has less salt content per teaspoon than Morton kosher salt
HOT TIP: When using a brine recipe with standard kosher salt measurements, reduce the salt if you use Diamond Crystal salt by 1/3.
Pros of Using Diamond Crystal Kosher Salt for Brine:
- Precise and consistent texture.
- Large crystals prevent over-salting.
- Available in a 3lb container.
Cons of Using Diamond Crystal Kosher Salt for Brine:
- Must be measured by volume, not weight, to avoid under-salting.
#3: Light Grey Celtic Sea Salt
This is a grey-colored salt that gets its color from the pure clay lining of the salt beds that it is harvested from. Hand-harvested from natural pools in France, Light Grey Celtic sea salt is:
- course
- whole crystal
- moist
- mineral-rich
- unrefined
Pros of Using Grey Celtic Sea Salt for Brine:
- Kosher certified, NON-GMO verified, organic compliant certified.
- Available in 1lb and 5lb resealable bags.
- The fantastic salty flavor is great for use in brine.
Cons of Using Grey Celtic Sea Salt for Brine:
- Salt is naturally damp due to being harvested from natural pools of grey clay. This is not a problem when being used in brine and should add to the saltiness.
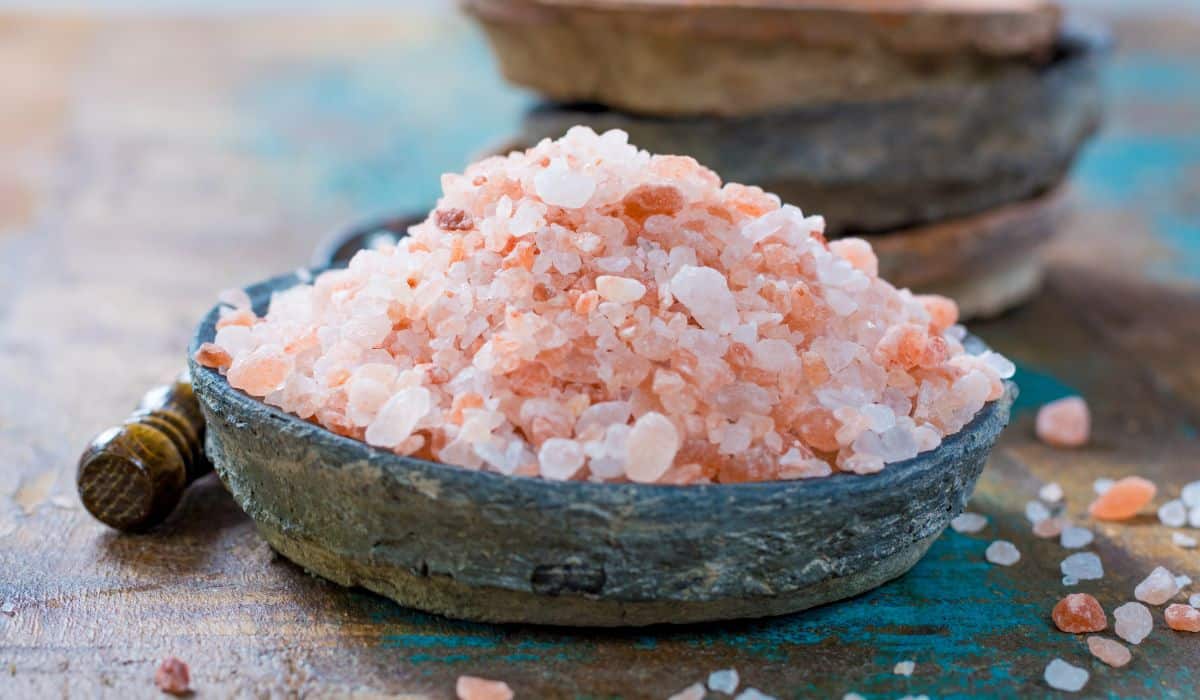
#4: Sherpa Pink Authentic Himalayan Salt
Sherpa Pink Himalayan salt, (Amazon link), is the purest and most beautiful rock salt in the world. Unlike most salts, its colors range from pink to light red due to the salt’s unique mineral composition. In addition, each salt crystal forms perfect geometric patterns.
Pros of Using Sherpa Pink Authentic Himalayan Salt for Brine:
- The highest quality salt on earth.
- Kosher certified.
- NON- GMO verified, contains no MSG, soy, gluten, or dairy.
- Organic compliant certified.
- Contains no iodine or anti-caking agents.
- Packed with essential trace minerals like iron, copper, potassium, magnesium, and calcium.
- Available in 2lb resealable bags.
Cons of Using Sherpa Pink Authentic Himalayan Salt for Brine:
- Despite the producers’ best efforts, this product can contain rocks and sand particles. This will not infiltrate your meat, so it is safe to use in any brine solution.
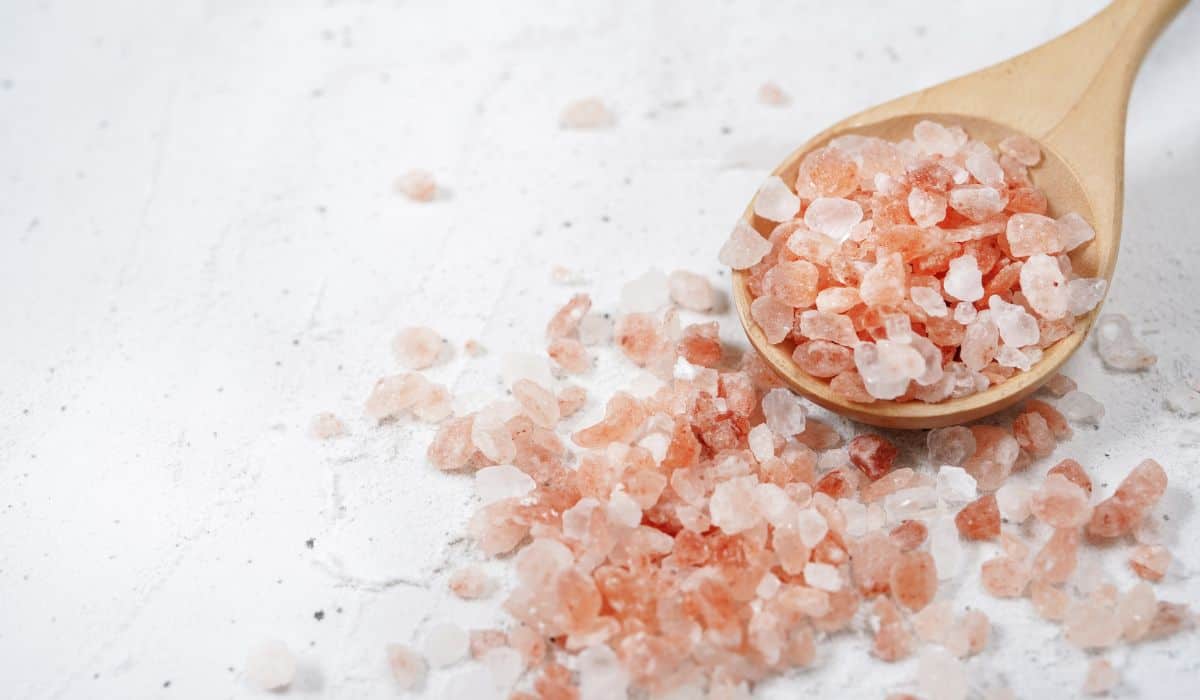
#5: Pickling Salt
Pickling salt is a pure granulated salt, often used for canning and preserving. This type of granular salt does not contain iodine or anti-caking agents. The fine salt granules are easily dissolved in the brine solution and don’t turn the liquid cloudy.
Pickling salt, sold on Amazon, is harvested directly from salt mines or the seabed. No additional ingredients are added to pickling salt, making this a fresh, healthy salt.
If you run out of pickling salt, it can be made at home by grinding kosher salt crystals in a spice grinder or blender, both sold on Amazon. Make sure that the salt is ground finely so that it can dissolve in the brine.
Kosher salt is heavier than pickling salt, so adjust the weight per volume when using pickling salt. 1 ½ cups of kosher salt equals 1 cup of pickling salt.
Pros of Using Pickling Salt:
- Can be used in place of standard table salt, but beware of caking.
- Almost identical to kosher and sea salts.
- Additive-free.
- Particularly good for use as a brine solution when pickling vegetables and fruit.
Cons of Using Pickling Salt:
- The only substitute for pickling salt is kosher salt. If you do run out of pickling salt, you can’t use any standard salt, so you will have to buy another product for pickling adding further expense to the process.
What is A Dry Brine?
Salt is an essential ingredient when using either the dry or wet brining method. Dry brines do not use any water. For the dry brining process, you rub pure salt into the meat or poultry. No excess moisture is added as this could dilute the meat’s natural flavors. Instead, the salt infuses with the meat juices creating concentrated flavors.
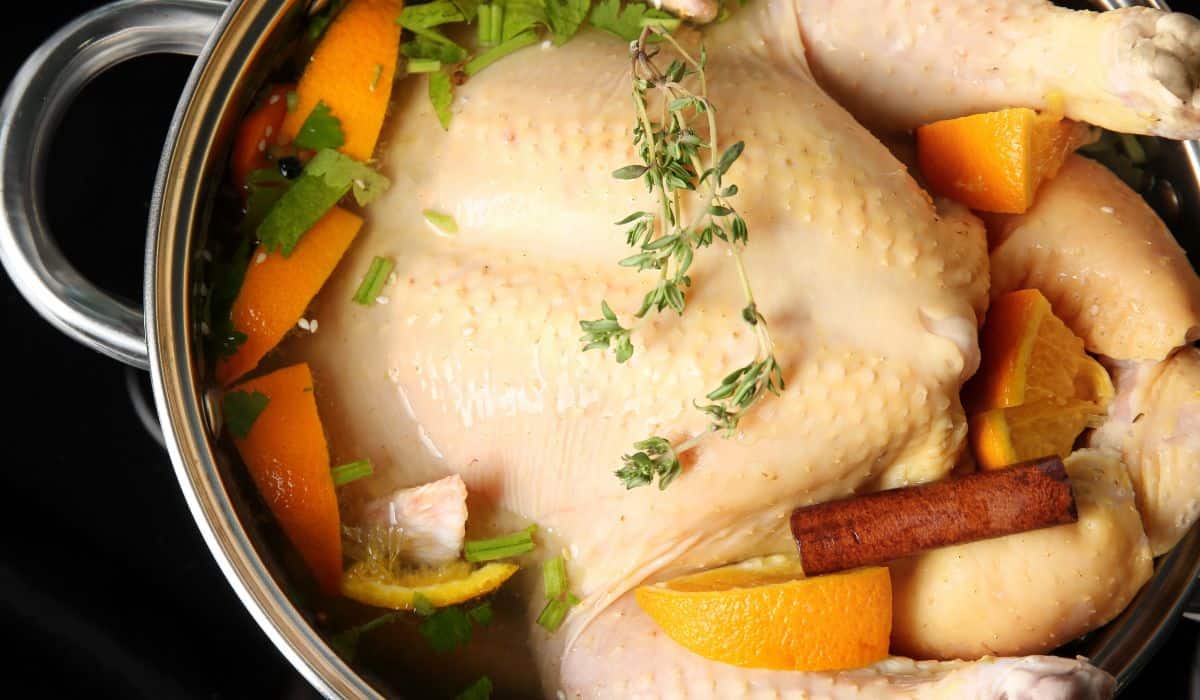
The dry brining method is often used on poultry, especially Thanksgiving turkeys! While rubbing the salt into the skin of the bird, you can rub in additional herbs to create your own unique flavor. Using a dry brine retains the meat’s natural moisture without giving you watered-down meat.
Dry brining is excellent for most leaner cuts of meat. In addition, the dry brining process is faster, leaving you with moist and flavorful meat.
What Is A Wet Brine?
The wet brining method uses water and salt to cure or preserve food. Submerging meat in the salt and water solution changes the structure of the cells by trapping the liquid inside the cells and creating a juicier piece of meat.
Adding salt to the brine causes the cells to retain more moisture and prevents the liquids from evaporating during the cooking process. Ribs and briskets are ideal for the wet brining method but don’t brine pre-salted or pre-seasoned meat as they already have plenty of salt and flavor.
NOTE: A wet brining solution is used to pickle and preserve vegetables and fruit.
How Long Should I Brine Meat?
As a brining solution is so very salty, it works very quickly. Of course, it is possible to over-brine your meat, but this can generally be fixed by soaking the meat in clean cold water to draw out the excess salt. Check the container often, though, as you don’t want mushy meat!
Generally, wet brining involves placing the meat into a large enough container to hold the piece of meat and the brine solution. The container is then placed into the fridge to soak, so make sure that you have enough space!
Dry brining takes up less space in the refrigerator as the meat is rubbed down first with the salt and placed into a smaller container. The container can be smaller as it does not need to hold liquid.
Here is a guide stating the brining times for different cuts of meat. The general rule is to brine meat for about one hour per pound of meat.
| Meat | Brining Times |
|---|---|
| Whole fish | 1 to 3 hours |
| Whole chicken | 4 to 12 hours |
| Whole turkey | 12 to 24 hours |
| Whole pork loin | 2 to 12 hours |
HOT TIP: Be sure the water is cold when the meat goes into the brine, and always leave the brine in the refrigerator!
What Happens If I Use Too Much Salt In The Brine?
Too much salt in the brine will result in an overpowering salty taste in your food. Unfortunately, brining does not work without the added salt, so always follow the recipe as a guide to the amount of salt to use.
Less is more when it comes to adding salt to the brine solution. Of course, you can always add more salt to the solution according to your tastes, but if the solution is too salty, add more water to it and reduce the brining time.
Other Brining Ideas
After the meat has been through the brining process, the salt which has been absorbed into the meat will naturally flavor the meat resulting in balanced levels between the meat and the liquid.
Try some of these in the brine solution to add to the flavor of your meat and vegetables. Adding flavorings to the brine will season the outside of the meat and add to the juiciness but will not penetrate the meat.
- Sugar, brown sugar, or molasses add sweetness to the meat while promoting browning. Adds a great flavor to grilled pork chops.
- Adding a tablespoon of alcohol like vodka, or ¼ cup of rum or gin, allows the brine flavor to penetrate deeper into the meat.
- Add fresh herbs, citrus peels, or lemon zest to spice up the flavor. A great idea is to heat the brine, add soy or Worcestershire sauce to the solution, and then allow the brine solution to cool down before adding the meat. Finally, add onions and garlic to the cooled-down mixture to add flavor.
- Try using apple juice or chicken broth instead of water as a base liquid in the brine. Leftover pickle juice can also be used. Dilute with a bit of water and reduce the brining time to prevent the meat from becoming mushy.
How To Store Homemade Brine
Once you have created an exceptional brine and it’s ready for use, place it into a:
- stainless-steel bowl
- plastic container
- resealable bag
If you heated the brine to dissolve any sugar or salt, let it cool down completely before storing it in a container.
Any unused brine which remains and has not been poured over your meat or vegetables can be stored indefinitely in the refrigerator. Brine made purely with salt and water can be stored for a long time, but it will only last for two weeks if you have added herbs or garlic.
If you only brew the correct amount of brine solution needed to cover the meat or vegetables on today’s menu, don’t reuse it. Any brine that has already been used should be tossed immediately after use.
How To Brine Meat
This is a quick recipe on the basics of brining meat using salt and water:
What do I need to make brine?
- A container like this from Amazon, that is large enough for the meat which you are brining.
- A measuring jug (I really love this one on Amazon) and clean fresh water.
- Kosher salt.
- Additional flavorings.
How do I brine the meat?
- Place the meat, still wrapped, into the brining container and cover with water. The meat should be completely submerged.
- Remove the wrapped meat and add 1 -3 cups of water to the container to fill it up.
- Measure the salt. Use one tablespoon of salt per one cup of water. Leave aside.
- Prepare the additional flavorings and set them aside.
- Dissolve the salt in hot water.
- Add the salt and flavorings to the container of water.
- Allow the water to cool down.
- Add the meat and push down until wholly submerged.
- Seal the container with the mixture inside and place it into the refrigerator.
- Wait for the correct brining time.
- Take the meat out of the brine and rinse under cold water to remove the salt and seasonings before cooking.
- Pat and dry the meat with a paper towel and cook as desired.
Conclusion
Brining is a great way to prepare your meat and vegetables! How much salt and flavorings to add all comes down to personal choice after the recipe has been followed, and that is the beauty of the brining process!
There are formulas available to give you the stats on how much salt should be added to achieve the end result, but, at the end of the day, it’s all about your choice!
Any food without salt added to it is just not worth eating, it makes most food taste better and creates new and wonderful tastes when mixed into other flavorings!
You might also be interested in:
