
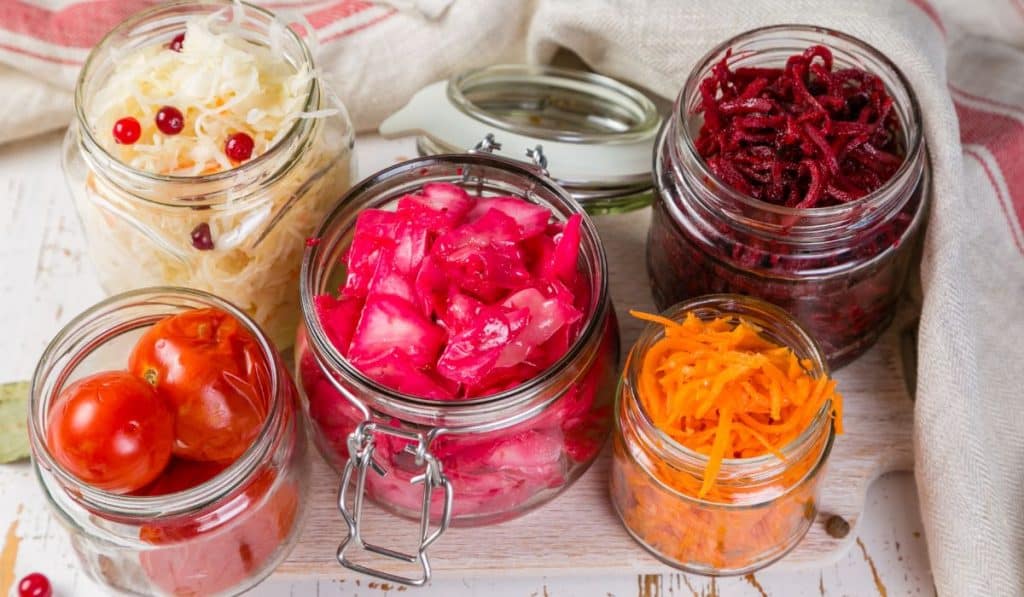
Fermenting vegetables is a practice that has been done for thousands of years. In modern times, even with all the tools of the trade and experience with fermenting veggies, you can still end up with a soggy and mushy mess of a fermented vegetable, and no one likes a soggy veggie. So, how do you keep fermented veggies crisp?
There are many ways to keep fermented vegetables crisp; let’s dive in and go into more detail about each step and how it will aid you in making perfectly crisp fermented veggies. Here are the basic steps to learn about when it comes to keeping your fermented veggies crisp:
- Use fresh, firm veggies
- Use sea salt for brine
- Add tannins to the brine
- Remove blossom ends of veggies
- Soak veggies in ice water
- Pierce skin of thick veggies
- Ferment at cool temperatures
- If it’s hot, ferment for less time
- Taste the veggies often
Steps To Keep Fermented Veggies Crisp
Keeping your fermented veggies crisp can be a challenge as one day can mean the difference between a crisp fermented veggie and a soggy, mushy veggie that no one wants to eat.
Thankfully, there are some things we can add to the brine before we put the veggies in it, and a few things we can do to prepare the veggies before they go into the brine to help them stay crisp, crunchy, and good to eat.
We also need to ensure that we have full control over how fast our veggies ferment to help us get the crisp fermented veggies that we like.
Fermenting the vegetables too quickly can have undesirable results and turn your veggies into mush inside the jar. Here is what we can do to the brine and the veggies to ensure a better crisp that lasts longer.
#1: Use Fresh and Firm Veggies
To help ensure that you get the crispness you enjoy from your fermented vegetables, you should start with quality vegetables. The fresher the vegetables are, the better the ferment will turn out to be.
TIP: The ideal situation is to use fresh-grown garden vegetables that are harvested on the same day that you intend to ferment them. You can’t get vegetables any fresher than that!
Make sure that your vegetables do not have any soft spots and that they do not look too wrinkly. If any are bruised during the harvesting process, it’s best to use that particular vegetable in a meal rather than include it in the ferment.
Bruised vegetables tend to get mushy much quicker than unbruised vegetables, so take your time to select the best ones.
You want to use the best and most fresh veggies that you can get your hands on. Whether you have the opportunity to pick vegetables fresh from the garden or get some from a local farmer’s market, then those veggies would be the ideal candidates to use for fermenting.
REMEMBER: If your veggies have any soft spots, or bruises, or are on the slightly over-ripe soft side, then it is best not to use them for fermenting. If you want your fermented veggies to be crisp, these old veggies that are past their prime will go even softer during the fermentation process.
Essentially, the reason that they will go soft is that they have already started to decompose. The decomposing process creates additional sugars that become part of the ferment and can result in unintended textures and tastes for your ferment.
This could also add different bacteria into the fermentation, which can cause the ferment to react differently and affect the final outcome of the vegetables.
#2: Use Sea Salt When Making Brine
Once you have fresh veggies, you can begin to make the brine for fermentation which is a crucial ingredient that is imperative to get right. The salt in the brine helps to control and prevent harmful bacteria from growing and multiplying in the fermentation.
The salt also helps to create a positive saline content around the vegetables, which draws excess water out of the vegetables and helps to keep them crisp and firm.
NOTE: The best and healthiest choice for the salt component is to use natural sea salt. The reason why sea salt is the best to use for fermentation is that sea salt contains minerals like magnesium and calcium. This sea salt from Amazon works great.
To make the best brine for crispy fermented veggies, it is best to have about a 4-5% salt concentration as this will help bring out the crispiness of the veggies.
To make a brine solution that has the right salt concentration for your ferment, use one of these ratios:
- For a 4% salt concentration, use two tablespoons of sea salt per 4 cups of pure water.
- For a 5% salt concentration, use two and a half (2.5) tablespoons of salt per 4 cups of water.

TIP: Try both salt concentrations to know which you like best, everybody’s tastes are different. Some people like the 5% but for others, it may be too salty.
A note on water:
Ordinary tap water is not the best medium for making brine. Most tap water contains fluoride and chlorine, which are both chemicals that are designed to reduce the quantities of microorganisms in the water.
These chemicals in tap water will hinder your ferment and could produce unsatisfactory results, such as slowing the ferment or reducing the effectiveness of the ferment.
It’s best to use filtered water or distilled water where the concentration of these chemicals has been reduced or eliminated completely. This water filter from Amazon is very good quality and perfect for filtering water for drinking and fermenting.
#3: Add Tannins to the Brine
Adding tannins to the brine is one of the best ways to keep your veggies from going soggy while fermenting. Once the brine is made and completely ready, add tannins before you add in your veggies.
Tannins will help prevent the cell walls of your veggies from breaking down, which is one of the causes of veggies going soggy. Tannins are the best thing to add to your brine to keep your fermented veggies crisp. We will go through tannins and tannin sources later on in this article.
#4: Remove the Blossom Ends of Veggies
The ends of the vegetables that connected them to their plants are known as the blossom end. This end of the veggies needs to be removed before they are soaked because it contains an enzyme that will soften and break down your veggies.
This is a natural reaction in the plants that causes the vegetable to continue to ripen, which encourages it to soften. However, this is the outcome we are trying to avoid and we do not want this to happen during fermentation.
So, use a knife to cut off a very thin slice from the blossom end of your veggies; this will help the veggies to keep their firm texture throughout the fermentation process. If you do not do this, then there is a chance that your veggies may go soggy while fermenting.

#5: Soak the Veggies in Ice Water Before Fermenting
Once the veggies have been trimmed and the brine has been made, soak the vegetables in ice water for about one to two hours before you place them in the brine.
Soaking vegetables in ice water will help them get nice and firm. This process cools down the water in the cells of the vegetables and also allows them to absorb any water that they are lacking.
REMEMBER: Vegetables can be a bit dehydrated without looking wilted, but you want them nice and hydrated for fermenting so they can stay crisp. Soaking them is a helpful task for hydration!
#6: Puncture the Skin of Thick Veggies
Some vegetables have harder skin compared to others, so for these hard-skinned veggies, you should pierce the skin a few times around the vegetable before you place them in the brine.
Use a paring knife or a skewer to puncture the skin of the vegetable. The vegetables can get a bit slippery during this process, so be sure to have a firm grip on the vegetable and the tool you are using to puncture it with.
Piercing vegetables that have hard skin helps the brine to penetrate into the vegetable faster, allowing it to culture more evenly. Faster brine penetration and faster culture time will help your veggies to stay crisp as it will take less time for them to ferment.
Once this is done, then it is finally time to place the veggies into the brine and get the fermentation process started!
#7: Ferment at a Colder Temperature
Once the veggies are in the brine and you have sealed the container properly, place the container in a cool place in your house. If your house is too warm, it can cause problems with the fermentation process. A hot fermentation can speed up the process too much and lead to your veggies losing their crispiness.
To keep your fermenting veggies cool throughout fermentation, you can place them in a cool and dark kitchen cabinet that does not get direct sunlight at any point in the day, or you can place your fermenting veggies in the fridge to keep them cool.
NOTE: Cooler temperatures do make the fermentation process take a bit longer, but give you more control over the process, and will keep your veggies at the crispiness you prefer.
#8: If It’s Hot, Ferment the Veggies For Less Time
If you do not have a cool place to keep your fermenting veggies, you can still ferment your veggies in a warmer environment and yet keep the veggies crisp. This will be a bit more difficult and require a bit more work as you will need to monitor your fermentation much more closely.
If the temperature in your house is over 75 degrees Fahrenheit (23 degrees Celsius), then you should ferment your veggie for a shorter amount of time.
In these conditions, you should check your fermenting veggies after about three days to see if they are ready yet or not. If they are not ready, then leave them for another two days and then check them again.
Hot temperatures will make your veggies ferment quicker, which could make them lose their crispiness and turn soggy if you do not watch them and stop the fermentation when it needs to be stopped.

#9: Taste the Veggies Frequently
Once the veggies have been fermenting for a bit, open them up and cut a small piece of the vegetable, and taste it. This will help you know if your fermented veggies are ready or not.
Check your ferment on a regular basis. Fermenting can be a finicky process and it can only take one day without checking your vegetables for them to change and go soggy.
TIP: If your fermented veggies start to show signs of going soggy, you need to place them in the fridge immediately to stop the sogginess from going any further.
Natural Sources of Tannin for Fermentation
Tannin is a great help to people who want to make crisp and delicious fermented vegetables. Tannin is one of the best things you can add to your fermenting veggies to keep them crisp. Almost all fermenters will highly recommend putting tannin in your brine when fermenting veggies.
If you do just one of the steps mentioned above to keep your veggies crisp, add tannin to your ferments. This is one of the best and simplest ways of keeping fermenting veggies crisp; it may even be called a trade secret for fermenters.
DID YOU KNOW? Most people who ferment veggies will use grape leaves when fermenting to add tannin to their ferments. Grape leaves have some of the highest concentrations of tannin in them that you can get.
However, it can sometimes be hard to get a hold of some grape leaves, thankfully, and to the delight of fermenters everywhere, there are many sources of tannin that you can use apart from grape leaves, and they are quite easy to acquire.
Good Sources for Tannin to Use in Fermenting
- Bay leaves (these ones from Amazon are great)
- Cherry leaves
- Black currant leaves
- Indian almond leaves
- Raspberry leaves
- Horseradish root, chopped or grated (order it here from Amazon)
- Horseradish leaves
- Sour cherry leaves
- Mesquite leaves
- Oak leaves (these contain the highest amount of tannins, so be careful, you only need a little)
- Green banana leaf
- Loose tea leaves
- A tea bag
These are all great sources of tannin, but bay leaves are by far the easiest one from the list to get your hands on. Only need about two to four bay leaves per quart when fermenting to achieve the best crisp for your veggies.

Conclusion
There are methods we can use to help our fermented veggies to stay crisp while fermenting: changing the type of salt used and the salt concentration in the brine, fermenting in a cool environment, adding some tannin, and more. All of these methods help the structure of the vegetables and keep them firm.
These fixes for soggy fermented veggies are easy to implement and will allow you to control the amount of crisp you want your veggies to be. Follow them and enjoy your crisp fermented veggies!
You might also be interested in:
- How to Ferment Cabbage in 10 Easy Steps
- How Long to Ferment Kombucha?
- Do Light and Heat Help Fermentation?

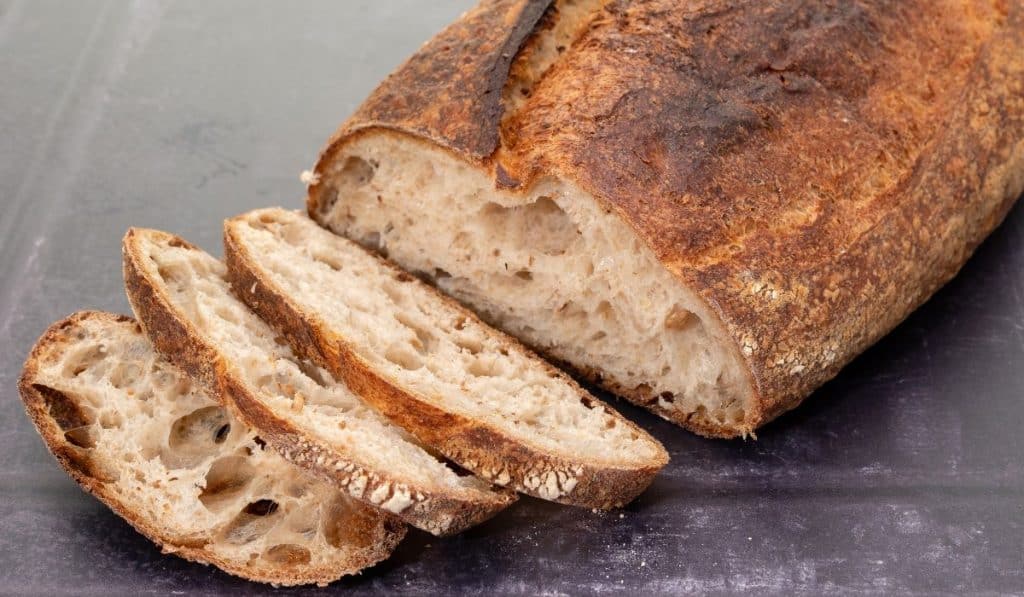
What’s The Difference Between Rye Bread And Sourdough Bread?
Rye bread and sourdough bread have often been pitted against each other; however, they are both considered to be very healthy choices of bread when compared to normal white wheat flour bread. They both have a good nutrition profile, and you can get many benefits from eating them. But what is the difference between rye bread and sourdough bread?
Rye bread is made using rye flour; rye is a type of grain that is broken down to make rye flour. Sourdough bread is made from a sourdough starter. This starter is made from water and flour that is left for a few days to develop yeast and ferment.
These loaves of bread are made from different things, but do they have different health benefits? And where can you get these healthy loaves of bread from? Let’s go through all the nutritional information and benefits for both these types of bread, as well as where you can get them, so you can decide which one is best for you.
The Difference Between Rye Bread And Sourdough Bread
Sourdough bread and rye bread are both healthy bread that are great alternatives to the standard commercial loaves of bread that you can buy at any grocery store. Both of these bread have multiple benefits to them that make the switch from commercial bread to these loaves of bread an easy decision, especially for bread lovers!
Adding rye bread or sourdough bread to your diet makes eating healthily easier; you can still make a quick and easy sandwich for lunch and be assured that you and your family are getting some good nutrients from their food.
What is the actual contrast between these two loaves of bread? Are they the same, or are they actually different? As some people use the term rye bread and sourdough bread interchangeably, knowing the differences can be a challenge.
FACT: There is a difference between rye bread and sourdough bread, they offer many different benefits and should be eaten according to each individual’s food criteria.
What Is Sourdough Bread?
Sourdough bread is made from a substance that is called a starter; this starter is generally made from white wheat flour and water. This flour and water mixture attracts natural yeasts that are in the air which leavens the bread, instead of using yeasts that have been commercially produced.
This process of attracting natural yeast usually takes a few days to complete and once it is done, the sourdough starter will need to be fed every day to keep the yeast alive. Once this starter is active, as long as it gets fed properly, it can last for years and sometimes even decades.
If you are interested in making your own sourdough starter, this kit from Amazon is good value and quite helpful!
When it is baked, sourdough bread itself has a very unique sour taste due to the good bacteria called lactobacillus bacteria that live in the sourdough starter. Sourdough bread also generally takes longer to rise than rye bread; this means that it takes a bit longer to make.
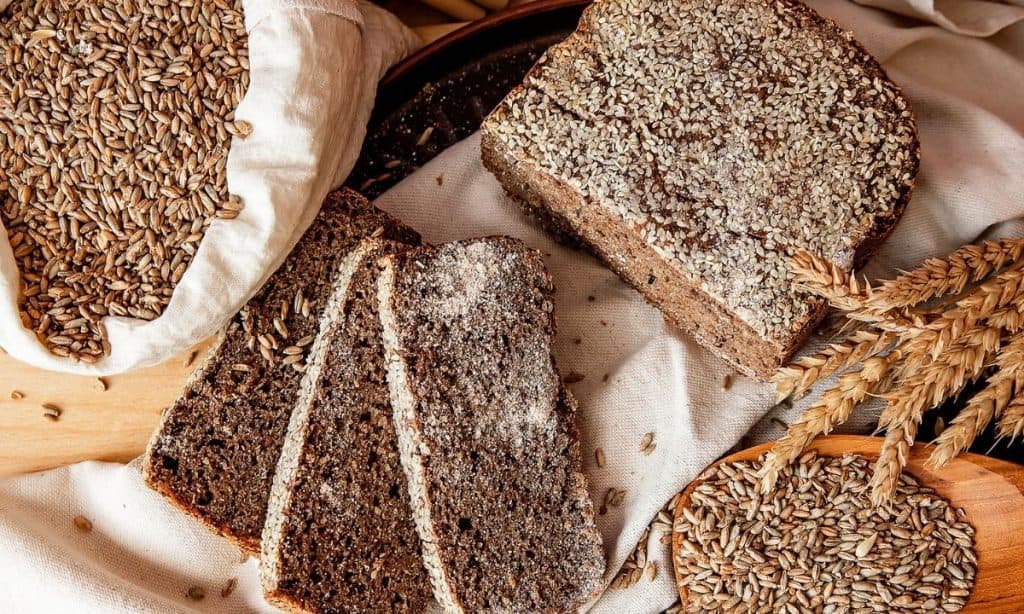
What Is Rye Bread?
On the other hand, rye bread is made from rye flour, a type of grain flour. Rye bread can also range from being made with a mixture of white wheat flour and rye flour at different quantities, or it can be made entirely with rye flour.
Rye flour contains a lower amount of gluten compared to normal white wheat flour. Gluten is generally what makes loaves of bread rise, so the more rye flour in the bread the smaller and more dense the loaf of bread will be. Rye flour can also be milled flour or unmilled flour, depending on where you get it from.
REMEMBER: Sourdough bread is made from a starter that consists of white wheat flour and water, and it can take a long time to get this starter ready for use. Rye bread is made from rye flour, which is a grain flour that generally comes ready to use.
Which Bread is the Healthiest?
Both rye bread and sourdough bread are very good for you and are considered to be healthy alternatives to normal commercially produced white wheat flour bread. However, there is a lot of competition in the health bread industry, with each bread trying to make itself the top healthiest bread.
NOTE: This industry competition can make it difficult for everyday people to understand each type of bread’s benefits and which one would suit them the most.
If you have gluten intolerance, then both of these types of bread are already better for you to consume compared to bread made with white wheat flour. However, depending on your intolerance severity, one bread may be better for you than the other.
As sourdough bread is made with a starter that uses white wheat flour, if your intolerance to gluten is quite bad, then you may want to skip the sourdough bread and go for the 100% Rye bread, which has a smaller amount of gluten in it.
Each of these loaves of bread has other benefits apart from helping those with gluten intolerance to enjoy a nice sandwich. Here are each bread’s benefits so you can make an informed decision on which will be the best bread for you.
Benefits of Rye Bread
# 1: Rich in Fiber
Rye bread is quite high in fiber, and it also has an impressive nutrient profile. In just one slice of rye bread, you can get a good amount of:
- protein
- fiber
- selenium
- manganese
- thiamine
- niacin
- riboflavin
- copper
- vitamin B6
- folate
- iron
These are by far not the only vitamins and minerals, but these are the ones that have the highest concentration in the rye bread slice. Other vitamins and minerals you can get from rye bread that is present in much smaller amounts:
- zinc
- phosphorus
- pantothenic acid
- calcium
- magnesium
- other micronutrients
#2: More Filling
Rye bread is also more filling than normal white wheat flour bread, which will keep you fuller for longer and not affect your blood sugar levels as much.
#3: Good for the Heart
Rye bread may also improve your heart health. Some recent scientific studies have connected the regular intake of rye bread and a lower level of heart disease risk factors.
#4: Helps Lowers Cholesterol Levels
These studies have also shown that rye bread can help lower cholesterol levels, especially in men. It can also reduce the amount of LDL cholesterol (the bad cholesterol) by up to 14% in men and 12% in women when rye bread is consumed on a daily basis.
This cholesterol-lowering effect is most likely due to the high soluble fiber content in rye bread. This type of fiber is an indigestible fiber that forms a gel-like substance inside your digestive tract that can help remove the cholesterol-rich bile from your body and your blood, effectively lowering your cholesterol.
#5: It Helps Control Blood Sugar
Rye bread may also aid in blood sugar level control; this is due to the high level of soluble fiber in the rye bread that helps to slow down digestion and the absorption of carbs and sugar, which can lead to a gradual rise in your blood sugar levels.
FACT: Rye bread also has phenolic compounds in it like caffeic acid and ferulic acid, which could slow down the release of insulin and sugar into the bloodstream; this can further aid in blood sugar level control.
#6: Good for Digestion
Rye bread also assists in digestive health; the high levels of fiber will help to keep the bowels regular and easier to pass.
Some other studies have also shown that rye bread fiber may help increase the levels of short-chain fatty acids in your bloodstream. These fatty acids have shown a link to many other benefits in the body, such as:
- lower blood sugar levels
- weight loss
- protection against colon cancer

Benefits of Sourdough Bread
The levels of nutrition of sourdough bread usually depend on the type of flour that was used to make it; it could be either refined or whole grain flour.
DID YOU KNOW? One medium slice of sourdough bread can contain a good amount of fiber, proteins, folate, selenium, sodium, thiamine, niacin, manganese, and iron.
Even though sourdough bread is made with the same flour as many other types of bread, the fermentation process that happens improves the nutritional value of the bread in many different ways.
#1: Rich in Minerals
If whole grain flour is used to make sourdough bread, then it would contain a good amount of minerals like:
- phosphate
- zinc
- potassium
- magnesium
In normal bread made with whole grain flour, the absorption of these minerals may be hindered by the presence of phytic acid.
FACT: Phytic acid is considered to be an antinutrient as it tends to bind itself with minerals, which reduces the body’s ability to absorb them. However, the bacteria that is found in sourdough called lactic acid lowers the pH of the sourdough bread, and this lower pH helps to degrade the phytic acid.
A lower level of phytic acid in the bread means that your body can absorb the minerals unimpeded, which makes sourdough bread more nutritious compared to other bread.
The long fermentation process of sourdough bread helps to improve the texture and flavor, which makes it very popular! This increases the number of people that consume more fiber and nutrient-rich food, helping the population become healthier.
#2: Good For Your Gut
Sourdough bread is filled with prebiotics and probiotics. Prebiotics are a form of non-digestible fiber that actually feeds the good bacteria that live in your gut. While probiotics are beneficial bacteria that can be found in certain foods.
Both probiotics and prebiotics aid in digestion; making sourdough bread easy for your body to digest. Regular consumption of Sourdough bread may improve your overall gut health.
#3: It Helps Control Blood Sugar Levels
Sourdough bread can also help control your blood sugar levels in these two ways:
- Fermentation of sourdough bread lowers the glycemic index (GI) of the bread, which slows down the rate at which the sugars enter the bloodstream.
- The lactic acid bacteria in the sourdough bread produce organic acids during the fermentation process. These organic acids may help delay the stomach from emptying, which could prevent a blood sugar spike.
As you can see, both rye bread and sourdough bread have good benefits to them, the choice is up to you which bread will suit your needs better.

Where Can You Get Rye and Sourdough Bread?
Rye bread and sourdough bread are quite easy to get your hands on nowadays, you can go to just about any health food store, and you will find it stocked either in a fridge, freezer, or with freshly baked goods.
This is nice because they offer a wide variety of different rye and sourdough bread, and you can purchase them fresh or frozen. Buying a frozen loaf will help the loaf of bread last longer as you just take one or two slices out at a time and defrost those while the rest stays frozen.
If you do not have a health food shop close to you, look for a specialized baker who also offers rye and sourdough bread at their bakery. This will allow you to have freshly baked bread at any time, and then you can decide to either freeze the bread loaf yourself or keep it fresh if you think you can get through the loaf before it starts to go off or grow mold.
Rye bread and sourdough bread can be found at certain local grocery shops in the baked goods section. However, they may be tricky to find and you do not necessarily know the quality of the bread that you will get from them.
TIP: If none of these shop options appeal to you, then you can try and make your own rye or sourdough bread at home; this will give you the freshest bread that you can get.
You are able to make your very own sourdough starter from flour and water; just keep in mind that this will take some time to mature to the point where it can be used to bake your bread.
To bake your own rye bread, you can buy some rye flour from a health food shop or see if a specialized baker close to your home is willing to sell it to you. Another super easy option is to order from Amazon, I really like this rye flour.
Can You Mix the Two Types of Bread Together?
You can get a bread loaf that has the benefits of both rye bread and sourdough bread all mixed into one loaf; this is called sourdough rye bread.
Making a sourdough rye bread loaf makes the fermentation process of the sourdough go faster, which allows the bread to be made in less time. This bread mixture also adds a very unique and tasty flavor profile to any sandwich; this can be a nice change from just your standard rye or sourdough loaf.
Using sourdough with rye makes the loaf of bread less dense with a light and fluffy texture. If you have been battling with your sourdough bread getting too hard, you won’t have to worry about that with a sourdough rye bread loaf as the rye helps the bread to stay soft for a longer period of time.
NOTE: Sourdough rye bread mixes the nutritional profile of both kinds of bread, making it an even more nutritious bread for you to eat.
Conclusion
Both sourdough bread and rye bread are very healthy and good for you because they a packed full of different nutrients and health benefits; plus, they make an excellent substitute for normal white wheat flour bread.
So, whether you are watching your weight or you are just trying to improve your overall health, then either one of these types of bread would be a good choice for you to add to your diet.
Are you interested in fermented drinks? Learn how to ferment kombucha in my article here!

Can You Brine Different Meats Together?

If you are planning on brining meat and are wondering what you can or cannot do when it comes to mixing different meats, you are not alone. Many people who are brining meat for the first time have asked the question: can you brine different meats together?
You can brine different meats together, but it is usually wise to make sure the meats that you are brining together are from the same species – this is to avoid hygiene issues such as cross-contamination. For example, you can brine beef with beef but should not brine beef with pork.
This may seem a bit odd, but cross-contamination can cause serious health issues when the meat is ingested, which is why experts have recommended that you do not cross species when it comes to brining different meats together. Let’s take a closer look at why that is.
The Risks Of Brining Different Meats Together
You can brine certain types of different meats together; however, you cannot brine all kinds of different meats together.
There are risks to mixing different types of meats together when you brine them. Some may be too big of a risk for you to take, and then some small risks that may be inconvenient but will not cause any big issues at all.
For example, it would be a big issue if you mixed chicken with another kind of meat because if the blood from the chicken mixes into the flesh of the other type of meat it can cause cross-contamination.
NOTE: Cross-contamination of chicken blood is incredibly dangerous as it can cause salmonella. It has been said before that raw chicken should be treated as a biohazardous contaminant since salmonella is present inside chicken flesh, as opposed to other meats, where you will only find microbes on the surface of the meat.
Then there are the less serious issues that can come from mixing different meats as you brine them together – issues such as one type of flesh being more absorbent than the other.
When one meat is more absorbent than the other meat, one meat will be done sooner and begin to get very salty while the other meat is still being processed in the brine.
This is not a big issue, but it can be very inconvenient and unpleasant.
Which Different Meats Can You Brine Together?
As a rule, in general, it is best to keep meats from the same animal family together.
For example, you can brine any kind of beef with another kind of beef and any kind of pork with another kind of pork. You can also brine most fish together, and you can even generally brine most poultry together.
Beef
You can brine any cut of beef with another cut of beef, as they are both the same type of meat and will usually brine at a similar pace.
You will not need to worry about any kind of cross-contamination when it comes to brining different cuts of beef together, as when you brine meat of the same species together, there is generally a very low to no risk of there being an issue with microbes.
Fish
It is safe to brine different types of fish together, especially because they will most likely absorb the brine at a similar pace and be done at a similar time.
If you choose to brine other types of seafood, it is also generally safe to brine other seafood with your fish – this is only if all seafood and fish are fresh and safe to eat, you do not want to mix old seafood with fresh fish or vice versa.
Poultry
Chicken is the only poultry that you should be cautious about mixing with any other kind of meat due to the salmonella risk that was discussed above.

However, you can mix other kinds of poultry together. You can mix turkey with goose or duck or any other kind of poultry you desire.
Even though there is a salmonella risk, some people say that it is still fine to mix chicken with other poultry such as turkey in a brine, so the decision would need to be up to you and based on what you feel comfortable with.
Which Different Meats Should You Not Brine Together?
Now that we know what meats you can mix together, here are which meats shouldn’t be brined together.
The meats that you should not brine together are as follows:
- Any non-seafood meat with fish – if you brine fish with any meat that is not seafood, it will generally make the other meat that it is being brined with taste like fish.
Not only is that unpleasant, because who wants their pork to taste like fish, but it is also very inconvenient because you would have wasted a whole piece of meat that you will more than likely now not want to use.
- Chicken with any other kind of meat.
- Meat that should not be brined – brining meat that shouldn’t be brined with meat that can be brined – for example, you should not brine a piece of pork belly, that will be great being brined, with some pork sausages, which should not be brined at all.
- Mixed species – some people say that it is fine to mix meats from different species’ meat together, while others say that it is a bad idea.
For example, you might read that it is fine to brine pork and beef together, while other sources say you absolutely should not – maybe it is then best to avoid mixing different species’ meat.
NOTE: If ever you are unsure whether it is safe or not to mix two different types of meat in one brine, rather play it safe every time and make two separate brines, as raw meat is not something that should be messed around with – so if it is not clearly safe, rather do not do it.
How Do You Brine Different Meats Together?
The way you would start to brine different meats together is by selecting the meats you want to brine together – suppose that you want to brine trout and shrimp together.
Here are the basic steps:
Step #1:
First, make sure the fresh trout and shrimp are clean. Next, in a bowl, you will mix together water, salt, and sugar.
Step #2:
Once the salt and sugar have dissolved properly into the water, put the trout and shrimp in the water and make sure they are fully submerged – if you need to, you can use a mug or bowl to weigh them down, or I really like to use these fermentation weights that can be ordered from Amazon.
Step #3:
Keep the trout and shrimp in this brine for 15 minutes, that’s all the time that is needed!
Step #4:
Take the fish out of the brine and pat them dry before grilling, frying, or pan-searing them.

NOTE: Pork is far tougher than a lot of other meat, and therefore needs more time for the brine to help make it tender.
If you choose to brine something like pork chops and pork tenderloin together, the brining process will look different:
Step #1:
First, use a large bowl or container to mix and combine water and salt and stir until the salt is fully dissolved to make the brine. This large container with a lid from Amazon works great!
Step #2:
Add the different cuts of pork to the brine, making sure that the meat is fully submerged. Set the bowl or container aside in the fridge for up to 12 hours.
NOTE: How you brine different meats together will entirely depend on the types of meat that need to be brined – make sure you do your research and only match meats together that will brine well and at a similar pace together for the best success.
Conclusion
You can brine different meats together without any problems, as long as you do your research and make certain that the meats that you have chosen to brine together will actually work well together.
When you are choosing the meats that you will brine together, be sure that they will brine at the same pace and will not be harmful in any way to each other when it comes to hygiene and bacteria.
So now that you know that you can brine different meats together make the perfect match of meats and get brining!
Wondering if you can mix different kefir grains together? Find out in my article here!

20 Easy Ways to Use Leftover Pickle Juice
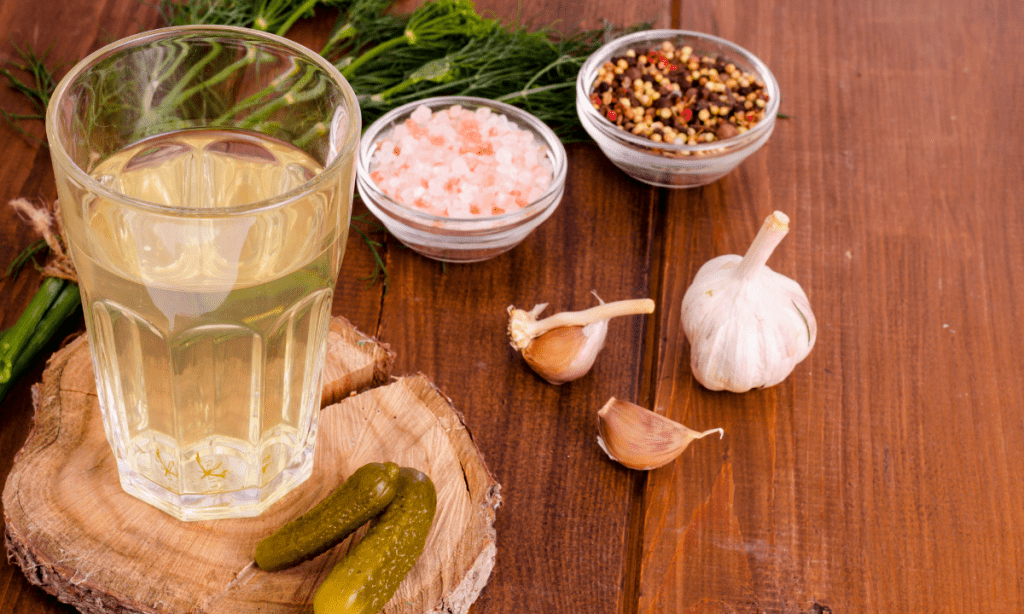
Pickles are one of the most common household foods found all over the world. If you’re among those who enjoy pickles, you’ve more than likely had plenty of jars full of leftover pickle juice and wondered if throwing it out was really the only choice. Well, there are actually a ton of ways to use it up without throwing it out! To give you an idea…
You can use your leftover pickle juice for the following purposes:
- Vinegar substitute
- Marinate chicken and other recipes
- Additional flavoring
- Weed killer
- Cleaning solution for utensils
- Brine for more pickles
That’s not all of it yet, there are so many other things you can use your pickle juice with.
In this article, I am going to tell you 20 easy ways to use up your leftover pickle juice instead of throwing it out. However, before starting, you must follow a few steps to ensure that the pickle juice you have is safe to reuse.
Wondering what to do with your leftover pickled onion brine? Find out in my article here!
When is it Safe to Use Leftover Pickle Juice?
Refrigerated pickle juice can last for two months. So, if you want to reuse the pickle juice, use it up by then. But, you have to be careful about reusing pickle juice. Sometimes it can go bad, and sometimes it can be too spicy, or have an unpleasant smell.
NOTE: Pickle juice can go bad when the lids are not sealed properly. Look inside the jar and if you see mold, then the pickle juice is no longer edible.
- First, consider how old the pickle juice is. If it is too old, then there is a good chance that it has spoiled. Moreover, the jars have to be closed tightly.
- Has your jar of pickle juice passed the mold test? Then great! Now, how do you want to reuse the pickle juice?
- You can keep the juice just the way it is and use it in different foods. Remove the spices such as garlic, cloves, pepper, chili, and dills. Try to remove the spices as much as possible to get a clear juice.
- Finally, taste the brine. If you like the taste, then start using it. On the other hand, do not throw away the moldy pickle juice as you may find other ways to use it.
Now the question is, how many times can you reuse pickle juice?
Most people who use pickle juice advise not to use leftover pickle juice more than once, and some say it can be used two or three times. However, keep in mind it will not have the same pleasant taste every time so you’ll want to do this assessment before each time it is used.
20 Easy Ways to Use Leftover Pickle Juice
Now that you have learned how to check if your pickle juice is good for reusing, you are now ready to learn the various ways of using them.
You will not only discover the most common alternative uses for pickle juice, but you will also learn about some unique ways to reuse it.
#1: Vinegar Substitute
When you remove the spices from the pickle juice, only the mixture of water, salt, and vinegar will be left. Then you can easily use the pickle juice as a substitute for vinegar and use it in different foods. Both vinegar and pickle juice enhances the taste of a dish.
Pickle juice has a similar sour and acidic taste to vinegar. What makes it slightly different is the salt and water mixed with it. Consider this while adding pickle juice in the recipes and avoid using salt or add just a small amount as the pickle juice already has salt in it.
#2: Marinade and Tenderize
Pickle juice is great for marinating chicken. The acid of the juice steeps into the muscle fibers of meats and tenderizes them.
To marinate chicken with pickle juice, you have to submerge the chicken meat in the pickle juice. Then cover and put it in the refrigerator for 6 to 10 hours.
TIP: Try marinating other meats like pork and beef with pickle juice and see how it elevates the taste of the dish. The dish will taste very nice because pickle juice has some remains of spices mixed with vinegar and salt.
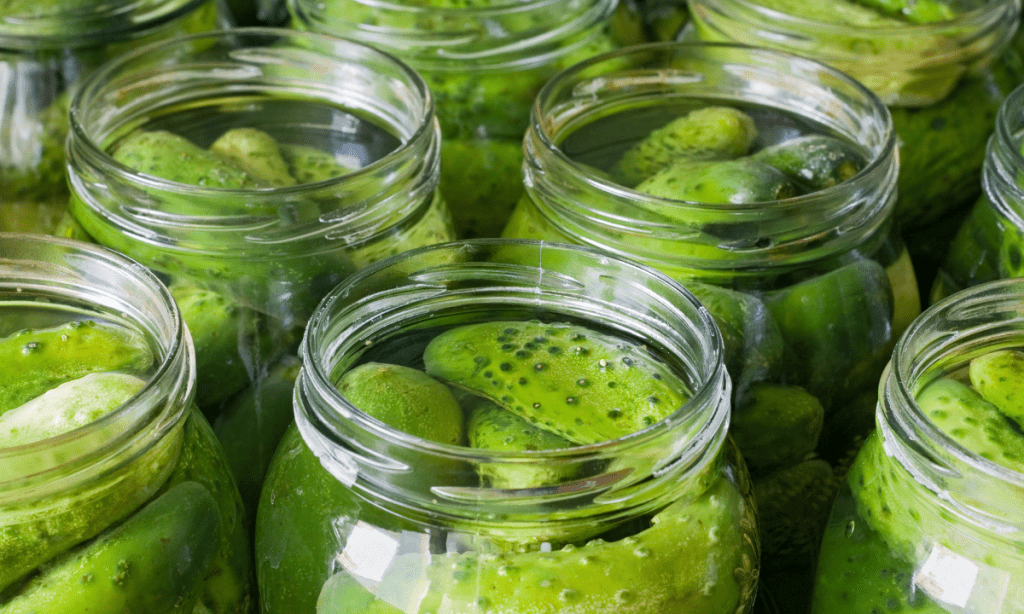
#3: Reuse to Make More Pickles
One of the most common and easy ways of not wasting pickle juice is reusing it to make more pickles. This can be done in two ways.
- Cut cucumbers, onions, green chili, or green mangoes and boil them with the pickle juice to make quick pickles.
- You can directly use the leftover pickle juice for quick pickles when you are planning to eat them soon. The pickles will be ready for eating within 24 hours.
DID YOU KNOW? Pickling and fermenting are two different processes. Many people confuse the two that’s why I wrote an article to answer the question of whether pickling and fermenting are the same thing. Check it out here!
#4: Can Vegetables and Food
Vinegar is a fermented solution of sugar and water. So, it is a natural preservative. We can say the same about pickle juice. Before using the pickle juice to make canned vegetables, you need to boil the pickle juice first.
You can cut soft vegetables like beets, carrots, cauliflower, and ginger into small pieces and preserve them for a while using pickle juice. These little pieces of preserved vegetables will have a tangy and delicious taste! The canned vegetables will remain edible depending on the age of the pickle juice.
#5: Weed Killer
What if the leftover pickle juice gets spoiled, or you simply do not want to reuse it? There is no need to throw away moldy pickle juice. You can still use it as a natural weed killer.
One of the biggest headaches for any gardener is weeds, as they can be hard to control and take over the plants in the garden.
You can put the pickle juice in a spraying bottle and directly spray it on the weeds. Pickle juice has acetic acid which can kill weeds very effectively.
IMPORTANT TIP: Make sure to avoid the plants you intend to grow when using pickle juice as a weed killer. Trees and plants can die when they come in direct contact with vinegar.
You can also use pickle juice to clean the moss growing in your yard or on the walls. Spray the brine on the moss, and they will gradually go away.
Because pickle juice has no harmful chemicals, it will not harm the birds or animals picking on the weeds or soil. So you don’t need to worry about your pet’s safety or the environment.
Moreover, there are also some plants that grow well in slightly acidic soils. Two examples of this type of plant are hydrangeas and rhododendrons.
To help these plants grow, simply pour pickle juice on the soil around them. Be careful not to pour pickle juice directly on the plants because it can cause serious damage to them.
#6: Cleaning Utensils
It can be frustrating to clean the burned food from the copper pans, and if you have tried different tactics to remove charred and crusty food from your pans to no avail, this method is for you! Fortunately, leftover pickle juice also works as an excellent utensil cleaner.
How to Clean Pans And Pots Using Pickle Juice
- Simply boil the leftover pickle juice
- Pour the boiled pickle juice into the pan or pot you want to clean
- Leave it for 15 to 20 minutes
- Clean the pan or pot with a scrub as usual
You will find it easier to clean this time with pickle juice. It is even easier to reach the spots which you could not before.
Aside from the dirty pans or pots, you can also clean a grill with pickle brine.
When you barbeque, food and other debris can get stuck on the grills, and cleaning them can be very time-consuming. This method using pickle brine is quick and easy!
- Simply pour boiled pickle juice on the grill
- Let it sit for a few minutes
- Use a scrubby to scrub off the dirt
- Rinse with water
- Wipe with a cloth
#7: Rust Remover
It will surprise you how effective pickle juice can be for removing rust from metal. Vinegar is already a popular rust remover, so why not use pickle juice?
Normally, you need to add salt to vinegar and create a mixture to soak rusty objects. But in the case of pickle juice, salt is already in the mixture. The rust on the metal react with the acid of the vinegar, and the salt eats up the rust.
To use pickle juice as a rust remover, you will need a container bigger than the rusty object so that you can completely soak it. The container has to be made of non-reactive metals like plastic or glass.
First, fill the container with enough pickle juice to soak the rusty object. Leave the object in the juice for 12 hours to a few days. How fast the rust loosens depends on the object and how rusty it is.
When the rust loosens, use steel wool or aluminum foil to remove the rust. Clean carefully, and you will find your object rust-free and squeaky clean once again.
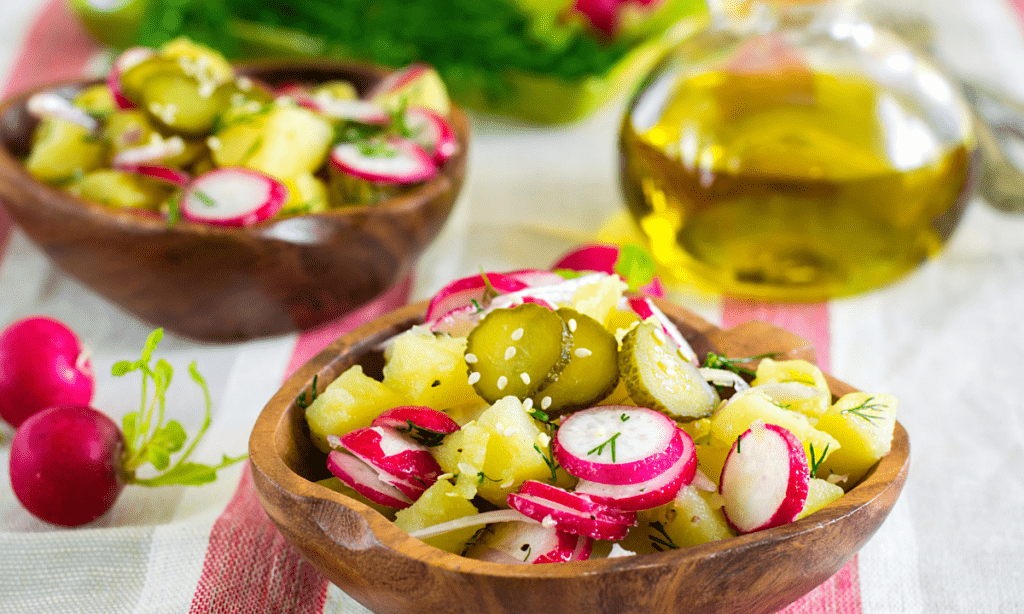
#8: Boiling PotatoesÂ
Want to make boiled potatoes tasty? Use pickle juice to make ‘Dill Pickle Potato Salad’!
How To Make Dill Pickle Potato Salad Using Leftover Pickle Juice
- Add enough pickle juice and water to a pot to boil the potatoes.
- Wait until the mixture boils.
- Once it boils, add a little salt.
- After 15 minutes of boiling, the potatoes should be ready to eat.
Similarly, you can make hard boil eggs using the same method. Try this egg cooker from Amazon for perfect hard-boiled eggs!
#9: Add on Tuna or Other Fish Recipes
Tuna and pickle juice are an impressive combination. From making tuna salad to a tuna sandwich, there are hundreds of ways to make tuna with pickle juice.
Other kinds of seafood can be marinated and tenderized with pickle juice as well. Cooking clams with pickle juice is also a tasty way to use pickle juice.
TIP: The acidic substance of the juice can enhance the taste of any seafood. You can also poach fish with diluted pickle juice to steam the fish or cook the fish broth with pickle juice.
#10: Add As Taste Enhancer
If you want to experiment with food, try adding pickle juice to different kinds of dishes. Now that you’re aware that it makes a great vinegar substitute, you can start with dishes in which you add vinegar often.
Here are some ways you can enhance your favorite dishes with pickle juice:
- Add some pickle juice to egg yolks and make deviled eggs. The taste becomes so extraordinary that people are bound to ask you the secret of your egg recipe. You can decorate the eggs with coriander, which will add more to the taste.
- When you have a good amount of leftover pickle juice, use it as a salad dressing. The taste of your salad will completely change. Mix only one or two spoons of pickle juice in a medium-size bowl of salad.
- Making some sauce to eat with fries? Consider adding pickle juice instead of vinegar.
- People use pickles in their sandwiches. So, pickle juice can also be a good option. Use the juice as a sauce and see how the sandwiches taste. You will not be disappointed that’s for sure.
- Macaroni and cheese is a favorite, but instead of the same old taste, mix in some pickle juice to get a sour flavor. Or, use the leftover pickle juice to marinate the cheese and use the cheese to prepare mac and cheese.
- Vegetable juice is full of vitamins but sometimes doesn’t taste the best. You can make it tolerable by adding a splash of pickle juice to the drink.
- Pickle juice is delicious when added to soups. It is a perfect alternative to vinegar water.
- Out of lemons to add to hummus? Grab that extra pickle juice and mix it in. It’s a tasty alternative to lemons in any hummus recipe!
#11: Making Bread
Instead of using a liquid like water or milk, try adding pickle juice to make bread. The taste of the bread will be sour and salty, but it will have a lot of health benefits compared to normal bread. If you’re short on time for making bread, this bread maker from Amazon is a great value!
#12: Marinate CheeseÂ
Give your mozzarella cheese a twist by using pickle juice to marinate it. Other soft cheeses like goat cheese and feta also taste amazing when you use pickle juice to marinate them. These cheeses can be used to make other dishes, which will be equally amazing.
#13: Get Rid of Bad Breath
Having bad breath is an embarrassing problem for anyone. However, if you have pickles or pickle juice every day, you can easily get rid of this problem.
The reason behind bad breath is the increasing number of bacteria in your mouth. As pickle juice is fermented, it can kill the bacteria.
So, to get rid of bad breath, have one spoon of pickle juice before your meals. It will definitely help!
#14: Pickle Juice for HairÂ
An itchy scalp can be an irritating problem. Use extra pickle juice to stop the itch! However, make sure to use the non-spicy ones because the spicy juice will seriously damage your hair.

The vinegar will kill the bacteria that cause itchiness and the salt stimulates blood circulation in the scalp. As a result, your hair will grow faster and become healthier.
To use pickle juice on your scalp:
- Soak some cotton balls in pickle juice
- Apply the cotton to your scalp on the affected areas
- Use this remedy once a week until the itchiness resolves
- This solution can also help reduce dandruff
#15: Cure Blackheads and Pimples
You can use pickle juice to cure pimples and blackheads. It can also work as a toner and tighten the pores. This is best used as a temporary replacement for vinegar since vinegar is much stronger than pickle juice.
The non-spicy pickle juice can fight the bacteria that cause pimples and blackheads.
To use pickle juice on pimples and blackheads:
- Dip a cotton swab or cotton ball in pickle juice
- Apply only on pimples or areas with blackheads
- Try adding rose water to lessen the pickle smell
- This mix removes dirt and toxins
- Removes dead cells and deep cleans the skin
NOTE: Do not apply the pickle solution all over your face, and do not let it sit on your skin for too long. Wash your face after a few minutes of application. The pimples will dry out eventually.
#16: Pickle Juice in Drinks
Get creative and use pickle juice in preparing party drinks! It adds a tangy and salty flavor to cocktails and is a perfect mixer for happy hour.
Here are some ideas to get you started:
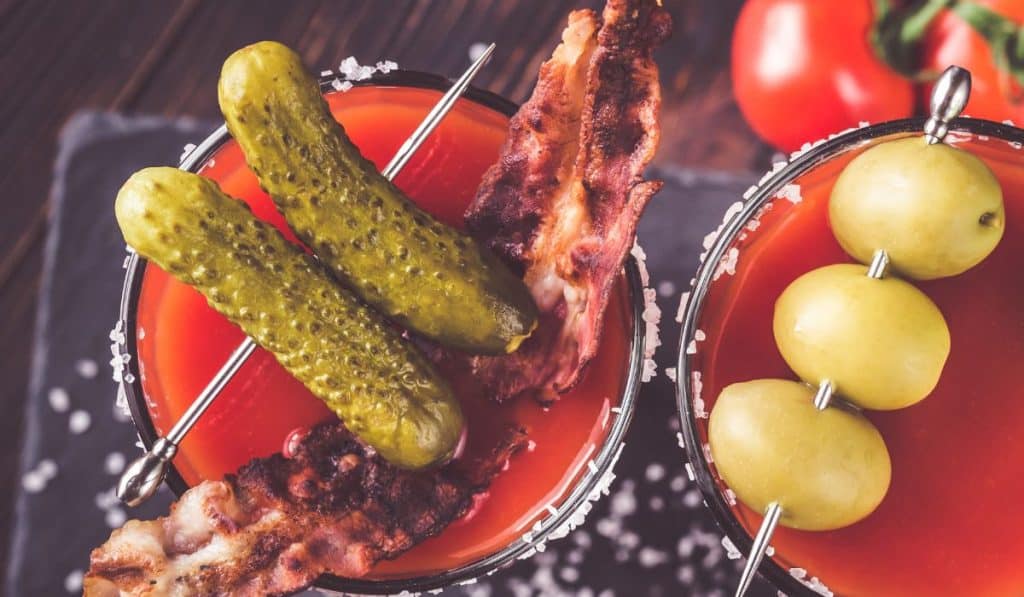
- Mixing pickle juice in making a Bloody Mary has become quite common these days. This drink needs salty and acidic addition so pickle juice goes well with it.
- When you are serving a dirty martini at the party and suddenly you run out of olives, you can use pickle juice. The juice will create a unique tart taste and your guests will definitely love it.
- You can make it even more fun with whiskey. Whiskeys are strong so you can lessen the effect by drinking shots of pickle juice right after drinking whiskey shots.
- Mix vodka or gin with a dash of pickle juice to make Pickletinis for your guests.
- You can also prepare non-alcoholic drinks with pickle juice. Add olive juice with pickle juice and present the drinks as non-alcoholic sparkling drinks.
HOT TIP: You can make pickle juice ice cubes to spice up your drinks! Use them in any of these drinks listed above or get creative. Try this ice cube tray from Amazon for pickle ice!
#17: Hangover Cure
Having the most fun and drinking too much at the party is okay! But the problem that follows afterward is not so pleasant. Yes, the terrible headache and hangover.
Drinking too much alcohol results in a loss of electrolytes. Dehydration can cause really bad headaches.
Pickle juice has potassium and sodium, and both can help to hydrate our bodies. It balances the electrolytes of the body and thus cures hangovers.
So, if you had too much drink at last night’s party, you can consume a few spoonfuls of the leftover pickle juice from your fridge and cure your hangover.
#18: Workout DrinkÂ
Pickle juice is quite popular among people who like to work out. It contains a lot of vitamins and electrolytes, so it can be consumed as an energy drink. You do not need to do anything extra to drink pickle juice as a workout drink and just drink it straight out of the jar.
The electrolytes in the juice give you energy and keep your body hydrated. Therefore, you can drink it both before and after exercise. This way, you do not need to buy any energy drinks and can save some money.
#19: Use as Medicine
Pickles are a favorite food not just because they are tasty but also because they are healthy. There are many reasons to add pickles and pickle juice to your daily diet.
Here are some health benefits you will get from drinking pickle juice regularly:
- Vitamins and Antioxidants: Pickle juice contains a considerable amount of vitamin C, vitamin E, and antioxidants. Vitamin C and Vitamin E boost our immune system. Antioxidants are great for our skin, teeth, and hair, and protect the body from harmful molecules like free radicals.
- Soothes Muscle Cramps: Dehydration is the main reason for muscle cramping. Drinking pickle juice soothes muscle cramps because it contains electrolytes and works faster than drinking water. The vinegar in pickle juice is a rapid pain reliever, and it stops nerve signals to soothe muscle cramps.
- Relieve Period Cramps: A lot of women often suffer from period cramps. Consuming a few spoons of pickle juice can help to relieve this pain. Drinking pickle juice can also help women to stay energized during menstruation.
- Controlling Blood Sugar Level: If you have diabetes, you can consume one or two spoons of pickle juice before every meal. According to research, pickle juice helps to control blood sugar levels. Uncontrolled blood sugar levels or diabetes causes serious health issues.
- Boost Digestive System: Pickle juice is highly helpful for the digestive system. As pickle juice is fermented, it has good bacteria that make our gut strong. It also eases gastric pain and food poisoning.
#20: Pickle Juice Popsicles Â
Make pickle juice popsicles! Children and adults will love these sour and spicy popsicles, so make a few and try them out. They might sound a bit weird but trust me they are really good, and perfect for a hot day. I really like these popsicle molds from Amazon!
Caution About Consuming Too Much Pickle Juice
Pickle juice has a lot of health benefits but it is not good for you if consumed in large quantities or too frequently.
Here are a few things you must know before adding pickle juice to your diet:
- Pickle juice contains a high amount of sodium. Therefore, consuming a lot of pickle juice in one go can cause stomach bloating and swelling.
- Too much consumption of pickle juice can also increase blood pressure. So, people with high blood pressure have to be careful about it.
- If anyone accidentally drinks spoiled pickle brine, they will suffer from stomach problems like diarrhea and stomach pain.
However, these problems can be avoided when you drink a healthy amount of pickle juice and avoid overconsuming it.
Conclusion
As you have learned by now, there are tons of ways you can use leftover pickle juice. Not only will you be wasting less food, but also pickle juice has various health and economic benefits.
Avoid wasting this useful and healthy brine, and instead, get creative and come up with different ways to reuse your left-over pickle juice!

How to Ferment ANY Vegetable with Success
Ever wish you didn’t need to follow a recipe every time you want to try fermenting something new? Me too! The truth is, once you know the principles of fermentation, you can pretty much ferment anything you want without following a recipe!
Fermented vegetables serve two purposes at once. They are ridiculously tasty and they are super nutritious. On top of that, you don’t have to worry about their preservation as they are rich in natural preservatives. Although it’s a simple process, there are some crucial things to pay attention to if you want to successfully ferment any vegetable.
The key to successful fermentation of any vegetable depends on a few things:
- The vegetables need to be chopped appropriately (shredded, grated, or diced)
- The correct fermentation method must be used
- The vegetable needs to be fermented for the right amount of time
Here’s a more detailed guide so that next time you wonder what a fermented version of that vegetable will taste like, you can simply try it for yourself!
How to Successfully Ferment Vegetables
Fermented vegetables last a very long time. Also, they taste great and are full of nutrition. They can be eaten on their own or as a side dish. You can slide them into burgers, wraps, and more!
Here, I am going to briefly discuss how to ferment vegetables properly, their benefits, and some popular fermenting methods. I recommend reading the entire article to grasp the process by heart.
Preparation and some basic knowledge are the precursors to successful fermentation. Although the steps I’m going to discuss are fairly simple, you have to be meticulous.
Related: Check out my article, “How to Ferment Cabbage in 10 Easy Steps”
Here are the steps for successfully fermenting any vegetable:
Gather All the Tools
What You’ll Need
The success of vegetable fermentation relies not only on the right method but also on the right tools. Here’s a list of what you might need depending on what you’re fermenting:
- a chopping board
- a sharp knife
- a large bowl for mixing
- a jar large enough to fit all your vegetables in AND some space on the top for air
How to Prepare the Vegetable for Fermentation
Properly preparing the vegetable is one of the key components to successful fermentation. Varying types of vegetables should be cut differently.
Some vegetables are fermented whole while some are shredded, grated, or cubed. It’s important to know which method is best for which vegetable beforehand so that you get a better fermentation result.
NOTE: The way the vegetable is prepared is not absolutely crucial to the ferment. In other words, shredding a vegetable instead of dicing it is not going to result in failed fermentation. However, certain vegetables are better suited to be prepared a certain way due to things like their sugar content, water content, and how hard or soft the vegetable is.

Here’s a handy table with a list of vegetables, and the most conventional way to chop the vegetable to ensure you get a great result the first time around! (You’re welcome to do your own thing too of course, but perhaps for the first go, you should stick to the traditional way until you get the hang of things!)
| Cucumbers | Spears or slices |
| Jalapenos | Sliced |
| Sweet Potatoes | Thinly sliced |
| Onions | Thinly sliced |
| Cauliflower | Cut into pieces that will fit in a jar |
| Beets | Spears or slices, peeled |
| Cabbage | Finely shredded |
| Carrots | Spears, peeled |
Select the Right Fermentation Method
There are different types of fermentation and it’s important to consider which vegetable you are fermenting before deciding on the method of fermentation.
Here are various fermenting techniques to consider:
- Dry salting – Also known as a dry cure which is a popular method to preserve seafood. It is also used to preserve some fruits and vegetables like lemons, tangerines, and cabbage.
- Pickling – Often used for fermenting cucumbers; this technique uses acidic brine (like vinegar) to add a sour flavor. Red onions, cauliflower, and jalapenos are popular examples.
- Salt brine – The most popular and easiest method of fermentation. Typically used for almost any vegetable.
We’ll discuss these other fermenting methods later on in this article, but for now, because it is the easiest and most popular, let’s discuss how to ferment your vegetable using the salt brine method.
Related: Want to know how to keep your fermented veggies crisp? Learn how here!
How to Ferment Using a Salt Brine
There are 2 primary ways in which you can salt brine vegetables:
- Adding water and salt – Some vegetables, such as cabbage, release their own ‘juices’ once the salt is added to the mix so there is usually no need to add extra brine.
- Adding salt only – Carrots, for example, don’t release any of their own liquids when salt is added. So in this case, a brine will need to be made (salt and water combined together) and added to make the ferment.
How to Make a Salt Brine
It’s always handy to know how to make a salt brine even if your vegetables produce enough juices of their own. This is because sometimes the juices are not enough to completely cover the vegetables and you need a salt brine to make sure they are submerged.
In both cases, one of the most important aspects of fermentation is to make sure all parts of the vegetable are submerged in the brine.
To be properly and entirely fermented, all the vegetables must be in contact with the brine. In fact, if any part of the vegetable is popping out over the brine, it is a surefire way to grow mold as the vegetable will be exposed to oxygen (which is a no-no for this type of fermentation!)

Weigh the Vegetables Down if Needed
If the vegetable you are fermenting is heavy and cut into cubes, then you shouldn’t worry about this. This step applies to some particular vegetables that are lightweight and usually shredded like cabbage, and cucumber. These vegetables that are likely to lift up and pop out over the brine.
You can place a clean, heavy weight on top of the vegetables to prevent them from escaping. You can use a number of things as weights, such as:
- cleaned rocks or pebbles
- a food-safe bag or cheesecloth full of baking beads
- fermentation weights (I use these ones from Amazon; they are super easy and fuss-free to use!)
After you have submerged the vegetables and weighed them down, place the lid tightly onto your jar. It’s important to do this to stop air going in and out. Again, this is to prevent mold. To make things easier, I like to use specialized jars for fermenting my vegetables.
This fermentation jar kit from Amazon comes with 3 airlock lids and fermentation weights. The airlock ensures much less chance of mold developing even if some of the vegetable pieces were to come to the top. They’re great to use for the piece of mind of not having to worry that the ferment will go wrong.
Release Gas Build-Up After 3 Days
Once your veggies have been fermenting for 3 days, it’s time to open the lid slightly. Just enough to let the build-up of gases out. Simply open the jar slightly for a few seconds (you’ll probably hear the gas releasing at this point!), and close it back up tightly again before any bacteria has a chance to get in.
If you are using airlock jars, (like the ones I mentioned here), this step is completely unnecessary, because the lids have special one-way valves that let excess gas out without having to open the lid and expose the ferment to potential bacteria.
After this, it’s just a matter of waiting!
How Long Should You Ferment Vegetables?
By the three-day mark, the fermenting process is already well underway, and if you like your veggies less sour (and/or you’re a little impatient!), then you can start eating them from day 3.
However, vegetables can ferment for seven days to a month or longer! The flavor continues to develop during this time, and so do all the beneficial bacteria!
I personally like to leave mine for a whole month to ensure that I am getting maximum health benefits and maximum flavor out of my ferments.
3 Different Fermentation Methods
Varying fermenting methods are best for different vegetables. Here are three of the most used fermentation methods used for vegetables:
#1. Dry salting
Also known as the dry cure method, dry salting is a very popular method for both vegetables and seafood. Just combine the vegetables with salt and mix properly.
The juice that is released from the vegetable and the salt mixed with it works as a brine solution. This process usually takes three to seven days and the most popular food made using this method is sauerkraut or fermented cabbage.
#2. Pickling
Pickling is commonly used with cucumbers but can also be used with other vegetables with delicious results!
Pickling is a simple process that involves submerging a veggie in a brine of salt, vinegar, and water. It takes five to seven days before the pickle is ready to eat. Its resulting vinegary flavor is one that is wildly popular for good reason.
#3. Salt Brine
Salt brining is another popular fermenting procedure. Salt brine is widely used for fermenting different kinds of vegetables. This method is similar to dry salting, except more brining solution is used.
A brining solution usually contains 25% salt. The vegetable is cut into pieces and soaked in the solution for a week or two. Sometimes, vinegar is also added.
NOTE: Adding vinegar changes the type of fermenting from lacto-fermentation to acetic fermentation. The latter is not as rich in probiotics as lacto-fermentation but is still nutritious and acts as a digestive aid.
Common Mistakes While Fermenting Vegetables
Some small oversights can make a huge difference in the fermentation process. Here’s what to look out for:
#1. Using Tap Water
While tap water is generally safe to drink and free of any harmful microbes, it is often chlorinated which can kill the bacteria needed for fermenting.
The key to fermentation is bacteria. So even if the fermentation process doesn’t fail completely, using chlorinated tap water will result in reduced nutritional value.
#2. Not Submerging Entirely
The vegetable must be submerged in brine for at least the first three days. Light vegetables like cabbage and carrots tend to float to the top of the solution.
Make sure all the vegetables are submerged in the brine, and if there isn’t enough brine to keep them all submerged, create more brine to add to the jar, and use a weight when necessary.
#3. Being Impatient
You can start eating three days into the fermenting process, but that’s not ideal. Complete fermentation takes around seven days, in some cases nearly a month.
TIP: Be patient to get the full fruits of your labor! Taste it after five or six days, keep checking it every day until you are satisfied with the taste.
Benefits of Fermented Vegetables
Vegetables have been fermented for thousands of years. This is how foods were preserved when there was no electricity or refrigerator to rely on. The reason it’s still popular to this day is that it yields great nutritional value with amazing taste. Here are some of the benefits:
#1. Natural Preservative
Fermented vegetables can be easily preserved for 3-4 months without refrigerating thanks to their natural preservatives.
Fermentation produces lactic acid which inhibits the growth of other harmful bacteria that facilitate the rotting process.
#2. Great Taste
Fermented vegetables as well as any fermented foods are unparalleled in taste. This process produces natural substances and probiotics that give the food its unique taste that can’t be achieved by any artificial flavor or additives.
#3. Good Nutrition Source
Vegetables are a great source of nutrition. When they are fermented, their nutritional values are increased and they are rich in vitamins, minerals, and probiotics. Probiotics are especially healthy for our gut.
FUN FACT: Two ounces of fermented cabbage have more probiotics than a hundred probiotic capsules!
Conclusion
Fermented vegetables are not only a great way to increase your daily vegetable intake, but they also help you get the essential nutrients that your body needs to function and perform, as well as give your immune system a boost.
The best part of fermenting is that it’s not rocket science. You can ferment all vegetables by the same process with slight variations. It’s easy, tasty, and healthy and is a likely reason fermenting vegetables is popular all over the world!
Are you interested in fermented drinks? Try these recipes:

Can You Reuse Pickled Onion Brine? How, When, & When NOT to!
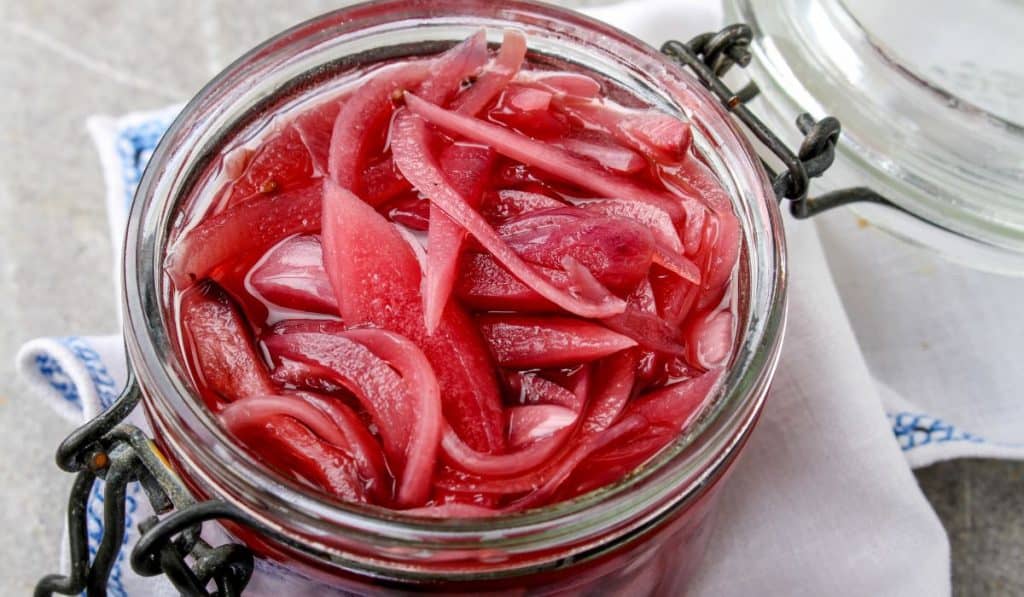
You might feel the pickle blues when you finish an expertly made and extra delicious jar of pickles. Now you are just sitting with the vinegar that is leftover from those marvelous pickles, and a thought pops into your head. Can you reuse pickled onion brine? Maybe you can relive that pickled onion bliss.
Pickled onion brine can be used more than once as long as you are following the proper procedure to reuse it in the safest way possible. Aside from making pickled onions, you can also reuse your pickled onion brine on so many other dishes and drinks to add or improve their flavor.
Here, learn how you can reuse your pickled onion brine safely so that you do not have to miss out on reliving the perfect pickle.
What other foods can be pickled? For a full guided list on what CAN and CAN’T be pickled, check out my article here.
How To Safely Reuse Pickled Onion Brine
You’ll be happy to hear that you can most definitely reuse your pickled onion brine. As long as the pickled onion brine is salty, sour, and sweet enough, there shouldn’t be any issues with reusing the pickle brine.
Although, here are some safety factors that you need to know before reusing your pickled onion brine. If you want to reuse the pickled onion brine to make more pickled onions, then the best and safest way to do this is as follows:
- Blanche the onions in water.
- Then remove the herbs and spices from the brine.
- Then boil the pickled onion brine.
- Let the pickle brine cool down.
- Add some more salt, vinegar, and water.
- Pour the brine over the onions.
The reason to blanch the onions first is to kill off any bacteria or microbes that are on the onions that could spoil the pickle brine and the onions.
Some people do not blanch the onions first, but blanching is the safest way to start your pickling process and make sure nothing goes wrong.
Boiling the pickled onion brine will do the same thing for the brine as blanching the onions. During boiling, the pickled onion brine may lose some acidity and salt, so you will need to add extra to ensure your brine can pickle your onions properly.
You need to ensure that the glass jar you will use to keep your pickled onions in is clean and disinfected. This will make sure the jar itself has no bacteria in it.
This way, you will make sure that no harmful bacteria or microbes will be introduced to your pickle brine or onions, causing the pickles to grow unwanted mold.
If bacteria is introduced to your pickle brine, then you will need to throw the pickles away and start from scratch again.
How Many Times Can You Reuse Pickled Onion Brine?
Although you can reuse pickled onion brine, is there a limit as to how many times you can reuse the same pickle brine?
The answer is yes, there is a limit. With every new batch of pickled onions you make, you are diluting the salt and acidity level of the pickled onion brine.
Even though you do add more salt and acidity when you prepare the brine for the new onions, there is only so much you can add before the flavor starts to be overwhelmed by the new vinegar and salt.
It is usually safe to reuse pickled onion brine twice, maybe three times, if you prepare the pickle brine correctly. However, the third time may also depend on the moisture in the onions you are pickling, as red onions have more than yellow onions.
NOTE: The more times you reuse pickled onion brine, the riskier it gets in terms of bacteria growth and contamination.
Other Ways To Reuse Pickled Onion Brine
If you are not wanting to make more pickles using the pickled onion brine, but you do not want to waste the pickle brine, then there are a number of other ways to use it.
You can use pickled onion brine to season other foods. For example, you can pour some pickle brine over warm potatoes to add an extra kick to your potato salad. You can do the same for pasta salads too.
Other Purposes For Your Pickled Onion Brine
There are so many uses for pickled onion brine that it would be such a waste to not reuse such a versatile ingredient and just throw it away. Here are some creative ideas for how to use it:
- Use the pickled onion brine in place of vinegar in salad dressings
- Use the pickle brine to add some extra zing to your tartar sauce for your seafood
- You can marinate goat cheese or any other soft cheeses in your pickled onion brine
- Combine pickled onion brine with mayo or yogurt and fresh herbs to make a dip
- Uses the pickle brine as a marinade for meats such as chicken or pork
- You can use pickle brine to poach or steam seafood
- You can also add a small tablespoon or two of the pickle brine to mac and cheese
- You can add the pickle brine to certain soups like Borcht soup
- You can add pickle brine to burger meat or meatloaf to add extra flavor.
- Add some pickle brine to a Bloody Mary or make ice cubes out of the brine for your cocktail
- You can try making a pickling, which is a martini with added pickle brine
Related: Check out my article here for 20 ways to Use up Leftover Pickle Juice!
When Not To Reuse Pickled Onion Brine
There are a few scenarios when you should not reuse your pickled onion brine.
If you intend to can some pickled onions, then do not reuse pickled onion brine. This is because to safely can pickled onions, the pickle brine needs to have a certain vinegar and salt concentration to ensure that the pickled onions can last and do not grow any bacteria.
You cannot reuse pickled onion brine for canning as there will not be enough vinegar and salt in the brine as the old pickles would have soaked it up, and the brine is now quite diluted.
If you can your pickled onions with used pickle brine, then you will most likely have to throw that batch away due to bacteria growth.
How To Check If a Pickle Brine Can Be Reused
Another reason to avoid reusing your pickled onion brine is if the pickle brine is off. So, before you reuse the pickle brine, there are a few things to consider to make sure the pickle brine is still safe to consume.
- First, you need to look at the jar of pickled onion brine. Do you see any mold anywhere? On the sides of the jar? On the lid? Or floating in the pickled brine itself?
- Also, look at the color of the pickle brine. Is the pickled brine milky, cloudy, clear, or a mixture?
- If you do see mold on/in any of these locations and your pickled brine is a milky or cloudy color, then you should throw the pickle brine away as it is not safe to consume.
- If you do not spot any mold, then the next thing you need to do is remove the herbs and spices from the pickled brine by pouring the brine through a fine mesh strainer like this one from Amazon.
- Now for the fun part, taste the brine.
- If the pickle brine tastes good, then it is probably still fine to use. The tasting will also help you decide if you need to adjust the vinegar and salt in the pickled onion brine.
Conclusion
You can reuse pickled onion brine, but you need to first make sure the pickle brine is still safe to consume, and the pickle brine can only be reused for pickling outside of a can.
There are multiple other ways you can reuse pickled onion brine that can help to spice up your cooking if you are looking for a change.
Do not throw away your pickle brine (unless it’s off), as it has many different uses and is a valuable ingredient to have in your home.
You might also be interested in: