
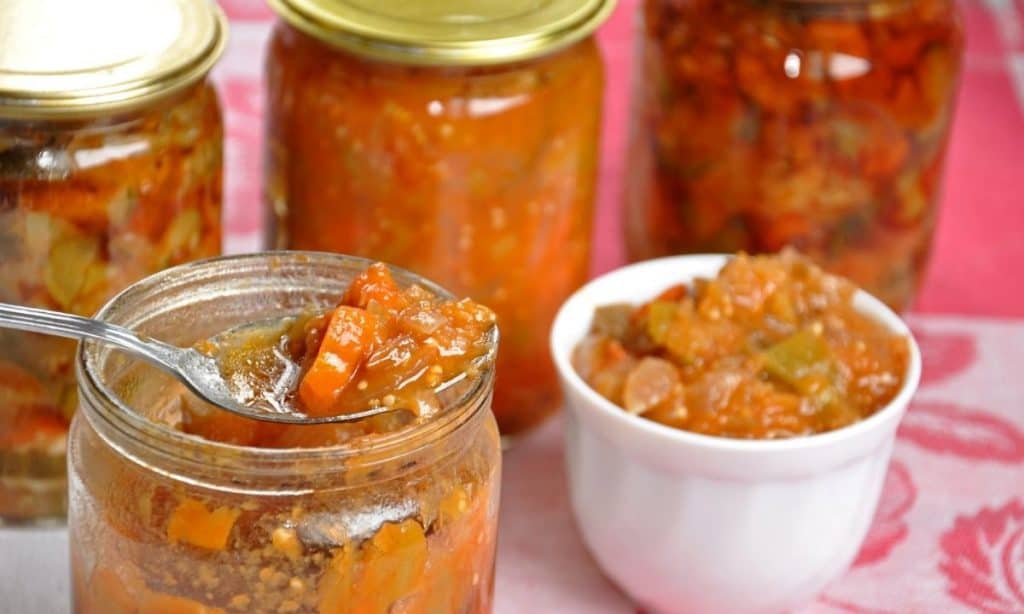
Pickles are the perfect, tangy, sweet, and crunchy food item to snack on throughout the day. They are a healthier alternative to most midnight munchies or other fast-food items. If you are an avid fan of pickles like I am, you’ve probably tried making them at home. They are pretty easy to make, but with so many options out there, I am sure you have wondered what foods can be pickled?
Almost any type of food that can be soaked in a vinegar bath and fermented with salt and water can make a perfect pickle. However, just because everything can be pickled, doesn’t mean they will all taste good. It is best to stick to popular items like cucumbers, dill, okra, carrots, and cherries.
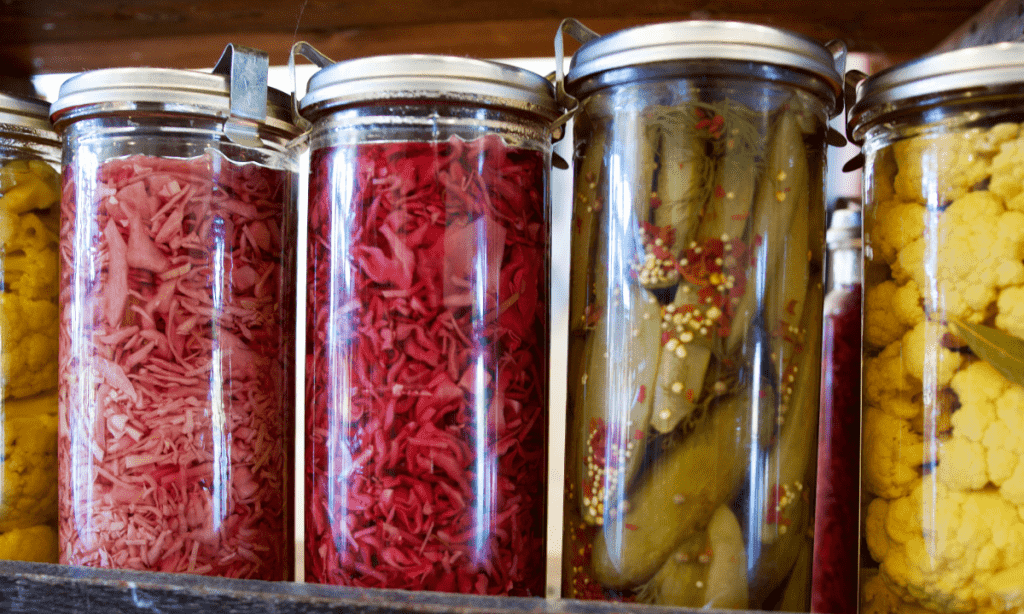
You might be surprised at just how many different forms of pickles there are! Each type of pickle has a certain specialty and uses slightly different techniques. I have listed several different types of pickles and how they are made in this article. With a little experience and practice, you will easily grasp which techniques suit which type of pickle.
What Foods Can Be Pickled?
Almost anything you can think of can be pickled, including:
- Vegetables
- Fruits
- Nuts
- Bacon
- Different kinds of meat
The best bet, however, is to stick to items you know will complement the sweet-salty flavor of pickles and to use fresh produce when it comes to fruits and vegetables.
Perhaps the most popular kind of pickles are…
- Pickled cucumbers
- Sauerkraut (made with shredded cabbage)
- Peppers
- Onions
- Dill
Different cultures also make pickles differently and there is a wide variety of options to choose from.
More exotic forms can include:
- Kimchi, which is made from fermenting cabbage
- Achar is made from fruits and olives
- Murabba is made from Indian mango
Pickles can be enjoyed alone, as a snack, or as a side to any dish. Cucumber pickles are the perfect mid-day snack, whereas pickled red onions taste amazing on top of fried rice, and can even be used as an ingredient in certain recipes.
This versatility makes pickles amazing. No matter who you are, there’s a pickle for you! All that said, however, it can be slightly tricky to get the perfect pickle recipe.
Pickling is all about ratios and getting the perfect blend of ingredients that complement the star of your dish. With so many options, it can be overwhelming to get your hands into the world of pickle-making.
Can you pickle without sugar? Learn all you need to know!
Easy Pickled Veggie Recipes to Try
If you’re a beginner, you can try these easy recipes for different types of pickles:
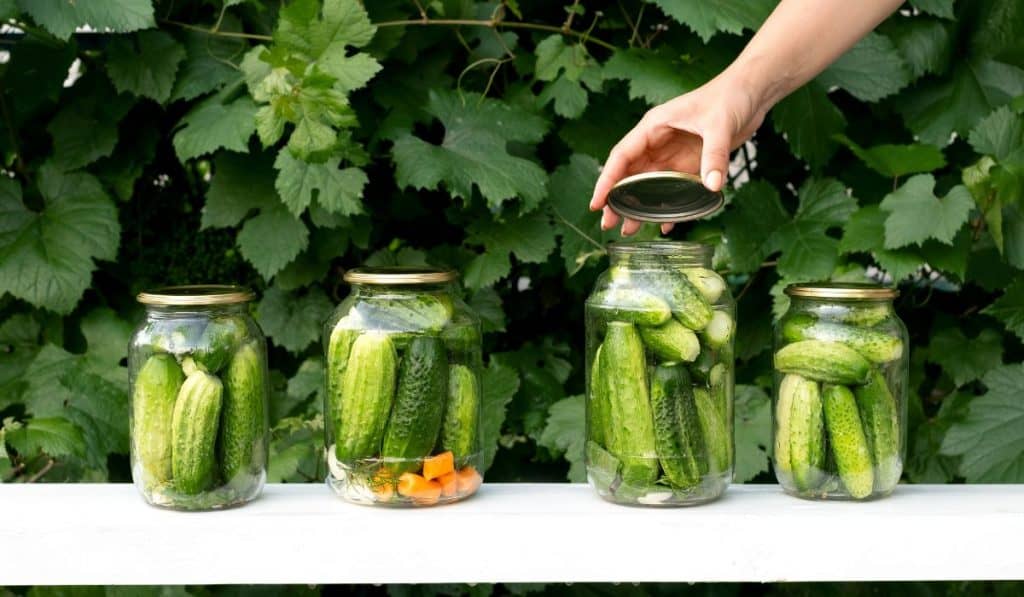
Cucumber Pickle
If you have never tried pickles before, it is probably best to stick to the classics. Cucumber pickles are a mass favorite with jars sold in most supermarkets.
How to make cucumber pickles:
- To get started on your cucumber pickle, cut them into thin long slices, and make sure it fits in the jar you will be using (these jars from Amazon work perfectly).
- The vinegar bath used for pickling is called brine, and this recipe calls for a ratio of 1:1 water and vinegar. Water is usually added to dilute the ‘tangy-ness’ of the vinegar. If you like more tang, feel free to add more vinegar.
- For spices, add in dill seeds and some crushed garlic, for that classic flavor. If you want your pickle to be sweet you can add in sugar too!
And that’s it. You are done. Yes, it was that easy! Now, you simply leave it in the refrigerator overnight for the magic to happen! The longer you wait, the more flavor will develop. This same recipe can be used for peppers as well.
BONUS TIP: To prevent the cucumber from becoming soggy, store them in ice for about 30 minutes before you start pickling.

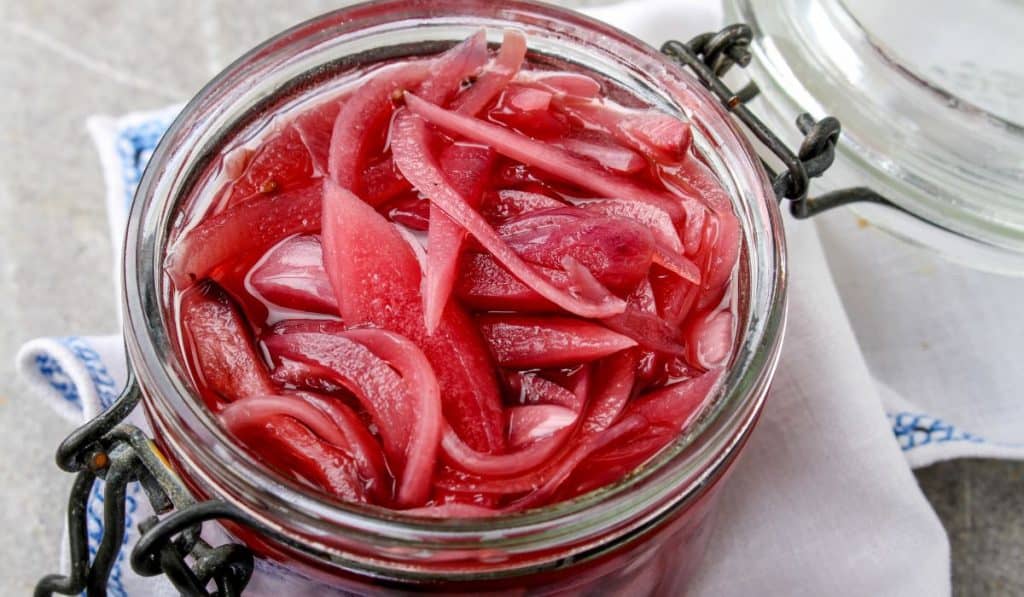
Red Onion Pickle
A red onion pickle is like caramelized onions, only better and packed with much more flavor! Add it as a topping to any dish, and it will instantly heighten its taste.
You can enjoy it with tacos, or as a filling in your classic grilled cheese sandwich, to even as a side with a melt-in-your-mouth perfect rib eye steak, these onions will give that juicy tang to just about anything. And making it is just as easy!
How to make pickled onions:
- To about half a cup of thinly sliced red onions, add 2 tablespoons of red wine vinegar, half a teaspoon of salt, and add a cup of water.
- To make it even better, you can spice it up and add paprika or red pepper flakes.
- All you have to do now is boil it until it’s soft and voila! You have got yourself the perfect side dish.
Depending on how you plan to use it, you can choose whether to make your pickle crunchy (like with cucumbers) or softer (like the onions). Some vegetables, like okra, for example, may need to be cooked beforehand for a better taste and texture.
Can you reuse pickled onion brine? Learn what you need to know first!
Beans and Long Green Vegetables
Like cucumbers, another yummy option to munch on while you binge-watch your favorite show is probably long-stemmed vegetables like asparagus, and green beans.
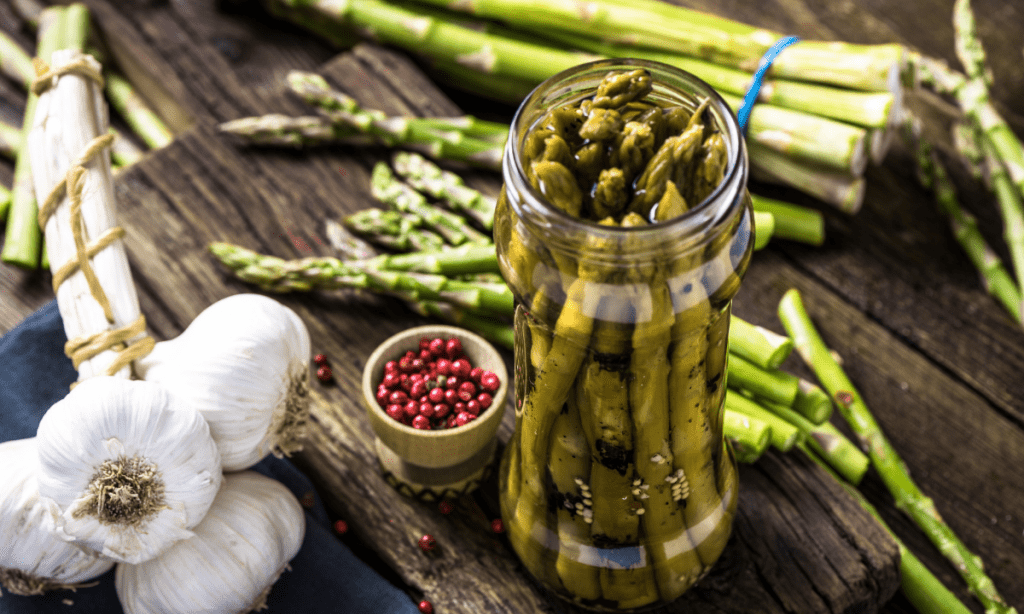
How to pickle long green vegetables:
- Start by cutting off the ends of your long stem veggie of choice
- Use a bath of about 80% or more vinegar. The excess vinegar is balanced with the addition of sugar to taste.
- To add a little spice, turmeric or mustard with celery can be used. This flavors the beans deeply and leaves you with a delicious sweet and sour pickle.
Kimchi (Pickled Cabbage)
Kimchi is a widely popular Korean side dish, which is a variation of spicy, pickled cabbage. Koreans eat Kimchi with fried rice, ramen, dumplings, and pretty much anything at all. This is, however, a little harder than the other recipes and requires more ingredients.
How to make kimchi:
- Once you have some cabbage sliced and washed, let it sit with a lot of salt and a little water (sprinkle the salt very generously and then splash some water over it, giving it a gentle mix).
- Keep the mixture covered for about an hour or two, then take it out and rub a lot more spice on the softened cabbages.
- You will also need crushed garlic and ginger, sugar, fish sauce, and shrimp paste (all to taste).
- Stir all of the ingredients from #3 into a smooth paste, adding water and some Gochujang (which is a Korean Spice; I like this one on Amazon because it has pretty clean ingredients and tastes great!).
- Once you have rubbed the cabbage with the soft spice and remaining water, you leave it to ferment for about one to five days.

Fruits Also Make Great Pickles
Pickles are not limited to vegetables, you can also pickle quite a variety of fruits. Here are some of the more popular ones…
Pickled Cherries
This is the perfect little treat to have as dessert, with a little bit of goat’s cheese.
How to pickle cherries:
- Boil equal parts of apple cider vinegar, and sugar with about three-quarters of a cup of water.
- Once boiling, add the mixture to your jar of cherries and add in a stick of cinnamon for that warm Christmas feel.
- Use nutmeg, black pepper, and ginger to flavor the brine.
- The best part about this recipe is that it only takes 15 minutes, and it’s ready to be eaten. It will be the perfect companion to a warm cup of coffee in winter.
Peaches, Plums, and Apricots
Pickling has long been a form of preserving out-of-season fruits and vegetables. You can use this recipe for any summer fruit and store it to eat later. Try to use slightly under-ripe peaches, plums, or even apricots for this recipe.
How to pickle summer fruit:
- Use a ratio of 2 parts sugar and 1 part apple cider vinegar to add to your chopped fruit of choice.
- Add a few pieces of star anise, cloves, black peppercorns, and red chili flakes (preferably bound in cheesecloth like this one on Amazon) into the pan and boil until the fruit is soft.
- Eat these with salads, a cheese platter, on shortcake, or even with tea. Pair it with anything and it will complement the flavors marvelously.
- These will last you for about a year, and when you are done with the fruit the remaining brine syrup can be used to make even more varieties of pickles or would make for an amazing, sweet, reduced sauce.
Mango Pickle
Mango pickles are another classic, especially in the Indian subcontinent where it is known better by the name of “Achaarâ€. They can be eaten alone, with rice and beef curry, or even can be made into a tangy chicken dish called Achari Chicken.
This method of pickling substitutes vinegar for oil and can be used to preserve summer favorites for year-round use.
How to make mango pickles:
- To a bowl of chopped-up mangoes, add salt and if possible, let it sun dry for an hour or so.
- Then, in a pan, heat some oil, and add mustard seeds and Methi Seeds.
- Add the mangoes, chili powder, crushed garlic, and salt into the pan.
- Let it sit on a low flame, and the mangoes will release moisture, and mixed with the oil will create the brine. You can add in a little sugar too at this point.
- After a while take off the heat, and leave it in a jar for 24 hours.
TIP: The more it sits, the more flavor will mix in and make a scrumptious little snack. This can be stored in the fridge or even at room temperature for months unless you devour it all first!
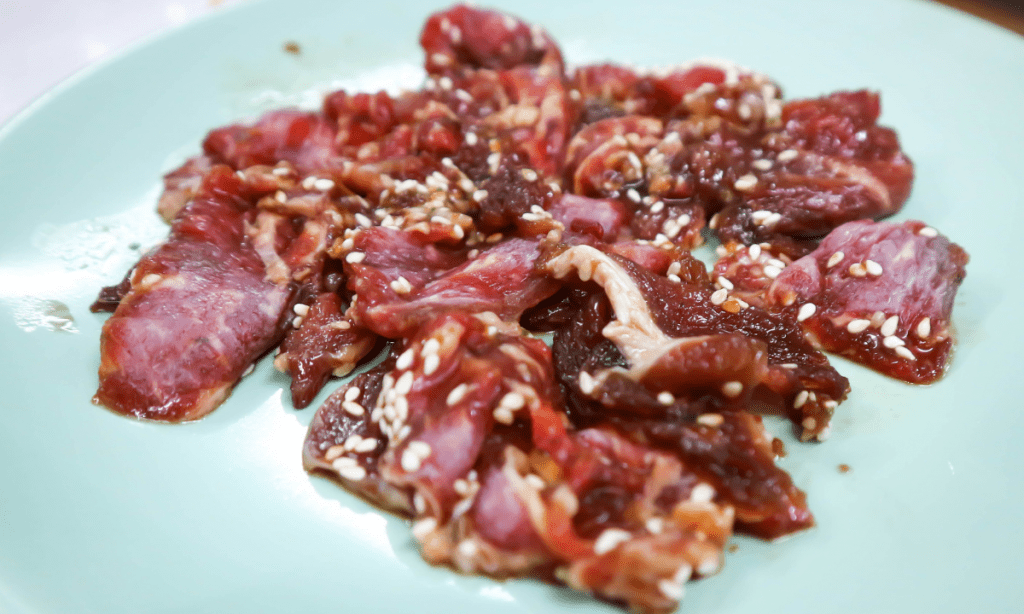
Pickled Meat Products
Corned Beef
Yes, Corned Beef is in fact just beef fermented in spices and salt, and therefore a kind of pickle dish. The brine here is made with spices including mustard seeds, coriander seeds, some allspice berries, and a little peppercorn. Don’t forget to season well, and add in some cloves and bay leaves too.
How to make corned beef:
- Combine water, pink curing salt, and brown sugar in a bowl.
- The beef should sit and bathe in this brine for up to 6 days.
- Once cured, it can be drained with water and further slathered with spices.
- This can now be used as a topping on pizza or pasta, shredded into thin pieces. I love using it to make corned beef hash browns!
Pickled Bacon
Who doesn’t like bacon? As if it wasn’t tasty enough already, similar to curing beef, bacon can be pickled too!
How to pickle bacon:
- Combine enough water, salt, and sugar brine to cover the bacon.
- Soak the bacon under a heavy weight for up to five weeks for maximum flavor.
- Once dried, it can be fried like regular bacon with a salty edge and delicious flavor.
- A delicious way to enjoy it is bacon-wrapped pickles, which are essentially bacon wrapped around dill pickle spears and baked in an oven until crispy. So good!
Pickled Seafood
Pickled Herring
Yes, in fact, you can pickle fish and other kinds of seafood as well. It might be best to stick to oily fish like mackerel and herring though. While certain fish may even develop a foul smell due to the fermenting process, it is considered a delicacy in some places.
How to make pickled herring:
- Slice the fish into thin pieces and in a separate bowl boil 2 cups of white vinegar, and one and a half cups of water with canning salt. Once cooled, store the fish in the brine for 2-4 days.
- For the pickling liquid, add equal parts of vinegar and sugar to a little more than half the amount of water.
- Boil and add any other pickling spices you want along with mustard seeds and a cup of white wine.
- Strain the spices and store them until cooled.
- Finally, take a jar and add a couple of layers of the prepared fish.
- Thinly slice up some onions and add a layer on top of the fish; add the remaining spices from the pickling liquid.
- Keep alternating layers until the jar is full. Once full, add the pickling liquid and store it in the refrigerator.
This makes for a delicious, restaurant-quality side dish and can be enjoyed alone or with bread, cheese, or even pasta salads.
Pickled Crab
If you are having guests over, and want to impress them with your cooking skills, making pickled crabs is a great idea.
How to make pickled crab:
- Start by steaming a Dungeness crab cluster in about 2 inches of water.
- Once cooked (usually after about five minutes), let it cool.
- You can then crack the shells and take out the crab meat and cut it into bite-sized pieces.
- Then, in a separate bowl, prepare the brine with one and a half spoons of apple cider vinegar, a teaspoon of sugar, half a teaspoon of mustard, and a pinch of salt.
- Add in the crabmeat and massage thoroughly. Finish with a dash of pepper.
- The crab then needs to marinate for about 8 hours or more in the refrigerator.
- Once fully marinated, the crab becomes tender and tangy with slight touches of sweetness.
This can now be eaten with mayonnaise and mustard and other toppings along with a serving of bread. You can use this as a topping for seafood pizza as well.
Which Foods Can’t Be Pickled?
As you can see, with a similar basic procedure, almost anything can be pickled. Nuts and even mushrooms also make up a variety of yummy pickles. Even squids and potatoes can be turned into pickled dishes. With the right recipe and complimentary spices, you can pretty much make a pickle out of anything.
The only exclusion to pickling is already cooked meals such as sushi or burgers or pizza. As bizarre as that sounds, you might even think of a way to make these taste good as well. While these cannot be pickled themselves, they taste amazing with different forms of pickles.
Japanese sushi or sashimi, for example, is often eaten with gari, which is pickled ginger. It is said to cleanse the taste buds and make the meal more enjoyable. The red onion pickles can be used as a topping for pizzas and within burgers. So, in fact, anything you can think of, there is probably a recipe to pickle it or add pickles to it!
Conclusion
If you are an avid pickle lover and are wondering what foods can be pickled next to satisfy your pickle craving, the answer is almost everything.
In fact, you do not even have to stick to conventional recipes, but can experiment with even more types of food. Once you have the basics down with practice, you can pretty much make any kind of pickle taste good!
Pickles make for amazing midnight snacks, can be a perfect side to any meal, and can often be incorporated into more complex recipes to add a depth of flavor. They can also be used as housewarming gifts. A handmade jar of pickles with a bow on top will make anyone happy!
So, have fun and experiment with different types, techniques, and tricks of pickling. You might even discover a new dish. Impress your friends, family, and even yourself with delicious pickles. Happy Pickling!

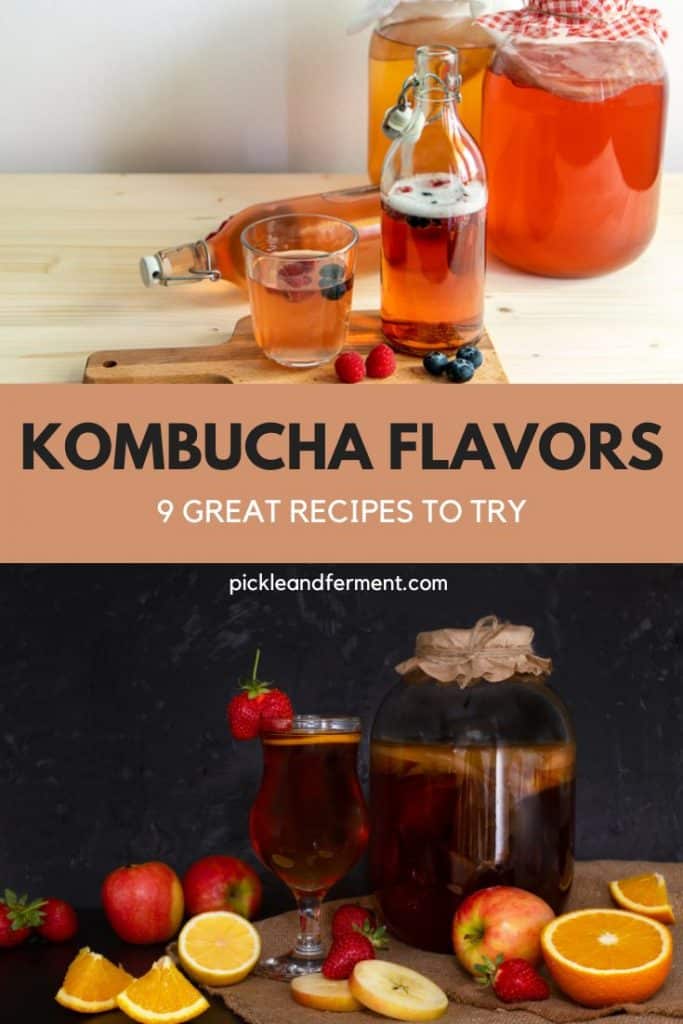
9 Great Kombucha Flavor Recipes to Try: Tried & Tested!
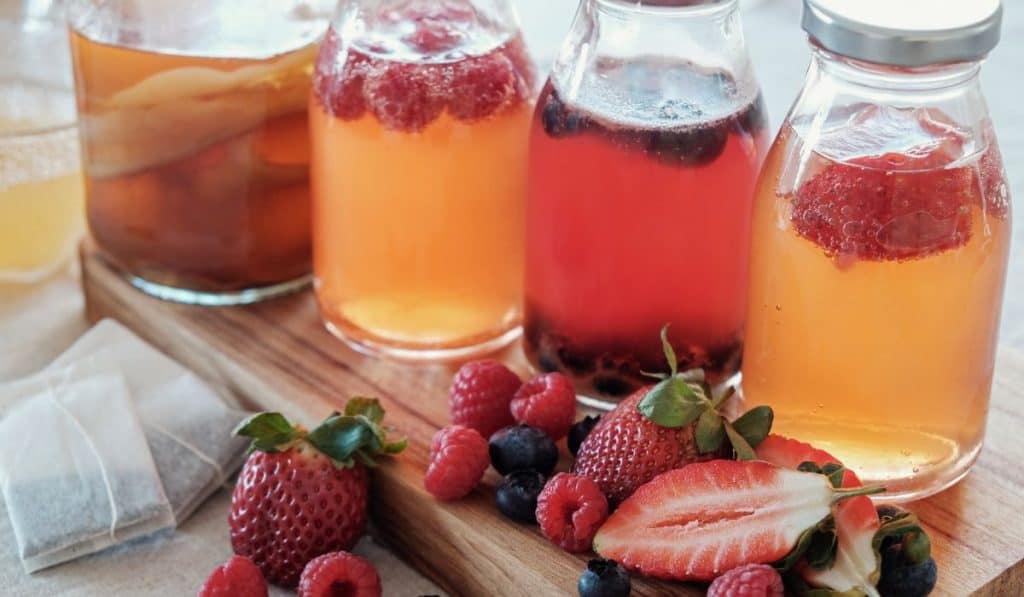
Kombucha can be flavored with a variety of combinations, and crafting great flavors for kombucha is easy once you know how to do it. Here are some guidelines to get you started.
Kombucha is mostly flavored with fruits with an easy process called the “second ferment” which takes place after the initial brewing of kombucha. There are so many flavor possibilities for kombucha that it’s impossible to describe them all.
So in this article, I’m going to talk about the 9 best kombucha flavors I’ve found, with instructions on how to make them.
All of these are a great place to start for beginners, and turn out with varying and delicious fizzy flavors perfect for making at home. Once these are mastered, you can experiment and tweak your favorite flavors until you find your own very favorite combinations!
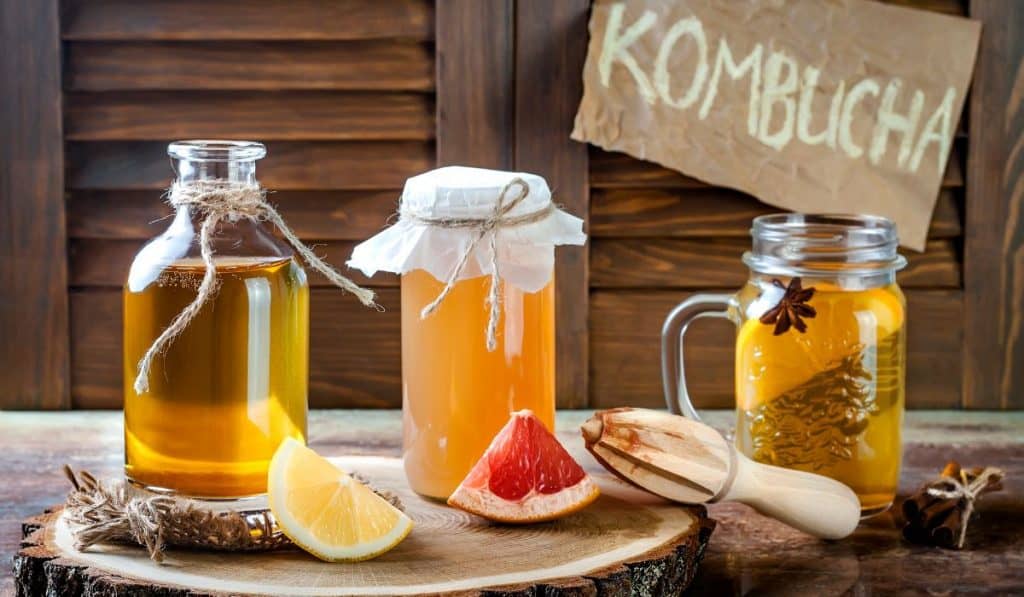
Basic Kombucha Flavoring Steps
Before we get into the recipes, here’s a quick guide to the basic steps of flavoring your kombucha in a second ferment process.
- Choose your fruit: This can be whichever fruit you like, a mix, or a recipe combination like the ones suggested here.
- Add flavors to kombucha: After the initial ferment with the tea, you will add the fruits or purees to the brewed kombucha.
- Second fermentation: Once the flavors are added to the kombucha, bottle it in airtight bottles (I really like these bottles from Amazon) with an inch or two of headspace. Set it in a cool dark room to ferment for about 5-10 days, depending on the recipe. This is when the kombucha gets fizzy!
- Strain out the solids: Once the second ferment is ready, strain out the fruit solids and store them in the refrigerator.
- Enjoy! Your flavored kombucha is now ready to drink and benefit your health.
NOTE: For a more detailed guide about flavoring kombucha with fruit in the second ferment, check out my article here!
9 Most Popular Kombucha Flavors (& How to Make Them)
Kombucha is endlessly popular around the world. With so many flavor options, there is truly something to suit everyone’s tastes!
Here are the 9 most beloved kombucha flavors that you should try:
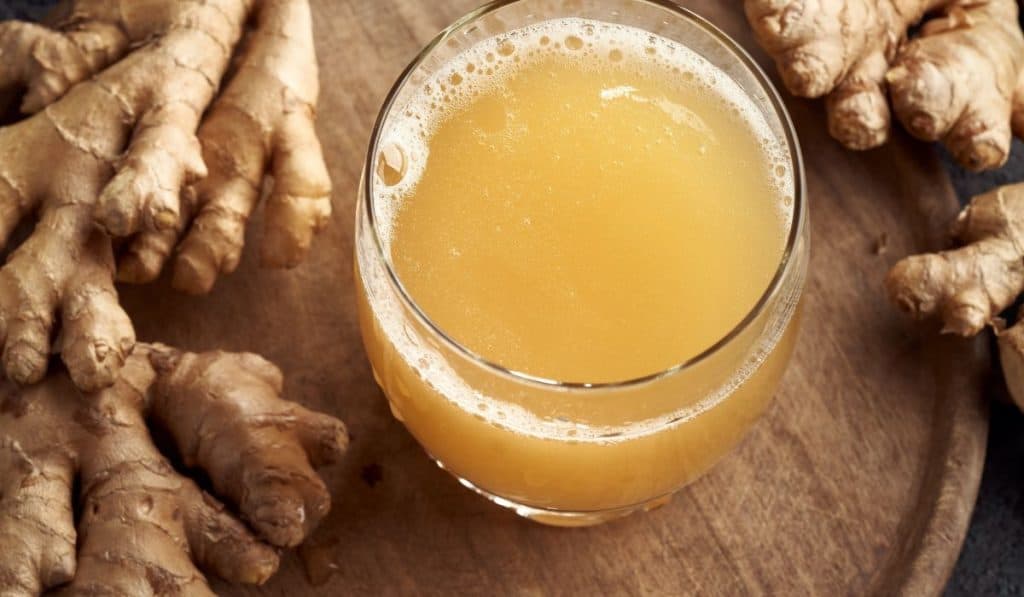
#1: Lemon Ginger
Anything with ginger in it has a unique taste. Ginger ale, ginger tea, gingerbread, you name it. All of them taste different, yet amazing. When ginger and lemon are together, it’s like a pair made in heaven.
Lemon ginger flavored kombucha is just like that. They complement each other like bread and butter and taste out of this world. Making lemon ginger kombucha is incredibly easy.
| Ingredients | Instructions |
|---|---|
| Juice of 1 lemon 1/2 Tbs chopped ginger 1 Liter kombucha | 1) Put the lemon juice and chopped ginger in a bottle. 2) Pour kombucha all the way to the top, leaving a two-inch space. 3) Let it ferment for at least seven days to get the best flavors. 4) Store it in the refrigerator and serve chilled. Use a strainer to sieve the ginger pieces if you like. |
#2: Chia Seeds
Chia seeds have amazing health benefits (these chia seeds on Amazon are a great value). They’re full of fiber, minerals, antioxidants, and omega-3 fatty acids. They can be consumed in numerous ways. When mixed with a batch of kombucha, the flavor goes to a whole different level!
Chia seed-flavored kombucha is a thick textured drink, completely different from what you’re used to imagine when thinking of kombucha. Making chia seed Kombucha is slightly different from second fermenting with fruit flavors.
Chia seeds soak up water and swell up. So, you can’t directly add them to kombucha and pack them in a bottle, as the bottle might explode. Here’s how to make it:
| Ingredients | Instructions |
|---|---|
| 1 Tbs chia seeds 1 Liter kombucha Fruit to taste (strawberry, mango, or raspberry work well) | 1) Hydrate the chia seeds slightly so that they soak up a little bit of water. 2) Ferment the kombucha beforehand with any favorite fruits of yours. 3) Mix the hydrated chia seeds with the Kombucha and store them in a fridge. Serve cold. |
#3: Ginger Beet
Beets are vividly colored vegetables with tons of vitamins and minerals. When bestowed the responsibility of flavoring kombucha accompanied by ginger, beets become a whole different thing. They are full of antioxidants and sugars, which amplify fermentation.
| Ingredients | Instructions |
|---|---|
| 1 beet, juiced or pureed 2 Tbs ginger, grated 2 Liters kombucha | 1) Put the beet juices or purees in bottles. 2) Pour the kombucha in and ferment for 3 to 10 days. 3) Store it in the refrigerator and serve chilled. Straining out the beet solids is recommended. |
#4: Strawberry Kombucha
Strawberries are a popular flavor choice all around. Strawberry ice cream, strawberry milkshake, strawberry pie, strawberry cake, you name it. So why not kombucha? You can make the most flavorful kombucha with just strawberries:

| Ingredients | Instructions |
|---|---|
| 1/2 cup strawberries, pureed 2 Liters kombucha | 1) Add the pureed strawberries to bottles and pour Kombucha, following the same method as before. 2) Ferment for 3 to 10 days. 3) Strain the strawberry solids and store the kombucha in a cold place. |
TIP: You can add other herbs, spices, or other fruits to lift the flavor even more. Ginger goes well with most kombucha flavors. Also, you can add a few drops of lemon juice to give the kombucha a nice twist!
#5: Blueberry Kombucha
Blueberry kombucha tastes incredible and is very easy to make. The taste, smell, and flavor of blueberries transcend all expectations when mixed with kombucha. Among fruit flavors, blueberry kombucha is one of the most popular around the world. They can also be combined with various herbs, but I will stick to the basics here:

| Ingredients | Instructions |
|---|---|
| 1 cup blueberries, boiled 2 Liters kombucha Lemon zest or grated ginger, optional  | 1) Boil the blueberries, which will allow the sugars to seep more freely and mix with kombucha. 2) Put the blueberries and 1/2 cup of water together in a stainless-steel pot and simmer them. 3) Once the mix becomes more viscous and reaches a gummy texture, add them with the kombucha in bottles. 4) Keep them in a dark place and ferment for 3 to 10 days. 5) After that, put them in the fridge for further consumption. You can add a hint of lemon zest or ginger to twist the flavor. |
#6: Zingy Raspberry Kombucha
I’m calling it zingy since that’s exactly what this flavor offers! This delicate mixture of raspberry, ginger, and lemon is full of liveliness and energy. Ginger is an all-time great when it comes to flavoring up drinks and giving them fizz with its natural yeast, and lemon juice is a perfect partner. Adding a drop of honey will boost the fermentation even more.

| Ingredients | Instructions |
|---|---|
| 1 cup raspberries 2 Tbs grated ginger 1 lemon, juiced 1 drop honey 2 Liters kombucha | 1) Mash the raspberries with a mortar and pestle. Once they are mashed into a pulp, set them aside. 2) Take swing-top bottles and put ginger, lemon, honey, and raspberry paste inside. 3) Pour Kombucha all the way to the top, leaving about 1 inch of breathing space for the carbonation. 4) Ferment for around 10 days. 5) Strain out the solids and store them in a fridge. Serve chilled for the best taste. |
#7: Spicy Apple Cinnamon
It’s almost astonishing how well the flavor of cinnamon goes with the sweet taste of apples. You can use Fuji, Honeycrisp, or Gala apples. Whatever you do, the end result is nothing short of toothsome kombucha that is full of flavors. This recipe will demonstrate how only a touch of cinnamon can enhance the flavor inside-out:
| Ingredients | Instructions |
|---|---|
| 1 cup apple, chopped 1-2 sticks of cinnamon 2 liters kombucha | 1) Pick your favorite apples. Chop the apples into small cubes. Apple juice or apple cider vinegar can be used instead for faster preparation. 2) Add the apples into bottles with a stick of cinnamon or two. You can grind the cinnamon and add the powder to yield better flavors if you prefer. 3) Pour the kombucha to the top, leaving an inch or so of headspace. Ferment for up to 10 days. Serve chilled. 4) No need to strain the apple solids as they taste delicious with the kombucha! |
#8: Mango Kombucha
The flavor of mangoes sets everything right, in my opinion! They are sweet, juicy, meaty, and yet one of the most delicious fruits gifted by mother nature. When combined with sour and tangy kombucha, the balance of flavor swings like a pendulum which you cannot help but love.
| Ingredients | Instructions |
|---|---|
| 1 cup ripe mango, mashed 2 liters kombucha | 1) Smash the ripe mango to a pulp using bare hands, or blend it in a grinder; whatever suits you. 2) Place the smashed mango in a large bowl to mix with the kombucha properly. 3) Put the mixture in bottles and ferment for 7 to 10 days (or more if you want more carbonation). 4) Straining out the solids is optional, but I recommend not to. Serve cold with crushed ice. |
#9: Blackberry Vanilla Kombucha
Who doesn’t like vanilla? This herb-derived flavor is second to none when it comes to making creamy, sweet, and succulent flavorings. When mixed with blackberry and infused into already fermented kombucha, the outcome is nothing you would expect. If you are into creamy, pie-like flavor, blackberry vanilla kombucha is just the thing you need:

| Ingredients | Instructions |
|---|---|
| 1 cup blackberries, frozen or fresh 1/4 cup water 1 Tbsp sugar 2 tsp vanilla extract 2 Liters kombucha | 1) Cook 1 cup of fresh or frozen blackberries and 1/4 cup of water in a pan to heat. Add the sugar when cooking. Once the berries reach a mushy appearance, turn off the heat. 2) Add the cooked berries to flip-top bottles along with kombucha and the vanilla extract. You can use vanilla beans if preferred. 3) Ferment for at least 3 days, but 10 days is recommended. 4) Strain out the fruit fibers if you wish, and serve chilled. |
I hope you love these recipes, and that some of these flavors inspire you to keep up kombucha making! Kombucha is a wonderful, healthy, and probiotic-rich drink that has amazing benefits. The possibilities of flavors are endless, and with fruits, herbs, and spices added, so are the health benefits of this wonderful fizzy drink!
Other than the 9 kombucha flavors that I’ve talked about above, there are plenty more. You can follow this guide or choose to make your own based on what your favorite fruits and herbs are.
I always like to enjoy a cold glass of kombucha in the afternoon when I need a little pick-me-up. Knowing mine is homemade with all of the good bacteria and lovely flavors I created myself makes drinking kombucha and planning my next flavor combination so enjoyable.
Need more kombucha tips? Look here:
Full Guide to Flavoring Kombucha: Step By Step

Kombucha is one of the most popular fermented drinks out there. Not only because of the wonderful nutritional value and unique taste; but also for its delicious and exotic flavors. You can flavor kombucha with a variety of combinations and it will taste great.
Kombucha is flavored mostly with fruits, which is an easy & tasty way to begin the flavoring process. Pick your favorite fruits, cut them into pieces, & put them into the bottle to ferment with the kombucha. Then seal the bottle & put it in a dark place for about 2-4 days.
At the end of this basic process, your favorite fruit-flavored fizzy kombucha is ready to drink! In this article, I’ll give you some tips to make the best kombucha flavors. These instructions will elevate your ‘kombucha mastery’ to the next skill level.
NOTE: Check out my post with 9 great kombucha flavor recipes for more ideas!
How to Flavor Kombucha
Kombucha is like a playground. You can go crazy with your play styles – but of course, within some boundaries!
Adding flavors to kombucha is called second fermentation. This process is undertaken after kombucha is made i.e. ‘the first ferment’. I’ve got more information on how to do that in this article. Once it’s made, your kombucha is ready for adding your favorite flavors. Don’t worry, this is a simple and quick step that’s explained in detail below…

Once your kombucha brew is fermented and ready for the second fermentation process; let’s talk about flavors and how to add them:
Step # 1: Choose Your Fruit
Choosing your desired flavor is the key here.
Popular fruits and herbs used to flavor kombucha:
- blueberry
- raspberry
- pineapple
- banana
- cinnamon
- rosemary
- ginger
- thyme
- basil
You can choose any single fruit or go for blends of flavors. For more complex flavoring, kombucha enthusiasts use a mix of fruits or flavors. Mixing multiple flavors isn’t difficult and they are popular for good reason!
Delicious flavor mixes to try:
- blackberry vanilla
- spiced apple
- lemon ginger
PRO TIP: Simple flavor mixes like lemon ginger, or blueberry cinnamon are great for beginners to start with!
Step # 2: Add Flavors to the Kombucha
Fruits can be added to kombucha in two ways.
- Adding chopped-up pieces of fruits
- Adding fruit extracts
You can use frozen, dried, or fresh garden-picked fruits. Using fresh fruits is highly recommended as they will give you the best flavors.
| Flavoring | Fruit to Kombucha Ratio |
|---|---|
| Fruit pieces | 1:9 up to 3:7 |
| Fruit extracts | 1:9 up to 2:8 |
NOTE: If you are using fruit juice, I suggest using fresh fruits to make the juice at home. Avoid buying packaged fruit juice from stores as they contain artificial flavor and preservatives that could interrupt the fermentation process.
Put the fruits first in the bottle, then pour kombucha leaving an inch or two of headspace. This space is required to accumulate dissolved carbon dioxide. Otherwise, the bottle might explode!
Step #3: Second Fermentation
The second fermentation is when the whole ‘flavoring up kombucha’ scheme comes together! After mixing the fruits with the kombucha, you can store them in your refrigerator or cooler for later consumption, or let them continue to ferment. That is why it’s called second fermentation.
First, you ferment tea with a SCOBY to make kombucha. Second, you ferment the kombucha all over again. To do that, store the bottles in a dark room at room temperature. Make sure the bottles are airtight. The second fermentation is when the kombucha gets fizzy.
Step #4: Sieve to Separate the Solids
Use a fine steel mesh strainer (I like this set from Amazon) to separate the kombucha from the solid fruits. Repeat the process 2-3 times to make sure that no solids remain. Then put the liquid back into the bottles and store them in a cool place.
Step #5: Tweaking the Flavors
You can tweak the flavorings if you wish. Know that the flavor quality depends on three things:
- Tea Type: Kombucha is all about flavors. The stronger the flavor, the better. Usually, tea leaves that have been oxidized for longer give stronger flavors. Black tea is more oxidized than any other tea, so try using those. You can also use green tea, oolong tea, or white tea.
- Length of Fermentation: The key to getting a strong unique kombucha flavor lies within fermentation time. If you want a strong and fizzy flavor, ferment it longer. The more you ferment, the more the sugar is converted to vinegar which gives the sour, tangy flavor while also acting as a preservative. (For more detail on how long to ferment for, check out my article here).
- Other Flavors: Try mixing two or three flavors together. Make your own flavor by mixing spices, fruits, and herbs together. See what works and what doesn’t. Who knows, maybe you might come up with the best kombucha flavor of all time!
TIP: You can add other herbs, spices, or other fruits to lift the flavor even more. Ginger goes well with most kombucha flavors. Also, you can add a few drops of lemon juice to give the kombucha a nice twist!
Common Mistakes to Avoid When Flavoring Kombucha
No matter how careful or meticulous you are, some common mishaps are bound to occur from time to time. Fermentation is a lengthy process that requires patience and diligence. Some mistakes might take place due to oversight or miscalculation. It happens!

Here are some common mistakes to avoid:
- Using Plastic Bottles: Plastic bottles are cheap and are taking over the world. We all know the downsides but can’t resist the urge to cut down some costs. Well, in this case, if you want the best out of your kombucha flavorings, you must stick to high-quality glass bottles (like these bottles from Amazon for example). Plastic bottles can develop an unpleasant ‘plasticky’ taste and smell in the Kombucha, which will ruin the flavor.
- Low-Quality SCOBY: Although this isn’t directly impacting the flavoring process, it sure has some indirect results. In short, SCOBY (symbiotic culture of bacteria and yeast) is what ferments the tea to make kombucha. So, it’s obvious that its quality will have a long-lasting effect. Be sure to use top-quality tea, preferably black.
- Not Maintaining the Right Temperature: When storing the kombucha after the second fermentation, make sure it’s at room temperature, which is around 68 degrees Fahrenheit (20 degrees Celsius). If the ambient temperature of the area you are in is higher or lower than that, try using an air conditioner or room heater to balance.
NOTE: Too-cold temperatures will inhibit the fermentation process, while a too-high temperature will impair the SCOBY’s function.
- Using Under-Ripe Fruits: Do not use under-ripe fruits, period. That’s the easiest way to put it. Unripe fruits lack flavor, so the flavors cannot ooze out of their surface. Using ripe fruits will give you the best flavors. Use overripe fruits if you can because the more ripe a fruit is, the more acid it produces, and acid is what we need to fire up strong kombucha flavorings.
- Too Many Flavors: Too many cooks spoil the broth, and too many flavors spoil the kombucha. Mixing multiple flavors can work well when flavoring kombucha, but don’t overstretch it. Try having two or three similar flavors altogether, or flavors that go well. Talk to kombucha experts, or consult the online community. Do not break it by the thing that was supposed to make it!
- Using Less Sugar: Sugar plays a pivotal role in kombucha flavoring. In fact, it single-handedly determines the flavoring. Bacteria and yeast ferment sugar to produce pyruvate, and in turn carbon dioxide. Carbon dioxide is then dissolved into the water content of the tea and produces carbonic acid. This acid is what gives us a sparkling taste!
QUICK TIP: Don’t use honey instead of sugar. When it comes to sugar, use lots of it. More sugar means more carbonation and a fizzier taste! And remember, a lot of this sugar will have been used up by the fermentation process, so you aren’t consuming as much as you have put in.
How to Properly Consume Kombucha
Kombucha is considered a health drink despite having unparalleled amazing flavors. Being methodical in your consumption of kombucha can bring the best results.

Here’s what I recommend:
The Right Amount
Don’t go around drinking kombucha in the same amounts as you would water. Even overconsumption of water can harm your body. When drinking for the first time, take a small sip or two to get used to the flavor. They are full of healthy bacteria and probiotics, so the impact on your stomach will be noticeable. I recommend 1/2 cup per serving for the first few days.
First Thing in the Morning
Kombucha can easily replace morning tea or coffee. It contains just the right amount of caffeine to kickstart your day. Also, the probiotics will help in digestion throughout the day and give your gut a happy feeling.
After a Big Meal
If you feel slightly bloated after a heavy meal, kombucha can be your rescuer! Having kombucha after a big meal will set your stomach straight and help diminish the bloated and uneasy feeling.
With the Right Food
Kombucha goes really well with various kinds of foods. You can try similar flavors of food and kombucha, or go for total opposites. Regardless of what flavor you choose, I can assure you that you’ll like it. You can try fruit-flavored Kombucha with sandwiches or salads; that’s a combination I like!
TIP: If you have a recipe with cheddar cheese in it, like pizza or a burger; try flavors like pomegranate or blueberry, it compliments well!
Tips & Tricks for Top-Notch Sparkling Kombucha
Despite doing everything right, your kombucha might turn out slightly less fizzy, or the sourness is a bit too much. Sometimes, things might not add up the way you expected them to.
Here are some pro tips for guaranteed superior quality sparkling kombucha:
- Use Fresh Fruits: Always use fresh fruits. Either bought from stores or hand-picked from the garden. Fresh fruits are packed with flavors. They’ll yield the best results when flavoring kombucha. Frozen or dried fruits are good too, but fresh fruits are best. They may be slightly more expensive or harder to find, but that little extra effort is totally worth it.
- Ferment for a Long Period: if you want more fizz, ferment for a longer period of time. The kombucha is already crammed with bacteria and yeast from the SCOBY, so all it needs is the sugars to be fermented. Ferment for at least 3 to 4 days for strong, sour, and fizzy flavors that kombucha is loved for!
- Use a Swing-top Bottle: Swing-top bottles are specially made bottles for carbonated drinks. It can hold the carbonation even after being opened, unlike traditional soda bottles. As you’re not going to drink all of it at once, using a swing-top bottle is a must to preserve the carbonation. (Here’s an example of a swing top bottle on Amazon).
- Use Fruit Puree: If you’re using fruits instead of fruit juice, try using fruit puree since they easily extract flavors. They give the probiotics a boost to ferment faster and produce more carbonation.
- Don’t Hate the SCOBY: When making kombucha for flavoring, do not take out the SCOBY too soon. Even after the process is done, let it float on the tea for as long as you can. It appears slimy, gooey, and doesn’t exactly look appealing. But the SCOBY is playing the most crucial role here! The more time it is in the tea, the more fermentation there will be for making an amazing tasting, bubbly brew!
NOTE: Swing-top bottles are also known as flip-top bottles, so whichever you choose should work, as long as it is air-tight.
Conclusion
The only expertise you need when flavoring kombucha is knowing the flavors you love. Just remember; the more fruits, the more flavors. Other than fruits, you can use various herbs and spices separately, or in a mix to add some tang to kombucha. There isn’t any hard and fast recipe to follow. You can go wild with the flavors of whatever you’re craving.
Start with the flavors above as they are the most widely used ones, then make them your own as you learn. I’ve also got this article with 9 popular flavor combinations if you’re after some ideas. This guide, with everything I’ve included; should be your gateway to delicious homemade kombucha flavors.
Interested in more fermenting recipes and tips? Start here:
- Water Kefir Guide
- How to Ferment Cabbage
- Can You Mix Different Kefir Grains?
- 10 Ways to Ferment Food Faster

Does Canning Save You Money? Here Are The Numbers & a Full Guide
In today’s fluctuating market of food prices, everyone is looking for a way to cut costs. Canning food has become popular for good reason, as people discover how entertaining and cost-effective it can be.Â
Canning food saves money. Costs can be cut by buying fruit, vegetables & meats at low prices in bulk when they’re in season. Canning empowers you to have more control of what you eat since you can choose what ingredients to use when canning. It’s a great way to preserve food for extended periods.
In this guide, I’ll go over all aspects of canning foods, including the following:
- Pros and cons of canning
- How-to can properly
- Risks and precautions of canning food
- A monthly guide for what to can when to get the biggest bang for your buck
- Economic savings vs time balance of home canning.
Canning is something that I love to do, and I hope you find facts and wisdom here that help you with your home canning adventures!
Canning History
In 1809 a French gentleman named Nicolas Appert invented the process to keep food from spoiling by preserving it in an airtight sealed container. A practice called canning.
Only after the Mason jar was patented were people using jars instead of tins to pickle and store foodstuff, but the name stuck nonetheless. Walk with me through this fascinating pastime activity with so many people jumping on the canning wagon.
What Is Canning?
Canning is but one of the ten methods of preserving food safely at home. Food-borne illnesses can arise from unsafe food storage if not done using proper precautions. Canning consists of safely removing air and sealing jars of food to store it for an amount of time without the need to freeze or refrigerate it.
Does Canning Save You Money?
Canning is a great money saver! Including cheap stock into your budget, the most expensive item on your list will be your time in making the canned goods. Canning will save dollars per batch if planned properly.
Here are some ways to save money with canning:
- Know how to look for bargains on fresh produce.
- Buy in bulk and can your groceries while they’re fresh and blemish-free.
- Browse farmers’ markets and find cheap sales on barrels of goods.
- Time your canning activities during their harvest season.
Does Canning Save You Time?
Time is the only expensive ingredient in the art of canning foodstuff. If you are like me, who enjoys chopping and dicing in the kitchen, you will find the preparation of canning goods fun and the time will fly by.
Preparing and pre-cooking food to store in jars does take some time and effort, and you should schedule at least a few hours in your day for the task.
Wash the fruit and vegetables properly and use only the best of the batch. Make sure to inspect the items for discoloration and imperfections and only include the prime of your purchase.
How Much Does It Cost To Start Canning?
Contrary to what people might expect, starting up your canning hobby is not that expensive, except for the star role-player.
A good stock pot like this one from Amazon is a practical once-off purchase. It’s non-stick, dishwasher and oven safe, and has a 12-quart capacity, making it ideal for cooking family-size meals.
If you invest in a properly sized appliance, you will never need to buy another.
A few items are vital to operating efficiently, but a lot of them you might already own. Apart from the flat pieces for the lids, almost everything will be bought once and reused every season. Let’s take a look at some options of equipment and it’s approximate cost (links take you to the recommended products on Amazon):
| Equipment | Cost |
|---|---|
| Pressure canner | ~ $65 – $100. |
| High-quality pressure canner | ~ $250 |
| Water bath canner | $20 – $45 |
| Mason jars that use two-piece lids | $7 – $15 per dozen |
| Flats for the lids | $2 – $3 per dozen, up to $30 per 100 |
| Canning starter kit | $17 – $25 |
Another option is to buy the pieces of a starter kit separately. Here are the approximate costs for these items (Again, the links take you to the product on Amazon):
- Jar lifter: $7 – $15
- Funnel: $5 – $8
- Tongs: $8 – $14
- Lid lifter: $3 – $9
- Headspace measurer: ~ $5
Should You Can If You Have Your Own Garden?
Imagine investing all that time and effort in growing your fresh vegetables and letting them go to waste because it’s simply too much for you and your family to consume!
The solution is to preserve the fresh produce so you will be able to enjoy it for the following year and avoid the heartache of throwing away the beautiful fruit and veggies you worked so hard to grow.
What Are The Benefits Of Canning?
Canning can bring such joy to you and your family. Not only will you be proud of your canned goodies, but it’s so convenient to have ready meals at your fingertips. Here are some more benefits of canning:
- A Stocked Pantry – It gives peace of mind to have groceries ready to use in this time of wavering costs.
- Convenience – Having a pantry filled with delicious canned goods prevents you from having to make a store run every two days. Shop right in your pantry!
- Protects From Rising Food Costs – Why buy canned food when canning the same items will be so much cheaper? Purchasing food when they’re in abundance generally means reduced costs. Canning and using them will cut your grocery budget.
- A Sense of Achieving Something – Offering homemade canned food for your family to enjoy at mealtimes gives you a sense of accomplishment after laboring to prepare your own recipes.
- Confidence in The Ingredients -You’ll find joy in creating your recipes, putting together fresh ingredients, and knowing exactly what is in the food you are eating.
- Relaxing Pastime – Doing chores in the kitchen can be a form of relaxation and meditation. Chopping, dicing, and blending the ingredients gives hours of introspection and satisfaction.
Are There Disadvantages To Canning?
As with most things, there are a few disadvantages to canning. Although I feel the benefits here outweigh the costs, here are a few disadvantages to consider before you take on this project:
- Glass jars can break compared to the durable cans you buy at the store.
- Unlike tins, the seal of a glass jar can crack, causing your canned food to spoil.
- Canning can be a laborious chore that takes time in the kitchen.
- Improper practices can lead to contracting food poisoning from spoiled food.
- Since most harvests are plentiful during summer, this is the best time to do your canning. The heat in your kitchen can increase dramatically, urging you to use the air conditioning more often.
- Regrettably, canned foods are not quite as tasty as the fresh versions.
- Unfortunately, there is a loss of nutrients during the process of canning.
- Investing in startup appliances will make a notable dent in your pocket.
- Storing the finished product will require sturdy shelving, and the items are quite heavy and bulky to move around.
6 Basic Steps To Proper Canning
Canning is a precise process that requires knowledge, attention, and thoroughness to avoid contracting illnesses like botulism. Depending on what you want to can, this process may vary, but the basic outline stays the same:
Step #1: Preparation
The preparation process differs depending on what you are canning, whether it’s meat, vegetables, fish, or fruit. But all items require a specific boiling point when cooking the ingredients to ensure they are properly sterilized.
Step #2: Container Sterilization
The importance of this step is critical. Sterilize the jars and lids by submerging them completely in a pot of boiling water and letting them soak in the rolling boil for at least five minutes.
Step #3: Filling, Cleaning, and Sealing
Filling – Unless the recipe instructions differ, remember to fill the jar to at least a quarter-inch from the top; this is called headspace.
Cleaning – After filling the jars, be sure to wipe the top of the jars with a paper towel dipped in the relevant preserving agent used in the recipe. This may include brine, vinegar, or lemon juice.
Sealing – Lastly, you will need to screw on the lid over each seal and check it by pressing down and making sure it doesn’t move. That way, you know it’s sealed properly.
Step #4: Processing
This step requires you to boil your jars of food in a water bath, a steam canner, or a pressure canner to reach full sterilization. The jars need to be fully submerged and need to be boiled for a minimum of ten minutes.
When this is complete, you will need to remove the jars with a pair of axenic tongs or jar lifters (I like these jar lifters from Amazon) and place them on a sterile surface to cool.
Step #5: Seal check
When the jars have been boiled, you will need to check once again that it’s fully sealed by pressing down the lid. This test is of vital importance. The contents of unsealed jars could spoil over time and make you very sick.
Step #6: Storage
The purpose of canning is to safely store food without the need to refrigerate or freeze it. However, there are still certain practices that add a little more shelf life to your products. For best results, avoid direct sunlight, store it in a cool, dry place, and stay away from damp basements or spaces close to heat sources.
Safety Considerations for Canning
Getting into canning food is a fulfilling experience, but be careful of the following:
- Canning goods requires working with scalding hot items. Take the necessary precautions not to burn. Handle them with gloves or protective gear. I like these gloves (Amazon link), as they allow a lot of freedom of movement, making it safer to handle your hot items.
- Not having the correct equipment presents a chance of not working with precision, but if you research and acquire the right utensils before you take up this hobby, you can avoid spilling, breakage, and unnecessary product loss. (This is one of the advantages of buying a canning set rather than individual items, like this one on Amazon).
- To upscale your production enough to sell canned items commercially, you will need to check with your local authorities to get sufficient rights and licenses.
- The main risk of canning food items is the possibility of contracting botulism (food poisoning). Here are some botulism risk factors to consider:
- Equipment isn’t sanitized properly
- Jars are not sealed completely
- The temperature of the boiler is not high enough
- The recipe isn’t followed to the letter
Botulism is a highly durable bacteria that can survive the sterilization process, contaminate the food, and make someone paralyzingly ill. So it is imperative that the proper canning processes are followed and checked every time.
Is Canned Food As Good As Fresh?
- The most evident difference between canned food and fresh food is that they differ in taste. Canned food is not as flavorful as fresh ingredients.
- Canned food also loses a percentage of its nutrients through the canning process, and its sustenance value decreases when stored.
- To make canned food last longer, we have to add certain preservatives like salt, sugar, and vinegar, making the canned food high in sodium and syrups that aren’t ordinarily good for you.
Can You Can Food Without Preservatives?
To avoid food from losing its taste and color, preservatives are added to the canning process. Not only does it keep the food tasty, but it reduces the risk of food-borne diseases. Food starts to spoil when it is exposed to oxygen. Antioxidants are added to the recipes to stop this from happening.
The most common preservatives you will find in your canning recipes are:
- salt
- sugar
- vinegar
- ascorbic acid (like vitamin C powder)
- rosemary extract
How Long Should Canned Food Be Kept?
Typically, unopened canned goods should be able to be kept for up to one to two years if stored in a cool, dry environment. It’s a prerequisite that you date and name the items properly to avoid getting confused with old stock, especially if you can quite frequently.
After the expiry time, the food doesn’t turn bad. It gradually loses its flavor and nutritional value. It’s not the safety that comes into question, but the quality of the food.
After the container is opened and the product comes in contact with oxygen, it starts to deteriorate. Low-acidic pressure canned goods (like carrots, corn, and green beans) should be used up in two to three days and stored in the fridge.
High-acid foods last up to a year in the fridge (like pickles, relishes, and chutneys). Sugar-free jams and jellies made with pectin should last up to four weeks in the fridge. Something like salsa will last up to 18 months.
TIP: To retain the quality of your canned items, you should store your jars in a dry area with a constant temperature of about 50° to 70° F (10° to 20° C).
What Are The Easiest Things To Can?
Even though it all depends on what type of canning method you apply, a few fruits and vegetables stand out on the simple and popular scale:
| FRUIT / VEGETABLE | METHOD | PRESERVATIVE |
|---|---|---|
| Tomatoes | Water bath canner | Lemon juice |
| Cucumbers | Water bath canner | Vinegar |
| Beans | Pressure canner | Salt |
| Corn | Pressure canner | Salt |
| Stock | Pressure canner | Salt |
| Fruit | Water bath canner | Sugar syrup |
| Squash | Pressure canner | With or without salt |
| Leafy greens | Pressure canner | With or without salt |
| Asparagus | Pressure canner | Salt |
| Carrots | Pressure canner | Salt or sugar |
What Can’t Be Canned?
Unfortunately, as with any rule in life, there are exceptions. Whether they are too soft to be pressure canned or if they contain ingredients that will disrupt the heating process, the following foods are not optimal for canning:
- Cauliflower and broccoli – They come out too mushy and unappetizing.
- Cabbage and lettuce – They lose most of their taste and consistency. It’s best to pickle them instead.
- Olives, artichokes, and eggplant – They become discolored and unpalatable and are better pickled.
- Squash – This is too soft to be canned and would be much better frozen.
- Sweets – Like marshmallows and caramel; they contain plenty of fat which will interfere with the heat distribution process.
- Milk and other dairy products – Like cheese. They have some of the lowest acidity levels and require extra care to exterminate all botulism spores.
- Avoid canning grains – Like oats, barley, crackers, bread, dough, and rice. Their interior parts contain very little oil and will struggle to retain heat. Heating the grains to such a high temperature destroys the nutritional value and still won’t be hot enough to kill bacteria.
- Pasta and noodles – They will practically disintegrate when they are put through that much pressure and heat.
- Cornstarch and flour – They break down acidic products, which negates the sterilization process to kill the germs.
- Nuts – They contain too much oil. The oil will coat and protect the botulism spores against the heat.
What To Can When?
Here is a short guide on what to can in which season you live in the northern hemisphere. The list consists of typically cheaper items in the specified months because they are in season and readily available:
| MONTH | VEGETABLES | FRUITS |
|---|---|---|
| January | Cabbages, leeks, broccoli, cauliflower | Oranges, grapefruit, tangerines, tangelos, lemons, papayas |
| February | Broccoli, cauliflower | Oranges, grapefruit, lemons, papayas |
| March | Broccoli, lettuce | Pineapples, mangoes |
| April | Zucchini, rhubarb, artichokes, asparagus, spring peas, broccoli, lettuce | Pineapples, mangoes |
| May | Okra, zucchini, rhubarb, artichokes, asparagus, spring peas, broccoli, lettuce | Cherries, pineapples, apricots |
| June | Corn, lettuce | Watermelon, strawberries, cantaloupe, cherries, blueberries, peaches, apricots |
| July | Cucumbers, tomatoes, summer squash, corn, green beans, lettuce | Watermelon, strawberries, cantaloupe, blueberries, peaches, apricots, kiwi, raspberries, plums |
| August | Cucumbers, corn, eggplant, tomatoes, summer squash, green beans, lettuce | Watermelon, strawberries, cantaloupe, blueberries, peaches, apricots, kiwi, raspberries, plums |
| September | Eggplants, pumpkins, tomatoes, spinach, lettuce | Grapes, pomegranates |
| October | Pumpkins, winter squash, broccoli, spinach, lettuce, sweet potatoes | Cranberries, apples, pomegranates, grapes |
| November | Pumpkins, winter squash, sweet potatoes, broccoli, mushrooms, spinach | Cranberries, oranges, tangerines, pears, pomegranates |
| December | Sweet potatoes, mushrooms, broccoli, cauliflower | Pears, oranges, grapefruit, tangerines, papayas, pomegranates |
Proper Canning Practices You Should Know About
The surfaces of fresh produce are coated with microorganisms that attack the bruised and broken skin. They spoil the fruit and vegetables and make them less desirable to can.
Make sure you take note of the following guidelines to circumvent wastage and keep bacteria out:
- Carefully select and wash fresh produce.
- Peel some of the fresh foods if and when required.
- Hot packing many food types, (more on this below). Stick to their recipes
- Adding acid preservatives (like lemon juice or vinegar) to some foods.
- Only use uncontaminated jars with self-sealing lids.
- Correctly process the jars in a water bath or pressure canner for the required period.
- Do not try to reseal the containers if they didn’t seal. The product should be stored in the fridge and used in the allowable time.
Hot Packed vs. Raw Packed Canning Methods
Different foods prefer different methods of packing into their jars. Meat is an example of packing raw whereas tomatoes can be either raw or hot packed.
The most important part is that whether you pack raw or hot, the liquid added to the product has to be boiling point hot, and so do the jars since the focus of canning is to sterilize and store fresh produce properly.
It is always best to stick to the recipes as much as possible to avoid spoilage of canned food.
- During raw pack canning, the hot jars are filled with cold or raw food and then topped with boiling syrup, water, or juice. This step is followed by sterilizing the jars in a water bath, an atmospheric steam canner, or a pressure canner.
- Hot packing is when the food is already fully or partially cooked before filling the hot, clean containers. It is the best method for a firm or crispy food since you will fit more food into the jar.
This is also the preferable way to ensure that most air is removed from the jars. As with the raw method, you must still process all food jars for at least 10 minutes to ensure they are sealed.
3 Methods Of Canning
Here are the three main methods of home canning food. All three methods are not to cook the food, but basically to heat the food enough so the bacteria will die and the lid will seal:
- Water Bath Canning
This is where you would use a huge stockpot that will fit a few jars. The pot must have a lid, be large enough for the jars to sit on a canning rack (or any other material making sure the jars do not touch the bottom), and be covered with at least two inches of water.
This method is used for preserving high-acid foods such as fruits, jams, jellies, tomatoes, pickles, and relishes. - Steam Canning (or atmospheric steam canning)
This involves a heat process including steam, but without the pressure and can also be used for acid foods. This method uses much less water and energy and reaches the desired temperature quicker than the boiling water canner. - Pressure Canning
This can only be done in an appliance called the pressure canner, which uses high temperatures and high-pressure steam. This method is mostly used for food with a higher pH level.
Which Method Of Canning Should You Use?
The processing method all depends on what kind of food you are canning.
All methods prevent the growth of the botulinum bacteria, but the bacteria tend to grow quicker in certain foods with a low acidity level (with a pH balance higher than 4.6). Examples include:
- meats
- seafood
- poultry
- most fresh vegetables (except for tomatoes)
The botulinum germ is a very tenacious microorganism and, even at boiling temperatures, can be difficult to eradicate.
TAKE NOTE: The lower the acid level in the food, the longer it needs to be processed in the pressure canner at about 240° to 250°F.
- High acid foods can be safely sterilized in a water bath because the acid balance in the food is much less hospitable for the botulinum bacteria to survive.
- If low-acid foods are processed in the boiling-water canner, they will have to be processed for between seven to eleven hours.
Conclusion
If you’re thinking about taking up canning as a hobby, it is probably the best idea you’ve had this year!
Not only will it save you money in the long run, but you’ll also have a huge variety of canned goodies ready to bring out for mealtimes.
It will save you from having to visit the grocery store every two days, and you’ll even save time on preparing dinner!
Here is my guide about the pros and cons of canning tomatoes!

Water Kefir Guide: Benefits, Recipe, FAQ’s & More

Water kefir has been gaining popularity very rapidly for its immense health benefits recently. If you’re a health nut and are researching to add some healthy drinks to your diet list then I’m sure you’ve heard of water kefir. But what is it? And what are its health benefits?
Water kefir is a traditional beverage that is made by culturing water, sugar, and fruit with a starter culture. This mixture is then left to ferment for 24–48 hours. It’s a low-sugar fizzy drink that is rich in probiotics and aids in boosting gut health, energy, and immune function.
There’s a lot more to learn and love about water kefir, and in this article, I’ll give you a complete guide to the many facets of this magical home-brew drink. I’ll include:
- the many benefits of water kefir
- what it is
- how to make it yourself at home (recipe included!)
- other frequently asked questions about it
You’ll learn everything there is to know about water kefir and will be guided with enough knowledge to set your foot in the right direction.
Related: Water Kefir vs Milk Kefir: The Differences & Which is Best?
What Is Water Kefir?
Water kefir is a fermented, carbonated beverage that originated in the late 1800s. It’s also known under the following names:
- tibicos
- California bees
- Japanese water crystals

Water kefir is produced by combining water kefir grains and sugar water, while regular kefir is made from cow, sheep, or goat milk.
FUN FACT: Although they are called kefir grains, they are not actually grains! They take that name due to their grain-like appearance.
Water kefir grains are a grain-like culture of bacteria and yeast. When these grains are mixed with sugar water, and fermented for 24–48 hours, it produces a carbonated beverage that’s rich in probiotics and beneficial bacteria.
Aside from being a tasty beverage, water kefir is also packed with probiotics and other health benefits, making it a great addition to a healthy and nutritious diet.
Probiotics are a type of good bacteria found in your gut. They play an important role in everybody’s immune function and overall health.
DID YOU KNOW? Water kefir is a better source of probiotics than yogurt because it contains a much more diverse range of bacteria and yeast!
Some research shows that kefir grains may contain up to 56 different bacterial and yeast strains, including:
- Lactobacillus
- Lactococcus
- Streptococcus
- Leuconostoc
To name but a few. All are friendly, and all are great for gut health.
How to Make Water Kefir at Home
Making water kefir is a very simple process that you can easily do in the comfort of your own home. Here’s a step-by-step detailed guide on making your own water kefir at home:
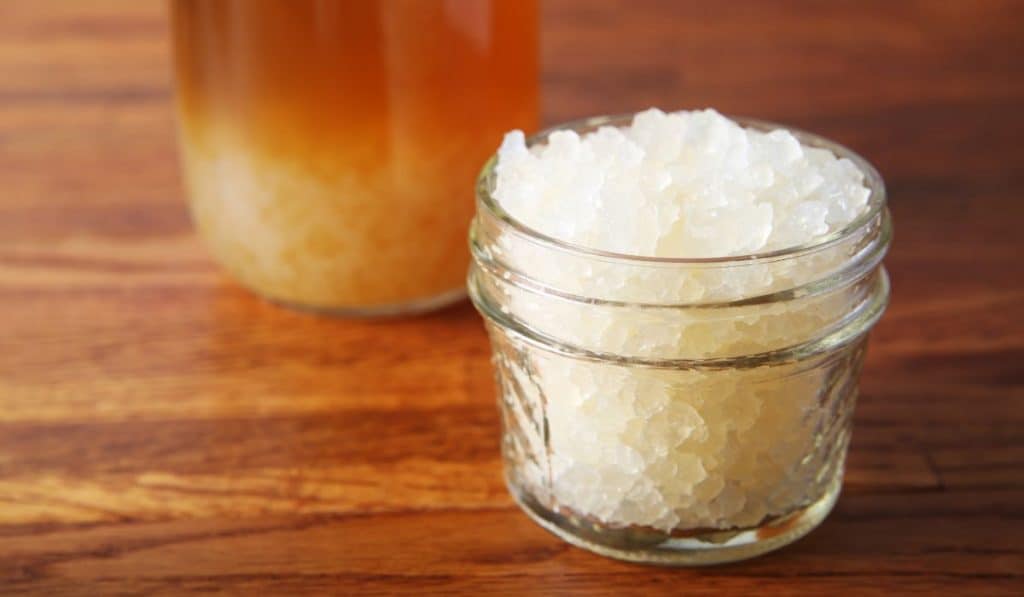
Step #1: Choose Your Kefir Grains
There are three types of water Kefir grains available in the market. These are; powdered, dehydrated, and live kefir grains.
- Powdered kefir grains – These have an unlimited shelf life and are ready to use but they do not multiply. So, their supply becomes limited.
- Dehydrated kefir grains – These also have an unlimited shelf life, they also multiply and can sustain themselves too. They need re-hydration before use. I like these dehydrated kefir grains from Amazon.
- Live kefir grains – Also known as hydrated kefir grains. They come in sugar solutions and are ready to use from the get-go. But they cannot be kept indefinitely so their shelf life is limited unless you plan to keep using them.

TIP: It’s best to get the dehydrated kefir grains, as they not only have an unlimited shelf life, but you can also maintain them and have them multiply. This is ideal if you are looking to keep making water Kefir.
Step #2: Activate The Kefir Grains
Activating the Kefir grains means rehydrating the dehydrated kefir grains. This gets their biological processes up and running again. This process takes 3 to 4 days to complete. After that, the revitalized Kefir grains are ready to use in your first recipe for water kefir.
1. You will need 1 liter of dechlorinated water that is warm.
2. Put that in a non-metal container. Plastic or glass is preferable.
3. Now you will need to put 100 grams of sugar in that water and stir until the sugar is all dissolved.
NOTE: You can use any kind of sugar, however, raw cane sugar, maple syrup, coconut sugar are preferable to more processed sugars. It means your water kefir has a little more nutrition to work with, and it also adds better flavor.
4. After it has cooled off, put one tablespoon full of water kefir grains in it. Do not close the lid as your Kefir grains need to breathe. Cover the top with a piece of cloth or paper towel and leave it be for 3 to 4 days.
IMPORTANT: Warm water will kill the kefir grains so you need to wait until the sugar water solution is completely cool before moving onto the next step.
5. After 3 to 4 days, your kefir grains will be activated and will be ready to use. Strain the kefir grains and separate them.
6. Throw away the re-hydration liquid. You are now done activating your water kefir grains.
Step #3: The First Fermentation
Making water kefir requires 2 steps of fermentation. The first phase happens with the grains still in the solution. In this phase, the fermentation is faster. The first fermentation will be a lot similar to how you have activated your kefir grains.
1. You will need a similar 1 liter of water and 100 grams of sugar.
2. Dissolve the sugar in warm water in a non-metal container and wait for it to cool off. Warm water can kill the grains so it is again a must for you to wait.
3. After it has done cooling off you need to add 1 tablespoon of activated kefir grains.
4. Now comes the flavoring. You can try many different types of fresh and dried fruits for adding nutrients and flavor to your water kefir. The kefir will ferment even without fruits but adding fruits will make it more nutritious and tastier.

NOTE: If you put more kefir grains, your water kefir will ferment faster. You will have to add more sugar and fruits but it will happen faster. So, if you want quicker results, you can try this out.
The amounts I am including in this guide are the most common and tested ones. Some common fruits added to water kefir are:
- fresh slices of lime or lemon
- grapefruit
- raspberries
- strawberries
- cherries
- apple slices
Dried fruits can also be added for more nutritional value. The following are all very popular options:
- dates
- dried figs
- dried plums
- raisins
TIP: Putting a slice of lemon or lime, no matter what sort of flavoring you are going for is a great idea. The acidic properties of lemon/lime prevent the growth of kahm yeast, which is not bad for you, but can affect the flavor and make it bitter.
5. After you’ve put all this together you will need to cover the container with a paper towel or a piece of cloth – I like this cheesecloth from Amazon. You don’t want to seal it because it needs to breathe, hence using the cheescloth or paper towel. Anything loose that covers the kefir from bugs and contamination, but still allows it to breath.
6. Leave the container for 2 to 4 days on your kitchen counter or somewhere similar. If the weather is warm, then 2 to 3 days is enough. But if it’s cold, then you might need to keep it for up to 4 days.
Step #4: Check for Flavor and Straining
Now that your first phase of fermentation is done, you need to check your water kefir’s flavor. The more fermentation that happens, the tangier and less sweet it gets. So there’ll be a sweet spot for you to stop the fermentation.
Ideally, you want it to taste only subtly sweet and tangy. Depending on your taste, you might prefer it a bit sweeter than tangier and vice-versa. If it tastes too sweet and you want it to taste tangier, then leave it out for a bit longer.
Once you’re satisfied with how your water kefir tastes, you can move on to straining and separating the water kefir grains from your water kefir liquid. You can save a bit of that liquid for when you store the water kefir grains.
NOTE: If your water kefir still tastes very sweet and not tangy at all after a few days, then this might be a sign that your kefir grains are not alive and healthy.
Step #5: The Second Fermentation
Water kefir requires two rounds of fermentation. The first, we’ve just mentioned. The second phase happens without the kefir grains through the bacteria present in the water. This step is where you would add further flavoring and carbonation.
You need to strain your water kefir liquid into a bottle or a jar that you can seal. This step does not require outside air so you would need to seal the container. However, there will be gasses building up inside so occasionally you will need to let them out.
In fact, it’s a good idea to leave a bit of space in your container rather than fill it to the brim, so that there is space for the gases to come out.

Some people leave the water kefir liquid as-is into the bottle while some decide to add more flavor. You can add bits of fruit and herbs or even flavored syrups into the mix for extra flavor and carbonation.
Inside the sealed container, the flavors will start to build up and so will carbonation. Carbonation is your main goal here. It will make the drink bubbly and fizzy, and pleasant to drink.
You will need to let the air out occasionally. Otherwise, the pressure can be too much and the lid might explode. Let the air out every 6 to 8 hours, this process is called burping.
After 24 to 36 hours, your water kefir should be ready. You can now store it, drink it directly, or mix it with other ingredients to create new drinks!
Step #6: Storing Your Water Kefir
If you leave your water kefir out on the counter top for long enough, it will eventually turn into something akin to vinegar. It doesn’t technically go bad. However, you do want to consume it in full before the taste becomes less desirable.
You can store water kefir in airtight jars or bottles. Some people prefer this drink chilled, while others prefer it at room temperature. Regardless of temperature preference, refrigerating does make it last quite a bit longer.
To properly store the drink, you need airtight jars or bottles. Glass jars or bottles are preferable to other materials because they don’t react to the acidic nature of water kefir. These are great from Amazon.
You can leave your water kefir out at room temperature, and it will stay good for about 3 to 4 days, while in the fridge it can stay good for 8 to 10 days.
NOTE: Water kefir does not last for months on end so you should be careful when making it. Don’t make so much, that you are unable to finish drinking it all. It’s best to make water kefir from the fresh ingredients you have to enjoy new flavors continuously.
Maintaining Water Kefir Grains
Water kefir grains are very much alive and they need to be fed and kept alive for maintenance.
Water kefir grains need to be fed with sugar water frequently so they can be alive and ready for your next batch of water kefir.
The ideal situation to maintain live kefir grains is to keep them at room temperature, submerged in sugar water. You will need to feed them with a bit of sugar every 3 to 4 days. However, if you go away or forget to feed them, they have the risk of dying.
You can put them in the refrigerator for a slower fermentation process. The cold temperature will slow down the rate of fermentation and a fresh sugar water solution can last them even longer.
TIP: If you need an even longer-term storage option, then you will need to strain them and put them in a plastic bag or plastic container, and put them in the freezer. They can last months in this hibernated state.
Another thing to note is that kefir grains will definitely multiply so you might end up having too many grains!
At that point, you could easily dehydrate them for later use. Use a dehydrator or spread them out in a tray and place them somewhere with good air circulation. As long as the temperature doesn’t go over 130 degrees Fahrenheit, they will not die.
Once dry, they can simply be stored away in an airtight container, and re-hydrated at a later date!
Benefits of Water Kefir
Many studies show that water kefir is one of the best sources of probiotic strains. It contains over 50 strains of good bacteria and yeast. Here are just some of the many benefits that you can get from regularly drinking water kefir:
- Wayer kefir contains friendly bacteria and yeast that boost the health of your gut and immune system.
- Water kefir is known to have anti-inflammatory and anti-allergic effects. It helps your immune system better regulate itself; the probiotic strains help restrain any negative immune responses and therefore prevent viral infections and allergies.
- Some of the common families of beneficial bacteria found in water kefir are Streptococci, Lactococci, Leuconostoc, and Lactobacillus. They boost intestinal functions and help gut health.
- Studies have shown that there is a chance that water kefir may even help prevent cancer cells from growing. A lot of tests have shown that kefir grains reduce the growth of many kinds of cancer cells including breast cancer and colon cancer.
- Water kefir is also helpful to people who are trying to control their diet. The amount of sugar used to make the water kefir is not present in the final product, making it a low-calorie beverage that can help with weight loss.
- In general water, kefir fits into all sorts of dietary plans. It is a completely vegan and vegetarian beverage that is low in calories.
- It tastes good and it has no lactose or gluten. And even if you are allergic to some fruits, you can just use other fruits and herbs for flavor so there are absolutely no restrictions whatsoever.

Other Probiotic Drinks Similar to Water Kefir
There are many other probiotic drinks that are garnering popularity recently such as milk kefir, kombucha, apple cider vinegar, and coconut kefir. Here’s a quick summary of each one:
- Milk kefir – This is the richest in probiotics from all of these options, but it also has the most calories. In addition, some people are lactose intolerant, which means they may not be able to consume this, (depending on how sensitive they are to lactose).
- Coconut kefir – This one is much more similar to water kefir and also contains a lot of key vitamins, although it is still a bit richer in calories that water kefir.
- Kombucha – This is actually the biggest “competitor†to water kefir when it comes to popularity. It’s made by brewing green or black tea with a culture of bacteria and yeast. Just like water kefir, it can also be packed with a variety of tangy and fizzy flavors, and of course, many probiotic strains.
- Apple cider vinegar – This probiotic solution has a lot of health benefits (in its raw, unpasteurized form), but packs a bitter taste and strong smell. It’s best to take this one in small diluted shots rather than as a pleasant beverage on it’s own.
Frequently Asked Questions About Water Kefir
How Long Do Kefir Grains Live?
Without adequate care, they can die off quite soon. But if you take good care in maintaining them, they can live on forever by reproducing.
Does Water Kefir Contain Alcohol?
Yes, water kefir does contain a bit of alcohol. Studies show that water kefir can contain 0.038% to 2% alcohol. But usually, it is around 0.08% alcohol so you do not need to worry about it so much.
How Much Water Kefir Can I Drink in A Day?
Due to the probiotics in water kefir, it’s best to start off with a small amount (1 cup maximum) a day to see if you face any unpleasant effects. You may find you need to slowly increase the amount you have over a few days on weeks. After a while when your body is used to the probiotic strains, you can drink as much as you like without worrying about any side effects.
Where Do Kefir Grains Come From?
They can be both cultured and derived from nature. There are prickly pear cactuses found in Mexico where kefir grains form as hard granules on the pads of these cactuses.
Do Kefir Grains Reproduce?
Kefir grains are not grains, but organisms living in a symbiotic relationship. As they are living, they do reproduce. Your batch of kefir grains can keep indefinitely, multiplying if fed and kept healthy.
What Is Water Kefir Known As?
Water kefir is technically known as Tibicos. Some other names are California bees and Japanese crystal water. But the most common name for them is Water Kefir.
What Kind of Water Should You Use for Water Kefir?
You can use any clean water as long as it is not chlorinated. Chlorine can kill the grains. You should use water with more mineral properties as that will provide the grains with additional nutrients.
What Kind of Sugar Should You Use?
Any kind of sugar can work as long as it is organic. Some batches of kefir grains will have an affinity towards some specific sugars but you will be fine with whatever you have. You can use sugars such as molasses, maple syrup, brown sugar, white sugar, sugarcane juice, etc.

Conclusion
Today in this article we went through all the different important aspects of water kefir. We learned about water kefir’s benefits and what the drink contains. We also discussed how to make, store and maintain the grains easily at home. I tried to provide a complete guide that will help you know all there is to know about water kefir.
I hope have fun with this amazingly tasty and healthy drink. If you’re new to it, check out the recipe I’ve given below for a basic water kefir. Along with the information above, you’ll be well on your way to enjoying the great health benefits of water kefir!
Learn more about water kefir:

How to Make Water Kefir
Water kefir is a traditional beverage that is made by culturing water, sugar, and fruit with a starter culture. It's a low-sugar fizzy drink that is rich in probiotics and aids in boosting gut health, energy, and immune function.
Ingredients
- 2 liters warm non-chlorinated water, divided
- 200 grams of sugar, divided
- 1 Tbsp dehydrated water kefir grains
- Fruits and herbs, to taste
Instructions
Activate the Kefir Grains
- Pour 1 liter of warm dechlorinated water into a non-metal container. Plastic or glass is preferable.
- Add 100 grams of sugar to that water and stir till the sugar is dissolved.
- After the water has cooled, add one tablespoon of water kefir grains to it. Do not close the lid as your kefir grains need to breathe. Cover the top with a piece of cloth or paper towel and leave it be for 3 to 4 days.
- After 3 to 4 days, your kefir grains will be activated and will be ready to use. Strain the kefir grains and separate them.
- Throw away the rehydration liquid. You are now done activating your water kefir grains.
First Fermentation
- Again, combine 1 liter of warm water and 100 grams of sugar.
- Dissolve the sugar in warm water in a non-metal container and wait for it to cool off. Warm water can kill the grains so it is again a must for you to wait.
- Once the water is cooled, add 1 tablespoon of activated kefir grains.
- For flavoring, you can try many different types of fresh and dried fruits for adding nutrients and flavor to your water kefir. The kefir will ferment even without fruits but adding fruits will make it more nutritious and tastier.
- Then cover the container with a paper towel or a piece of cloth. Again, you do not want to seal it because it needs to breathe.
- Leave the container for 2 to 4 days on your kitchen counter or somewhere similar. If the weather is warm, then 2 to 3 days is enough. But if it is cold, then you might need to keep it for up to 4 days.
Second Fermentation
- Strain your water kefir liquid into a bottle or a jar that you can seal.
- Add bits of fruit and herbs or even flavored syrups into the mix for more flavor and carbonation. Inside the sealed container, the flavors will start to build up and so will carbonation. Carbonation is your main goal.
- You will need to let the air out occasionally. Otherwise, the pressure can be too much and the lid might explode. Let the air out every 6 to 8 hours, this process is called burping.
- After 24 to 36 hours, your water kefir should be ready. You can now store it, drink it directly, or mix it with other ingredients to create new drinks.
Notes
- Store water kefir in airtight jars or bottles. Refrigerating will make it last quite a bit longer.
- To properly store the drink, you need airtight jars or bottles. Glass jars or bottles are preferable.
- Leave the bottles out at room temperature and they will stay good for about 3 to 4 days. In the fridge they can stay good for 8 to 10 days.

Is it Worth Canning Tomatoes? Pros, Cons & What to Consider
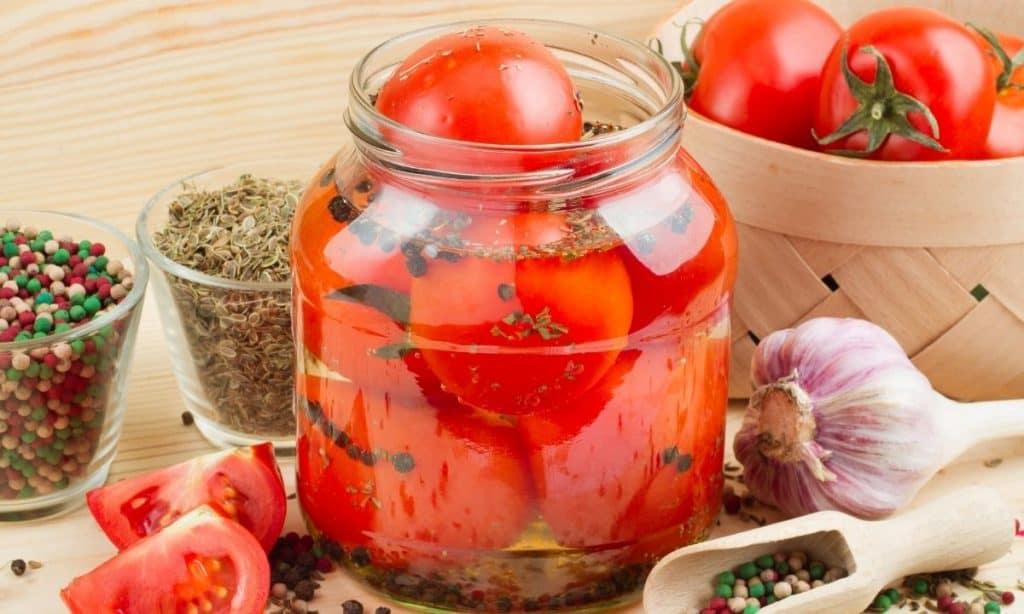
You can use canned tomatoes as an ingredient in many recipes, making them a lovely and convenient ingredient to have in your kitchen. But there are some pros and cons to canning your own tomatoes. So, is it actually worth doing?
Although there are pros and cons to canning tomatoes, it is still a great option. There can be some upfront and maintenance costs, but you benefit from overall cost savings, complete control over the ingredients, higher quality of flavor, and it’s also the environmentally friendly option.
But canning certainly isn’t for everyone, and ther’ll be cases where it isn’t really worth it for some people. In this article, we’ll go through:
- The pros and cons of canning tomatoes
- When it is or isn’t worth it for you can tomatoes
Is It Worth Canning Tomatoes?
There are many benefits to canning your tomatoes, but there are also some downsides to think about. Some of the advantages include:
- Being very cost-effective in the long term
- A healthier option than store-bought products
- High-quality taste
- Environmentally friendly
Many of us are concerned about what ingredients are added to foods that we buy from the store. Many of the ingredients you read on product labels are not only hard to pronounce, but don’t sound like food items at all!
Canning tomatoes yourself is a sure fire way to know that everything you are eating in this homemade product is in fact real, wholesome food, making it a much healthier alternative.
And one of the best things about canning your own tomatoes? It’s also environmentally friendly, so you’ll be doing your bit to help out our precious planet. (More details on this later in this article)
Some of the disadvantages of canning your own tomatoes are:
- larger upfront cost (but not excessive, as you’ll see later in this article)
Let’s take a more detailed look at whether canning tomatoes is right for you…
Cost of Canning Equipment For Your Tomatoes
It is crucial to choose the correct storage containers before you start making the mixture. The initial cost of the equipment you will need may be relatively high.
Even though it is a bit costly, it can be used multiple times, and after a few months and years, the equipment’s overall cost will end up being minimal. Let’s take a look at what equipment you would need for canning and how much it might set you back…
Equipment Needed for Canning Tomatoes & Other Foods
The basic equipment you would need for canning tomatoes and other foods would be:
- Suitable canning jars (reusable)
- Bands for the jars (reusable)
- Lids (new lids every time you can a new food)
Canning jars are great storage containers for canning tomatoes, and the nice thing about them is that they can be reused multiple times. These jars on Amazon are a great starter set for canning. They’re made from high quality BPA free and lead free food grade material, and the lids are made from rust-free aluminium.
They’re also great because they’re made of glass, making them dishwasher safe and reusable for years to come, and the bands and lids are provided with the pack so no need to worry about sourcing them separately.
Canning aside, the jars are so versatile even for non canning needs, as they are airtight, making them ideal for regular food storage too.
The tomato canning containers and bands can be reused multiple times for new batches you produce, but you will need new covers/lids for every new product made.
Canning jars, lids, and bands can cost about $8.99 for a dozen. When looking at the cost over the first year, it will cost you around $0.75 per month. If you keep your equipment well, you can use these jars for over ten years, making them very cost-effective.
You will need to purchase new covers for every new batch you make. These will cost about $0.16 per cover. The covers are not very expensive and they will be your only ongoing expense for your canned tomatoes (apart from the ingredients of course!).
You can buy a whole bunch of lids from Amazon here, where you have the option of choosing how big a pack you’d like to buy depending on how often you can tomatoes, and how much you want to save.
You also have the option of buying reusable covers/lids too. This saves you the hassle of having to remember to buy some each time you make a new batch.
You can find reusable lids on Amazon here, called Tattler lids. If looked after well, they can be used many times over, making them very cost-effective.
Purchasing Second-Hand Equipment for Canning
Purchasing second-hand equipment will help you bring the overall cost down if you have a specific budget. You could receive second-hand equipment from a friend or family member, or you could buy them at a second-hand store.

If you have received or have purchased these jars, it is crucial to check that there isn’t any damage, such as cracks or nicks on the cans’ rims. This is super important for canning, because even a small crack or nick can affect the jars ability to seal properly.
Difference In Price Of Homemade & Store-Bought Canned Tomatoes
When comparing the price between homemade and store-bought canned tomatoes, a few factors need to be considered. Comparing your price to the cheapest can in the store is not entirely fair because the quality of this can will not be the same as your homemade product.
Something that can affect your canned tomatoes’ price is whether you grow your tomatoes, or buy them in bulk at the store.
If you purchase your tomatoes at the store, it will be more expensive than growing them in your garden:
- Homegrown tomatoes can cost up to $0.25 per jar
- A bulk pack store-bought tomatoes can cost around $1.75 for a 32 ounces jar
- An organic tin of tomatoes purchased at a store can cost about $3.45 per 16 ounces
This shows that it is much cheaper to make your canned tomatoes. So although canning your tomatoes can start off being a bit costly because of the purchase of canning equipment, you end up saving A LOT of money in the long term.
Most (if not all) of the materials that you’ll need can be reused if looked after well. If you continue to can regularly, it’s a very cost-effective. Making canned tomatoes is undoubtedly advantageous during bad economic times.
But cost is not necessarily the only consideration when trying to figure out if it is worth doing or not. Time is another big factor…
Is It Time Effective To Can Your Tomatoes?
Time is an essential factor when it comes to making canned tomatoes because it can take a great deal of time to make. However, it is still possible to make a year’s supply of canned tomatoes within one day.
So if you’re strapped for time, it is still a perfectly viable option. Because canned tomatoes have such a long shelf life, you can make them all in one go and leave them in storage ready for when you need it.
In fact, it’s more practical to make bigger batches of canned tomatoes than only making a few cans at a time, as this will be more time-effective.
Your homemade unopened canned tomatoes can last up to 2 years when kept in the pantry. (Store-bought canned tomatoes can last longer than this).
Is It Healthier To Can Your Own Tomatoes?
All canned foods are not necessarily healthier than fresh or frozen foods because canned products contain fewer nutrients than fresh or frozen produce.
Water-soluble nutrients can become lost in the liquid during production and canning. Although this is true, canning your own tomatoes is much healthier compared to store-bought products.
The ingredients found in many canned goods in stores are usually high in corned syrup, sugar, salt, GMOs, and other preservatives.
When making and canning your tomatoes, you can choose what ingredients you would like to add. Your family’s health is of great importance, which is why it is worth canning your own tomatoes.
The type of container you choose is also something to look at with canned foods. Many people choose to can their tomatoes in glass jars as they don’t enjoy the tinny taste that comes with tin canned tomatoes.
Tin cans can release chemicals that leach out of the can’s metal and plastic lining into the product, which is why glass jars are much healthier and safer to use.
When you make homemade canned tomatoes, it is vital to ensure that the proper storage containers and the correct techniques are used. And it’s also good to know what signs indicate if your canned goods have gone off to ensure they’re safe to consume. (This is vital for homemade and store-bought products!)
Is it More Eco Friendly to Can Your Own Tomatoes?
If looking after the environment is essential to you, you will reduce your environmental footprint even more by canning your own tomatoes.
Growing your tomatoes can help reduce the pollutants released when transporting food from the farms to the factory and then to the distributor. Canning jars and reusable lids, which can last years, will save on packaging waste too.
Do Homemade Canned Tomatoes Taste Better than Store Bought?
The quality of flavor is always better with homemade products because they are personally made and not produced in large quantities.
QUICK TIP: The quality of taste will be even better with homegrown tomatoes, especially if they are picked and canned straight away once ripened! This is when they are the most flavorsome and also the most nutritious!
A product of this quality will be costly in stores, which will help you save money. The other added benefit is that you can alter the recipe to your taste, and you will be able to experiment with flavor combinations in each new batch.
Conclusion
Canning tomatoes is a perfect way to preserve your tomatoes, especially if you have an abundance of homegrown tomatoes waiting to be used. It’s a great product to have in the kitchen for a quick dinner that is flavorful and healthy.
Canning your tomatoes is more nutritious, the taste is much richer, and it will improve your dishes’ flavor.
There are other ways of preserving tomatoes that have been grown in the garden too. You can freeze tomatoes for later use, which will also protect the nutrients. The only thing you cannot do is can raw tomatoes as the FDA does not recommend this.
Once you have decided that canning tomatoes are a good idea, it will be useful to look at the various techniques that can be used and which is best for you.
