
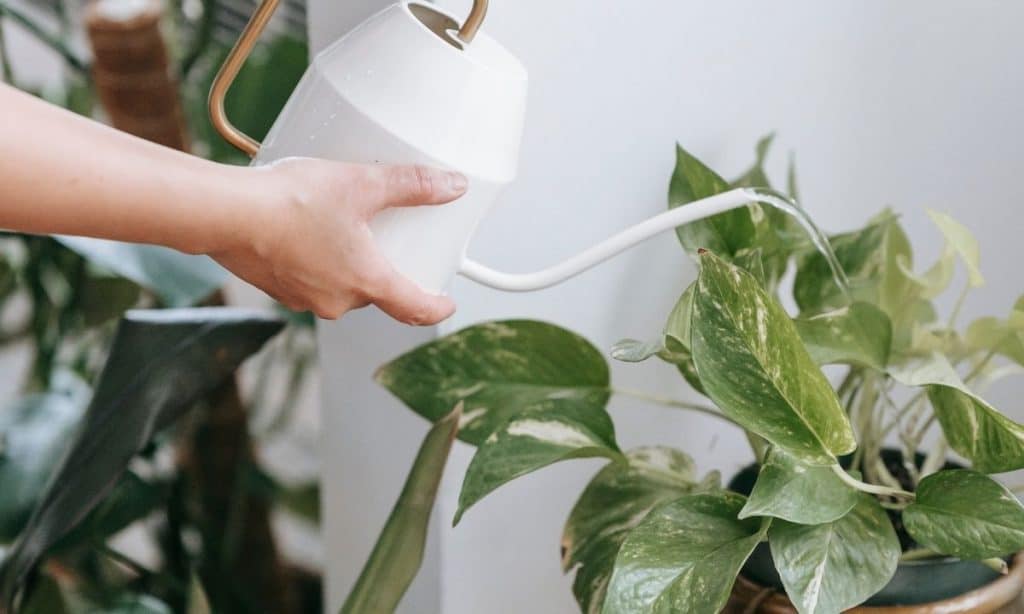
Kefir water is so good for your health. Not only does it boost your gut health with great good-gut bacteria, but as a by-product of this, it increases your overall health – gut, body, and mind. Is this the only thing that kefir water is good for, though? Can you water plants with kefir? Would it be beneficial to other living things, such as plants, or is it strictly for humans?
You can water your plants with kefir water, and as it is actually very beneficial for them. Kefir water acts as a wonderful natural fertilizer and will add many great nutrients into your plants’ soil, and therefore into the plant.
What is it about kefir water that is so great for plants? Does it have the same effect on them as it does on people? Do you prepare the water any differently when planning on using it for your plants? Let us have a closer look at this wonderful product’s benefits and how to use it correctly for your plants…
Can You Water Your Plants With Kefir?
You definitely can water your plants using kefir water, and in fact, you probably should every now and then.
Kefir water acts as a natural fertilizer for your plants, which means it adds essential nutrients and minerals that your plants need into the soil they are in.
These nutrients and minerals help your plants thrive – it assists in their growth and their stamina, leaving them all-around healthier and stronger, which also means they will be more likely to make it through more challenging weather conditions.
So not only is it okay for you to water your plants with kefir water, it’s actually incredibly beneficial!
You can think of kefir water as being a multi-vitamin for your plants. Sure, they will keep living without it, but having that multi-vitamin will help produce more energy and give them a metaphorical spring in their step.
What Plants Can You Water With Kefir?
Now that we know it’s a great idea to water your plants with kefir, you may be wondering if it applies to all plants?
Well, any plant that would benefit from a good fertilizer will benefit from being watered with kefir – this means that most plants will benefit from it.
Here are a few specific plants that will benefit from the nutrients that come with being watered with kefir water:
Watering a Lawn with Water Kefir
Your grass is one of the best plants that can benefit from being watered with kefir water.
Although grass will grow almost anywhere, it is actually one of the most tricky plants to work with. It needs relatively high-maintenance to keep it growing well and can often be a frustration for homeowners to have to deal with.
Kefir water can help your lawn grow and thrive like never before, and here is why: Grass needs a lot of nutrients. It grows quickly and uses the resources around it just as quickly. When the soil it is in runs out of nutrients, it has nothing to feed on.
Watering your grass with kefir water adds those much-needed nutrients back into the ground for your grass to use freely again, which will help it look better, stronger, and thicker.
Watering Indoor Plants with Water Kefir
Watering your indoor plants with kefir water will be super beneficial to them.
Unlike outdoor plants that get their nutrients from many different aspects in nature, indoor plants are limited to the soil in the little pot they have been planted in.
As much as being watered is definitely essential and needed, replacing the nutrients in their soil is just as important, and often, it is completely forgotten about.
Giving your indoor plants all of these wonderful minerals and nutrients that they will receive when they are watered with kefir water will provide them with a whole new life again.
Indoor plants often need to be replaced, even though they are watered regularly. This is usually because the nutrients in the soil are limited, and run out soon if the the soil is not replaced. Feeding the plant with water kefir replenishes the soil with much needed nutrients that help your indoor plants thrive.
Watering Outdoor Plants with Water Kefir
Although many outdoor plants may be fertilized on a small scale by other natural resources, such as animal dropping and decomposed plant matter that has soaked back into the ground, having kefir water added to the mix will only be a good thing.
Even though these plants can use these other resources as an acceptable form of nutrients, adding kefir water to outdoor plants is like giving them an extra boost, like supplements/vitamins.
Watering Flowers with Water Kefir
Flowers are one of the best plants you can give natural nutrients of any form to.
They are beautiful plants that produce the most amazing colors and smells but often die really quickly as they are also one of the most high maintenance plants you can get.
Flowers are only high maintenance as they require a lot of nutrients, minerals, and water on a regular basis. Watering your flowers with kefir water will give them all three of these essential requirements in one easy step.
If you were to make kefir water apart of your regular watering routine with your flowers, there is a good chance it will keep them growing bigger and brighter for longer.
Do I Prepare Kefir Water Differently When Using It On Plants?
You don’t need to prepare your kefir water any differently when preparing it for your plants than you would when preparing the water for yourself.
This is super convenient because it means that you can make a much bigger batch of kefir water in one go rather than trying to make two separate batches of kefir water – one for you and one for your plants.
It’s a brilliant way to use up any leftover kefir water you too. Simply use anything you don’t want to drink anymore for your plants, flowers, or lawn, both indoor or outdoor.
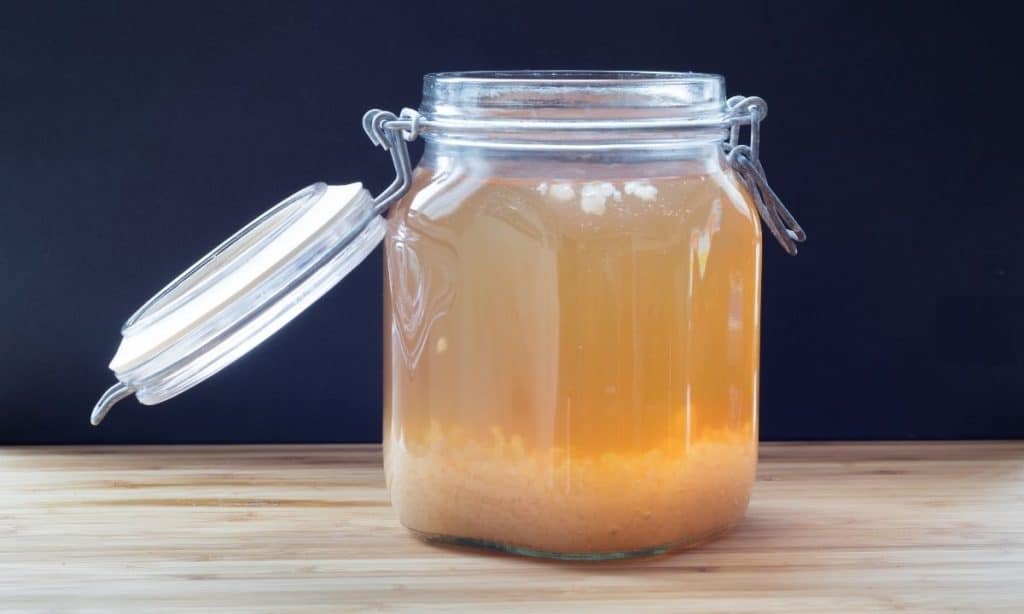
If you have never prepared kefir water before but would like to learn how to in order to use some on your plants, it really is a simple process:
- Have a sterilized jar ready for use.
- Add a ¼ cup of sugar to the jar.
- Add water to the jar until it is mostly full, but not to the brim – there should be space left in the jar.
- Stir the sugar and water mixture until all the sugar has dissolved into the water.
- You will then add two tablespoons of kefir grains to the sugary water mixture.
- Cover the jar with the lid or alternatively with a cheesecloth cover (use a rubber band to keep the cloth in place.)
- You will leave this mixture for 24 to 48 hours on your counter top to ferment and turn into kefir. (don’t leave it any longer than this, simply place it in the fridge and it will keep for a week at least).
You can then enjoy this mixture as a sweet and slightly fizzy beverage, or feed it to your plants – who will be very grateful for it!
As you can see, making kefir water is not a tricky or complicated process and only uses three ingredients over a one to two-day period, which means that anybody could make this water even with little or no experience.
Conclusion
Not only can you water plants with kefir, but it is highly recommended that you do so, as it’ll be a great benefit to your plants all-round.
Preparing the kefir water mixture is not a complicated process, and at the most will take two days to prepare – the pay off of it will outweigh the hassle when you see the results of the kefir water on your plants.
You can use kefir water on any plant that would naturally benefit from the use of a fertilizer, which will be almost all plants.
So if you have been looking for a good and natural remedy to help your plants grow better, bigger, and stronger, start them on kefir water as soon as you can.

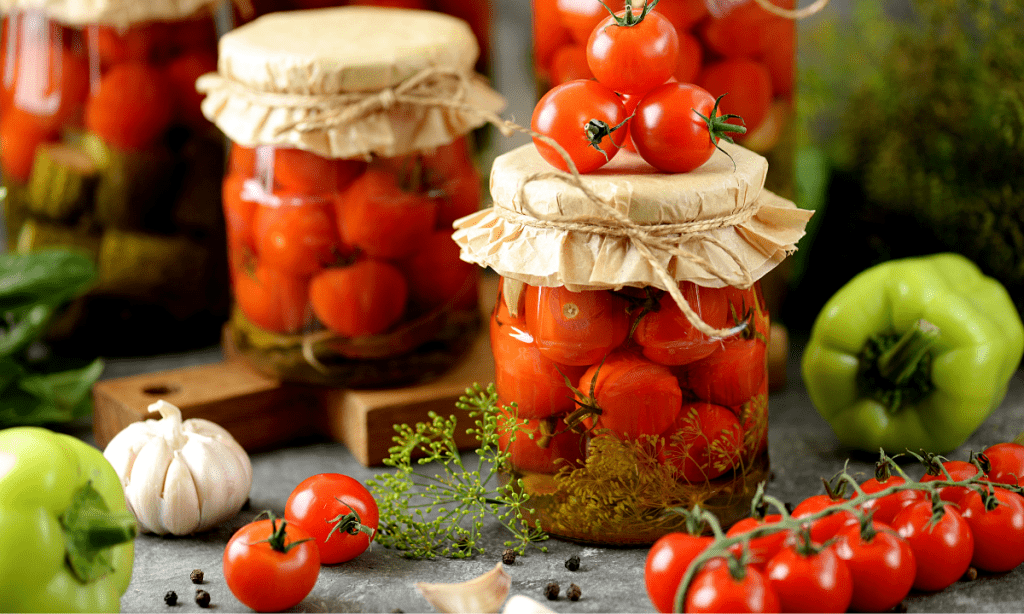
Can You Pickle Without Sugar? (Pros, Cons, How To, Recipe Included)
While trying to lead a healthy sugar-free life, most of us need to give up things we love to eat, whether it’s chocolates or pickles. If you love pickles and want to keep savoring them without worrying about your sugar intake, don’t fret, I’ve got you.
You can pickle foods without using sugar because it is not the main preservative used in pickling. It is an optional ingredient and is only used for flavor. If you want to sweeten your pickles without adding sugar, you can use an alternative like honey, maple syrup or other sweeteners.
In this article, you will find the answer to:
- why sugar is used in pickling
- what substitutes you can use (if any)
- a basic low sugar quick pickle recipe
Read on and explore the different steps of pickling without sugar…
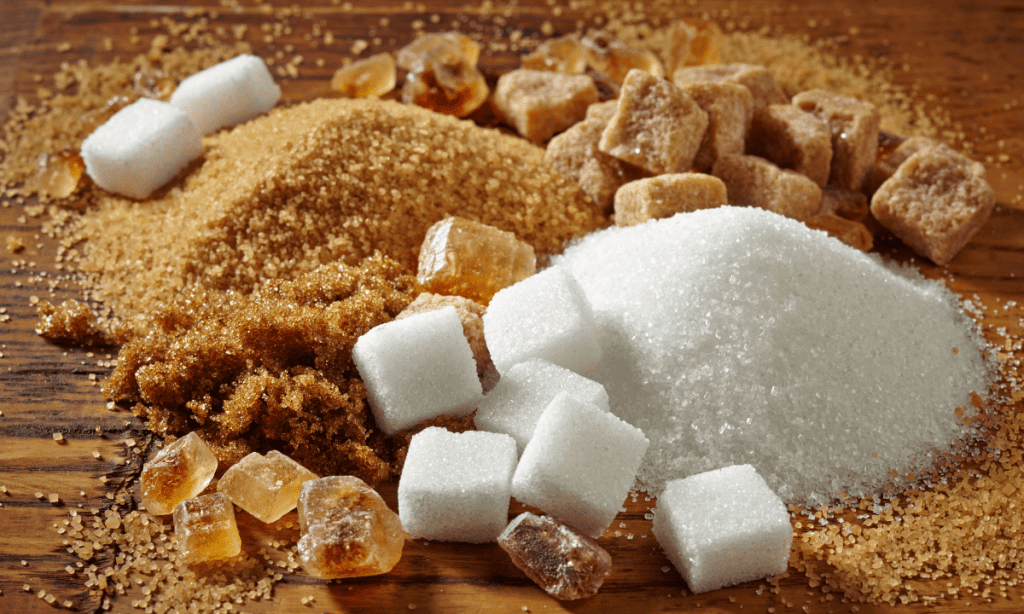
Why is Sugar Used in Pickling?
The sugar in your pickles balances out the acid from the vinegar. It neutralizes the flavor of vinegar and salt in the pickle and gives it a milder flavor. Along with vinegar and salt, it is the third preservative used in pickling.
Sugar is both a natural preservative and strong flavor enhancer. It also helps slow down the colonization of some microbes. But sugar’s antimicrobial action only happens when it is used in very high quantities, like in jams. In pickles though, sugar mainly acts as a flavor enhancer and reduces the harsh taste of vinegar and salt.
Without sugar, the taste of vinegar and salt would make pickles way too tart and sour. Almost, to the point of being inedible for some.
Sugar is a more preferred ingredient than an essential ingredient in pickles. You can choose to not add sugar in your pickle, but you cannot ignore the impact sugar has on your taste buds.
Hence, if you want sugar free pickles, you need to find suitable alternatives to balance out the tartness of vinegar and salt. There are many sugar alternatives out there that are not as unhealthy but will put out the same results. Like honey, maple syrup, artificial sweeteners, etc.
NOTE: If you don’t want to use any kind of sweetener in your pickle, we’ll cover that in this article later!
What are Some Natural Alternatives to Sugar for Pickling?
Honey, maple syrup, other artificial sweeteners or even water can be substitutes for sugar in pickling. Although these are not perfect substitutes for sugar, as you will not get the exact taste of sugar in pickles, these will help you make tasteful low sugar pickles.
Let’s take a look at how to go about using some of these alternatives…
Honey & Maple Syrup
Honey and maple syrup can work as sugar substitutes in sweetened pickle recipes. Since honey and maple syrup is sweeter than sugar and is liquid, you will have to change your recipe a little.
- If you are using maple syrup as a substitute, replace 1/4 the amount of sugar you used to add in your old recipe.
- If you are using honey, you should add 3/4 cup of honey for every cup of white sugar.
Again, maple syrup and honey add liquid to your recipe. So, you will want to replace a 1/4 cup of liquid with every cup of maple syrup or honey.
Both honey and maple syrup will affect the texture, color and flavor of the sweetened pickles so bear this in mind.
QUICK TIP: Honey will also darken the sweetened pickle with time. So, it is better to use light colored and mild honey in low sugar pickling.
2. Agave Nectar
If you don’t want to use honey or maple syrup, you can opt for agave nectar. It not only sweetens, but also acts as a preservative in a pickle. It is made up of real sugars such as glucose and fructose. But it has less calories and thus, can be used to make quick low sugar pickles.
During pickling, agave nectar has to be added like honey.
- In a sweetened pickle recipe, 2/3 cup of agave nectar should replace one cup of white sugar. Again, liquids have to be reduced by 1/4 to 1/3 cup.
In case of sour or vegetable pickles, adding more water to your vinegar will reduce the sourness of your pickle. Again, you can use apple cider vinegar instead of white vinegar to add a hint of sweetness.
Honey and maple syrup can be used in vegetable pickles too. For example, in making onion and cucumber pickles, you can use maple syrup and honey respectively. But you will have to experiment with the recipe and add flavorings to make the low sugar pickle suit your taste buds.
Can You Use Artificial Sweeteners for Pickling?
Yes, you can use selective artificial sweeteners for pickling. But, when replacing sugar with artificial sweeteners for pickling, one must tread carefully. Because most artificial sweeteners lose their sweetening power during the canning process and affect the flavor of the pickle.

Moreover, artificial sweeteners used in making the pickle may change the flavor and leave an unpleasant aftertaste.
Thus, many artificial sweeteners such as Saccharine, NutraSweet and Equal are not approved for pickling. But artificial sweeteners such as Stevia and Splenda are approved for pickling. Because both of them do not lose sweetness during the canning process.
- If you use Splenda packets in your pickles, one cup of sugar should be replaced with 24 packets of Splenda.
- If you use Sweet Leaf Stevia packets for pickling, one cup sugar should be replaced with 18 to 24 packets.
It is better to use artificial sweeteners in quick pickle recipes rather than regular ones. Although Splenda and Stevia can survive the canning process, there is no guarantee that the pickle will always turn out perfect. For example, Splenda can make the texture of sweetened pickles mushy.
Another artificial sweetener you can consider using for pickling is xylitol. It is a white crystal-like substance that looks and tastes like sugar. It is a carbohydrate and polyol that can survive the canning process of pickling.
- What’s more, with xylitol, there are no conversions to worry about because 1 cup of xylitol would replace 1 cup of sugar.
How Can You Pickle Without Sugar?
You can choose to make low sugar pickles using either the canning or refrigerating method. I suggest using the refrigerating or quick pickle method if you are trying to go on a sugar-free diet.
Because if you use any sugar substitute, there is no telling how it will react when your jar is being canned with heat. Plus, quick pickling is easier to do. Here’s a tried and tested step-by-step recipe for quick pickling without sugar:
Pros of Not Using Sugar in Pickle
If you are diabetic or trying to lose weight, pickles without sugar are perfect for you. Again, if you are trying to go on a keto diet, or just generally reduce you sugar intake, then quick pickling with no sugar is perfect.
The usual bread and butter pickles you see on the market are rich with carbs. Hence, you cannot consume them if you need to reduce your sugar intake. But quick pickles contain no refined sugar, or carbs. You can satiate the pickle lover in you by eating no sugar quick-pickles while on a keto diet, or other low sugar diet. (Great low sugar recipe for you to try below!)
Generally, brines are used in making pickles without sugar. The water and sodium mixture in brines lower the sodium level in regular pickles. Hence, you do not worry about gaining water weight. Quick pickles with low sugar and low sodium levels are perfect for weight loss.
Cons of Not Using Sugar in Pickle
Not using sugar in pickles makes a big difference in how it tastes. Although sugar does not give an obvious sweet taste to the pickled dish, it does make its flavor mild, whether we realize it or not.
When you avoid using sugar in an old recipe, you will notice how different the taste is. So, not using sugar, changes the entire recipe. You will need to mix and match a lot with the water-salt ratio and different spices to make the sugar-free article palatable.
Another down side of low sugar pickles is that any sugar substitutes do not consist of pectin. So, they are not great preservatives. Thus, low sugar pickles do not have a long shelf life and spoil faster than regular pickled food.
However, we are still talking a couple of months at least. You should bear this in mind when deciding how much to make at a time. Here’s a great tasting quick pickle recipe that doesn’t use any sugar or sweetener of any kind…
Recipe for a Quick Pickle Without Sugar
1. Collect Ingredients
- 8 Cups of Mixed Vegetables (Cauliflower Florets, Sweet Bell Peppers,1 Jalapeño Pepper)
- 2 cups of Apple Cider Vinegar
- 1 tablespoon of Fine Ground Salt
- 2 Cups of Water
- 2 tablespoon of Simple Pickling Spice Mix (Mustard seeds, Dill seeds, Red Pepper Flakes, Whole Cloves, Coriander Seeds, Allspice Berries)
2. Prepare and Sterilize Jars
Whether you make quick pickles or canned pickles, you must sterilize your jars. To sterilize your jars, first, you need to wash and rinse the jars and its cap thoroughly with soapy warm water.
After washing, immerse the jar in a large pot of water and boil. The water should cover the jars by at least 2-inches. To sterilize the jars, boil them for 10 minutes. Leave the jars in the warm water, even after turning off the heat.
In a separate saucepan, boil and simmer the caps of the jars in water for 10 minutes. After 10 minutes, you should remove the lids from the water and let it dry till ready to use.
While preparing the jars, you need to choose the size and number of jars depending on your pickle recipe. For this recipe, you will need 4 pint-sized jars with a lid.
Here are some great pickling jars available on Amazon that are suited for pickling and canning on a regular basis.
3. Prepare Vegetables
Always pick fresh vegetables and fruits for pickling. You can choose any type of vegetables since most of them can be pickled. But avoid using slightly bruised vegetables or fruits for pickling.
After you have picked your vegetables or fruits, get to washing and cutting them. You can cut them in any shape you want or according to the size of the jar you are using. For example, while storing your pickle in a mason jar, you can choose to slice your cucumbers into spears.
Carrots and cucumbers can be sliced in spear or coin shapes. Carrots can be peeled and sliced into matchstick-shape too.
For this recipe, you have to slice your cauliflowers into florets. Then mix with the chopped sweet bell peppers and jalapeno peppers.
Then fill the jar with the mixed vegetables and pack tightly. Leave a half an inch head space from the opening of the jar and then set it aside.
NOTE: Certain vegetables need to be blanched in the preparation phase. Blanching is the process of boiling vegetables for 2-3 minutes to enhance their flavor for pickling. Brussel sprouts, carrots, asparagus, beets, beans, ginger and okra need to be blanched.
After blanching, the vegetables have to be transferred to a large pot of cold water and then drained. Vegetables like cucumber, turnips and tomatoes should not be blanched.
4. Add Flavors
The secret to a unique home-made pickle is in the flavoring. In this step, you mix your choice of spices and herbs to create a pickling spice mix.
For this recipe, you will need a basic mix of flavors that include:
- coriander seeds
- dill seeds
- mustard seeds
- whole cloves
- red pepper flakes
- Allspice berries
Mix these together and store in an air-tight jar. Your mix will last for about a year. For this serving of low sugar pickles, you will need only 2 tablespoons of this mix.
Classic Flavorings/Spice Mixes for Different Pickles
If you’re looking to try out some other flavors of pickles, here are some other classic pickle flavorings that make a tasty combination:
- Green beans with fresh dill and garlic
- Squash with garlic and onion
- Cherry tomatoes with garlic and black peppercorns.
- Cucumbers flavored with dill seeds, garlic, and red pepper flakes (classic dill pickle mix).
- Carrot pickled with coriander, thyme, ginger and turmeric (have a wonderful exotic flavor to it.)
QUICK TIP: Adding bay leaves to your cucumber pickle, will keep the cucumbers nice and crispy!
Here are some other basic spices, herbs and other flavors for pickles that you could use:
- Herbs: dill, thyme, bay leaf, oregano, rosemary, marjoram
- Garlic Cloves: smashed and sliced depending on mild to strong garlic flavor respectively
- Ginger: peeled or sliced into thin strips
- Spices: Turmeric, red pepper flakes, smoked paprika, mustard seeds, coriander seeds, black peppercorn etc.
5. Make Brine
A basic brine consists of an equal ratio of water and vinegar mix. It is a combination of water, vinegar, salt, sugar (optional) and spices (optional). Sugar will not be added in the brine mixture of a low sugar pickle recipe.
You can adjust the type and amount of vinegar, water and salt used in the brine depending on your recipe and taste. From white vinegar, white wine, apple cider to rice vinegar, you have a variety of options. But you should steer clear of concentrated or aged kinds of vinegar such as malt or balsamic vinegar.
In this recipe, you will make a brine using apple cider. To make your brine you will have to mix water, ground salt, apple cider and your pickling spice in a saucepan. Then boil it over high heat and simmer for 10 minutes at medium heat.
In case of a general low sugar vegetable pickle recipe, make the mix with your choice of vinegar, water and salt. Then boil and stir it until the salt has dissolved and let it simmer.
6. Fill Jar with Brine and Seal Tight
The brine for pickling has to be ladled and filled carefully inside the pickle jar. With any jar you use, make sure there is some head space between the brine-vegetable mixture and the opening of the jar. After filling the jar up with brine, wipe the rims clean.
In the case of this recipe, you need to ladle your piping hot brine into the pint-sized jars. Make sure the brine covers all the vegetables. Also, ensure that there is a half-inch head space between the brine mix and rim of the jar.
TIP: Sometimes air bubbles appear after you are done filling the jar with brine. In that case, you have to tap the jars lightly on the counter, to get rid of the air bubbles.
After you have filled all four of your jars with brine, you should seal it tight. Place the caps on and screw them tight.
7. Refrigerate Jar
The last step of making low sugar quick pickles is to cool and refrigerate the pickle jar. After you are done sealing the pickle jar, you need to let it sit and cool in normal room temperature.
Then you have to refrigerate your pickle jar. After an hour, your quick pickle will be ready for serving. But for better taste, you should wait for 48 hours because pickles taste better as they age.
Unlike canned pickles, low sugar quick pickles do not last long. If you store and refrigerate this pickle, it will last you a few months at best.
Conclusion
Pickling is all about experimentation. Whether you are trying to spice up your pickle mixture or make sugar-free pickles, you will need to experiment to get the perfect pickled dish.
The good news is that there is so much versatility in pickle making and the possibilities with flavorings are endless. So you will be sure to find a sugar free pickle recipe that you love! So, savor the journey, mix and match until you stumble upon your perfect sugar-free pickle.

How Long to Ferment Kombucha? Full Guide with FAQ
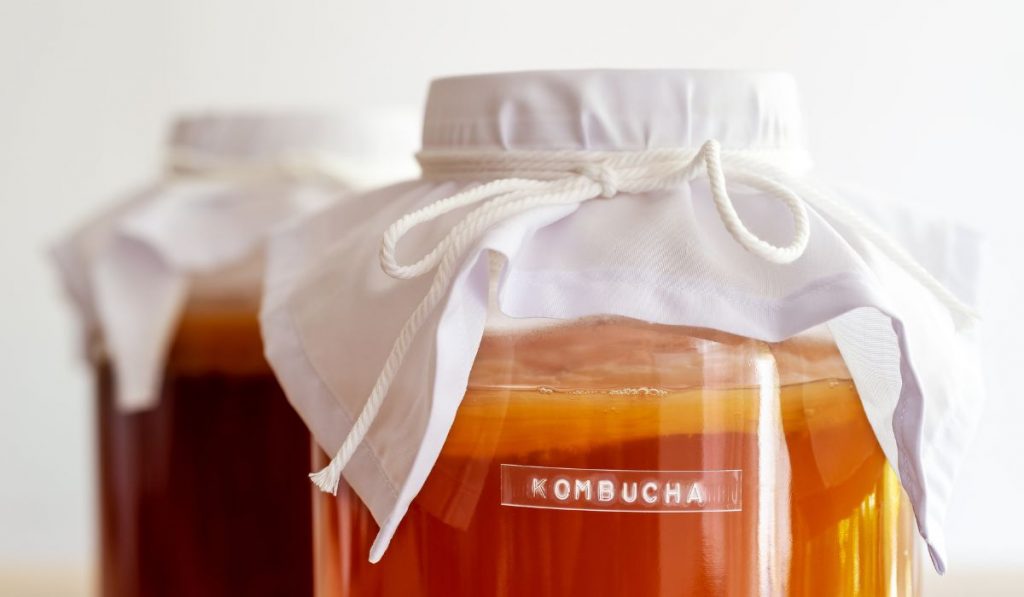
Making kombucha at home is an affordable and fun project, that boasts many health benefits. However, instead of spending 5 minutes at the grocery store, you will need to spend much more time fermenting your own kombucha. Exactly how long does this process take?
Fermenting your own kombucha can take somewhere between 7 to 21 days. The number of days varies depending on the temperature, size of the vessel, & your own preference. It will also depend on if you are making a symbiotic culture of bacteria & yeast (known as SCOBY), or if you already have one.
There’s a lot to learn about kombucha fermentation! In this article find out all there is to know about fermenting kombucha at home, including
- how long to ferment it
- choosing the right tea
- how to make a SCOBY
- troubleshooting, and more.
How Long to Ferment Kombucha?
Happily, making kombucha is not a high-maintenance project. Although the whole process of making kombucha may take some time from start to finish, you will need to spare only 15 to 20 minutes to get it started. All you have to do is:
- Brew the tea
- Add the ingredients inside jars
- Store it in a shady spot for fermentation
The time required to complete the first and second fermentation of 1-gallon of kombucha is between 7 to 21 days, but it can take more or fewer days depending on many factors. For example, if you are growing your own SCOBY, add 7/10 days more to the equation. Â
The number of days to ferment your kombucha depends on your taste and the environment. There are also other factors that can affect the fermentation of kombucha…
Temperature Affects Kombucha Fermentation
The speed of fermentation of kombucha is influenced by the temperature of the environment it is placed in. When the temperature is hot, the fermentation speeds up. When the temperature is cool, the fermentation slows down.
TIP: If the SCOBY is taking a long time to form, it could be because the temperature is too low. The ideal range of temperature for kombucha fermentation is 75 to 85 degrees Fahrenheit.
- In warm regions, the kombucha will ferment faster and could sour easily.
- In cold regions, kombucha will take a little longer to ferment than in warmer regions.
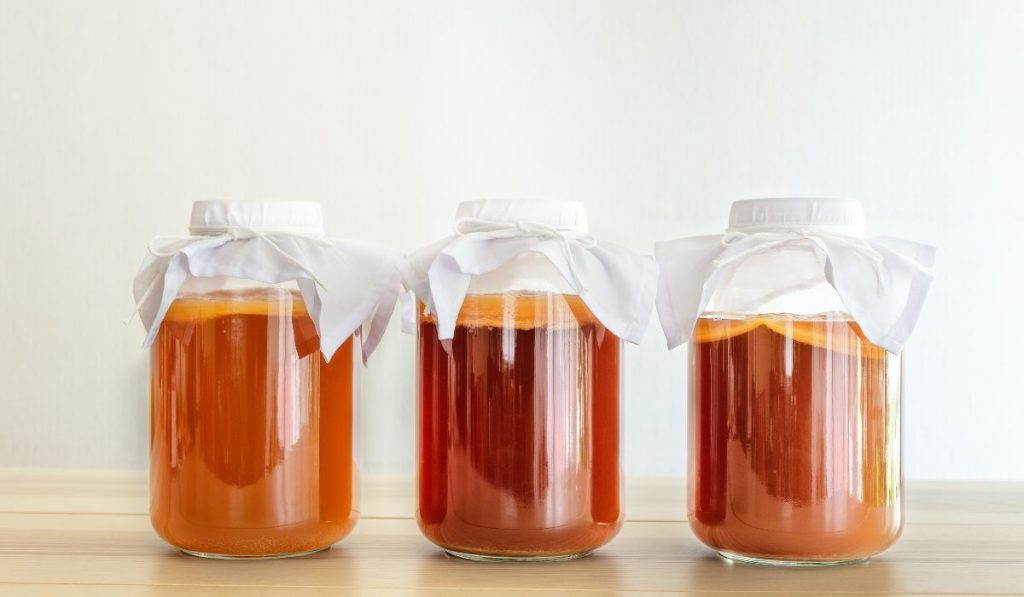
The Size of the Jar & Brewing Method Affects Kombucha Fermentation
The size and brewing method of kombucha affect the time required to ferment it. Kombucha produced with a continuous brewing system takes less time to ferment than the regular method.Â
| Batch Size & Method | Time to Ferment |
|---|---|
| One Gallon Regular Ferment | 10 Days |
| 2 Gallons Regular Ferment | 15 Days |
| 2.5 Gallons Continuous Brew | 15 Days |
The lid size of the jar also influences the speed of the fermentation since the SCOBY requires oxygen. The oxygen intake is more if the opening of the jar is larger.
Kombucha kept in a half-gallon jar with a 10-inch diameter will ferment faster than the one kept in a half-gallon jar with a 4-inch diameter.Â
Taste Preference Affects Kombucha Fermentation
How long you want to ferment kombucha depends on your own preference. You can ferment as long or as little time as you want, depending on how you like the taste of the brew. Your taste is the final decider of how long you let your kombucha sit and ferment!
For those new to making kombucha, I recommend tasting the kombucha on the 5th day. Use a ladle or a straw under the SCOBY and taste the brew. If it is too sweet, then let it continue to ferment and taste it again in a few days.
If you want your kombucha to taste more on the sour side, let it ferment for a few more days. However, don’t let it ferment too much after the SCOBY has been formed because then it might turn too sour.
Ingredients for Making Kombucha
You can customize and adjust the ingredients of homemade kombucha however you like. Every kombucha recipe has a few basic things in common, but it can vary, so take note of what is needed:
#1: The Right Tea for Kombucha
You can use almost any type of tea you want for making kombucha, and create a custom blend by mixing and matching teas. If you are just starting out, it is better to use plain black tea.Â
You should never use scented teas like earl grey or tea with added spice like chai while making kombucha. The chemical that goes into creating the scent of those teas may not react well with the SCOBY.
If you prefer, here are some herbal teas that can be used to make kombucha (with links to Amazon for buying):
Other than these, you cannot use most herbal teas in making kombucha because they do not have the nutrients that are required for fermentation to take place.
TIP: Both tea bags and loose tea leaves can be used to brew kombucha. For every 1 tablespoon of loose tea, use 4 tea bags.
#2: The Right Sweetener for Kombucha
Sugar and tea is the required fuel that feeds the fermentation process. The longer the fermentation process, the more sugar is used. So, if you decrease the amount of sugar used, you might end up starving the SCOBY and hampering the fermentation process.
Using the right type of sugar for the fermentation process is important. The best sweetener for making kombucha is organic cane juice crystals (I like this one from Amazon). It’s perfect for home brewers because of its affordability and availability.Â
Artificial sweeteners and other alternatives to sugar will only give you inconsistent results. However, if you cannot consume sugar for medical reasons, you can opt for honey. You may get inconsistent results while using raw honey so make sure to keep a backup SCOBY just in case.
#3: Water for Kombucha
An ample amount of water is needed during the fermentation process of kombucha. Make sure to use chlorine and fluoride-free water. Also, avoid pH-Adjusted or alkaline-rich water, and water that is rich in minerals, since they can harm the SCOBY during fermentation. Any inexpensive spring water is okay to use.
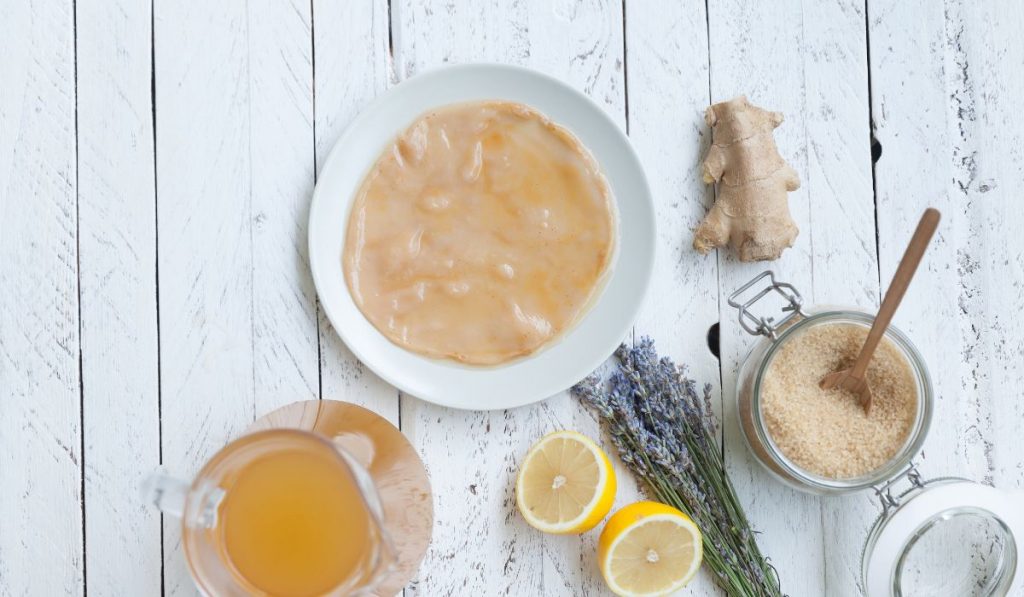
#4: SCOBY and Starter Kombucha
You need a SCOBY (Symbiotic Colony Of Bacteria and Yeast) and starter tea to make kombucha.
SCOBY is a pancake-like mother culture that hosts various bacteria and yeasts required in the fermentation process. You can either purchase a SCOBY (try this one from Amazon), get one from a friend, or grow one on your own.
If you purchase a SCOBY, make sure it is pathogen tested. Wherever you are getting your SCOBY from, you must make sure it’s from a trusted source.
You will need one SCOBY and a half cup of starter tea to make your first quart of kombucha tea.
NOTE: Starter tea is an acidic liquid that ensures the good health of your SCOBY. Usually, unflavoured kombucha from a previous batch acts as a starter tea. But if you don’t have an older batch of kombucha, you can opt for the regular store-bought, unflavoured kombucha tea. Â
#5: Materials for Making Kombucha
You will need a lead-free porcelain or glass vessel to ferment and store your kombucha. Do not use plastic containers. You can use glass jars, canisters, or even bowls. Generally, homebrewers use gallon-sized or quart-sized glass jars to ferment their kombucha (like this one on Amazon).
Other pieces of equipment you will need while making kombucha are:
- Measuring cups
- ThermometerÂ
- Plastic Mesh StrainerÂ
- Tight Weave Cloth to cover the jar
- Canning Jar Rings or Rubber BandsÂ
TIP: A starter kit like this one on Amazon is great for beginners as it has all the things that you might not already have in your kitchen for making your first batch of kombucha.
Making Kombucha At HomeÂ
To make this delicious and healthy fermented tea, you need to go through 2 phases:
- F1 (first fermentation)
- F2 (second fermentation).
- (To grow a SCOBY from scratch, you will need to go through 3 phases.)
Follow these steps to brew kombucha at home:
Step #1: Make a SCOBY
If you already have a SCOBY, you can miss this step out, but if you are making one from scratch, here are the main ingredients to make a SCOBY:
- unflavoured kombucha
- tea
- sugar
- water.
Making a SCOBY is a low-effort endeavor consisting mostly of waiting and watching it grow while the mixture of all the ingredients goes through fermentation. Let’s take a detailed look into making your own SCOBY at home:

Ingredient list:
- 1 tbsp. loose tea or 4 bags of black tea
- ½ cup of white sugar
- 7 cups of water
- 1 cup of raw, unflavoured, store-bought kombucha
- Tight weave cloth
- 1 1-gallon or 2 ½-gallon glass jars
- Rubber bands
How to Make a SCOBY:
- Boil water and add white sugar to it. Mix well till all the sugar is dissolved.
- Add black tea to the mixture and let it steep. Afterward, let the tea cool off at room temperature.
- When the sweetened tea is cooled to room temperature, pour it into a jar. Then pour store-bought unflavoured kombucha into the jar. If you are using two jars, pour half of the store-bought kombucha into each jar.
- Cover the jar with tightly a woven cloth and secure it with a rubber band. This will keep out bugs and debris.
- Place the jar in a dark place, out of direct sunlight. The room temperature should be between 70 to 75 degrees F. Keep it in a dark place like the cupboard and let it sit there for a week or more.
- After a while, you will notice that a ¼ -inch SCOBY is growing. The SCOBY will take around 1 to 4 weeks to form. When you take it out, toss out the tea if it is too sour.
Step #2: First Fermentation (F1)
The first fermentation is the phase where kombucha is actually made. After the first fermentation is over, you will have non-carbonated, unflavoured kombucha in your hands!
To complete the first phase of fermenting, you will need:
- Water
- Tea leaves
- Organic cane sugar
- SCOBY
- Glass jars (these are a good value on Amazon)
- Tight-weave cloth/cheesecloth (I love these ones from Amazon!)
- Strainer
- Rubber bands
How to Make 1-gallon Jar of Kombucha: First Ferment
- Boil 4 cups of water and add 2 tbsp. of loose black tea to it. Let the tea steep for around 15-minutes.
- Add ¾ cup organic cane sugar to the hot water. Stir until it dissolves. Non-organic sugar is ok to use, but artificial sweeteners will not do as cane sugar is food for yeast and bacteria. Make sure not to decrease the sugar, or you might starve the yeast and bacteria during the fermentation.
- After 15 minutes, when your tea is steeped, use a strainer to remove the tea leaves. Pour the hot tea into a 1-gallon glass jar.
- Cool down and dilute the hot tea inside the jar by pouring 8 cups of cold water inside the jar. The optimum temperature is between 70 to 90 degrees Fahrenheit.
- Add the SCOBY and pour 2 cups of the starter tea from a previous batch of kombucha.
- With a clean tight-weave cloth, cover the lid of the jar. You can also use a clean T-shirt or coffee filter. Secure the cloth covering with rubber bands. The glass jar is not covered with an airtight lid because the brew needs airflow for fermentation.
- Place the jar in a shady spot out of direct sunlight at room temperature.
- Let the jar sit for a week before checking it. Do not move the glass jar or peek inside before a week. If you move around the glass jar or open the covering, you might disturb the growth of the SCOBY.
- Around the 5th day, you can start taste-checking the kombucha. Use a ladle or clean straw to take out some of the liquid and taste it. The kombucha should be acidic or sour tasting, but it should not have an overpowering smell.
- Depending on how you like your kombucha, sour or sweet, let it sit for longer. If you like your kombucha sourer, let it sit for another 2/3 days. After you think your kombucha is done, you can start the second fermentation by flavoring and bottling it.
Things to Look Out for During First Fermentation:
- Unlike while making the SCOBY, you can add other tea leaves besides black in F1. Experiment and make your own blend by mixing oolong, green or white tea. You can also use other teas on their own. Some may need to be mixed with black tea so that the mother SCOBY gets enough fuel.
- The SCOBY should not be added to the sweetened tea if it is too hot or cold. If it is too hot, it can kill the SCOBY and extreme cold can make it go dormant. If the SCOBY is dormant, it will not acidify the brew fast enough. If the brew is not acidified by the SCOBY at the proper time, it may get moldy.
- When the SCOBY is about an inch thick inside during F1, you can create a second SCOBY by peeling off a few layers.
- Around the third day, you will notice white dots form at the top of your brew. Do not mistake it for mold and remove it. The white specks are just your new SCOBY forming!
- If you see any brown stringy bits inside your jar, no need to panic, that’s just the yeast, making your kombucha nice and fizzy.
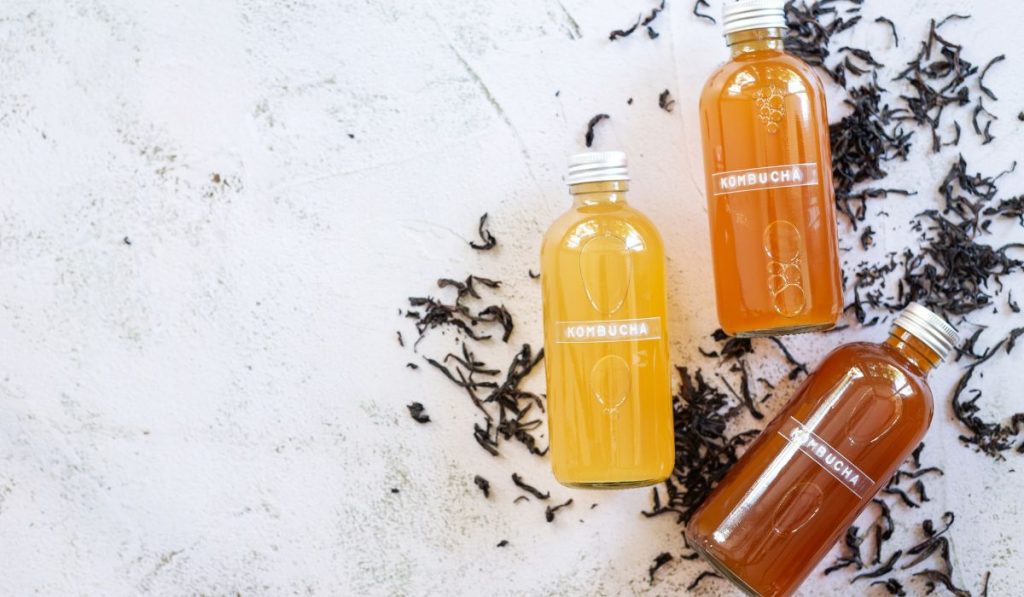
Step #3: Second Fermentation (F2)
The process of bottling and flavoring kombucha is called the second fermentation. Without this process, your brew will not be fizzy and flavourful enough. The airtight bottle traps the yeasts in your brew which turns the extra sugar into carbon dioxide for a lovely bubbly brew.
The trapped carbon dioxide makes the brew fizzy and the second fermentation also allows the added flavors to meld together and give the brew a more complex taste.
How to Bottle and Flavor Kombucha (F2):
- Remove the SCOBY from the gallon jar and set it aside for future use along with some of the unflavoured tea as a starter tea.Â
- Stir the remaining brew to distribute the bacteria and yeast all throughout the liquid. Stirring is a crucial step as it will ensure that the carbonation occurs consistently in all the bottles.Â
- The 1-gallon batch from the first fermentation will need approximately seven 16 oz. bottles (these ones from Amazon are great). In each bottle add 1/3 cup of pureed fruit or juice.
- Use a pitcher and funnel while pouring the brewed tea into the bottles. At the top of each bottle, leave half an inch of headspace.Â
- Wipe the top rim and lid of the bottles and make sure it is dry. Seal the jars tightly. If the lids are screw-on, use rubber grippers to seal them tightly.
- Place the bottles in a dark cupboard at room temperature. Let it sit and ferment for 2/3 days more.
- After a few days, place the bottles inside the fridge. The cold of the fridge will keep the drink carbonated. It also pauses the fermentation process and prevents over-carbonation.
Things to Look Out for During Second Fermentation:
- When the bottles are fermenting at room temperature, there is a risk of over-carbonation. That is, if you are using poor-quality bottles, they may explode. To be safe, you should keep your bottles in a closed cabinet to avoid any mess.
- Do not use beer bottles for the second fermentation. These are made of thin glass and thus are at more risk of exploding.
- Before placing the bottles in the fridge, “burp†them. This means opening the lid of each bottle to release some pressure and slow down the fermentation.
- Be careful while opening the bottles for the first time. If possible open it over the sink and keep a towel at hand.
- If you want the kombucha to be fizzier, you should take the bottles out of the fridge and let them ferment at room temperature for a few more days, and then put them back inside the fridge to chill.
Related: What Happens if Kombucha Ferments for Too Long?
What Flavors to Add to Kombucha?
From dried fruits to herbs you can add just about any flavor you want to your kombucha during the second fermentation. You just have to mind the added flavor to kombucha ratio while mixing:
| Flavoring | Kombucha |
|---|---|
| Fruit Juice: 10-20% | 80-90% |
| Dried fruits: 10-30% | 70-90% |
| Herbs: to taste | adjusted to taste |
If you plan on using almond or vanilla extract, add ¼ teaspoon per cup of kombucha. You can drink kombucha tea right after flavoring, or ferment it for longer to make it fizzy.
Kombucha Flavor Ideas and Combinations:
- Strawberries and Basil
- Apple Juice and Cinnamon
- Pineapple and Basil
- Vanilla Extract
- Ginger and Pepper
- Lime Juice and Ginger
- Blueberries and Cinnamon
- Lavender and Chamomile
- Chia Seeds
- Pumpkin Pie Spice
Continuous Brewing: Another Way to Make Kombucha
The continuous brewing technique allows you to brew a large amount of kombucha in a short period of time. Moreover, it ensures that you will have a steady supply of kombucha. But how does that work?
After the first fermentation of the kombucha inside the continuous brewing vessel, you can draw off 1/3rd of the brew through a spigot. Then you can add more sweetened tea to replace the previous volume. With this method, the fermenting process continues indefinitely.
The continuous brewing method of kombucha is generally used for commercial purposes. But, if you are a family of kombucha enthusiasts who drink it regularly, this method is perfect for you. If you are looking for a low-maintenance method of making kombucha, consider trying this!
The equipment you need to make kombucha through the continuous brewing method is a large glass vessel with an attached spigot (try this jar from Amazon) and cheesecloth. The vessel should have a capacity of keeping 2 to 5 gallons of kombucha.
TIP: The spigot can be made of plastic, wood, or high-quality steel and should not be made of poor-quality metal. The high acidity of the kombucha can cause the spigot to leach.
Try to purchase a vessel that has the spigot attached in the middle instead of the bottom. That way you will get the most bacteria and yeast-rich kombucha. If you cannot find a vessel like that, then make sure you stir the kombucha well before you bottle it.
Batch brewing kombucha at home can be a tedious, yet worth-it process. Here are some benefits of opting for continuous brewing over batch brewing kombucha:
- Continuous brewing takes less time to ferment. Since you can draw tea whenever you want, the fermenting process speeds up.
- Instead of using many quart-sized or gallon-sized jars, you can use one large vessel to brew your kombucha for the whole family.
- Continuous brewing has a lower chance of contamination than batch brewing kombucha. Since you will be taste-checking the brew and handling the SCOBY less in this method, there will be low chances of contamination by other microbes.
Frequently Asked Questions
1. What to do when the SCOBY sinks?
Nothing! There is nothing to worry about as it is quite normal for a SCOBY to sink or float around. It will most likely float up on its own or a baby SCOBY will form on top of it, which is also normal.
2. How to tell if kombucha is fermenting properly?
A healthy sign of your kombucha fermenting properly is when a new SCOBY forms near the opening of the jar. Another good sign of your kombucha fermenting properly is the formation of brown stringy yeast bits. You can also tell that your kombucha is fermenting properly when it tastes less sweet and more vinegar-like.
3. Is it necessary to strain the kombucha before drinking?
No, it is not necessary to strain kombucha before drinking it, although you can if preferred. Many people strain their finished kombucha before drinking to get rid of any yeast bits or baby SCOBY particles.
4. Does kombucha contain alcohol?
Alcohol is a by-product of the fermentation process. So, like most fermented food products, kombucha contains a small amount of alcohol. The amount varies from batch to batch, but most kombucha has less than 0.5% ABV, so it does not contain enough alcohol to get you drunk.

Conclusion
Kombucha is wonderful for a healthy gut and heart. Enjoy all the benefits of kombucha at home by brewing your own batch. Customizing the flavors of kombucha makes spending more time making it at home well worth the initial effort. Plus, you save money in the long run!
Fermenting kombucha at home can take a while but the whole process of making it is simple. While the kombucha ferments in 7-21 days, it is hands-off except for taste-checking it once in a while.
I hope you found this full guide to kombucha helpful, and have a happy fermentation experience!

9 Different Types of Fermented Foods & Why You Need Them

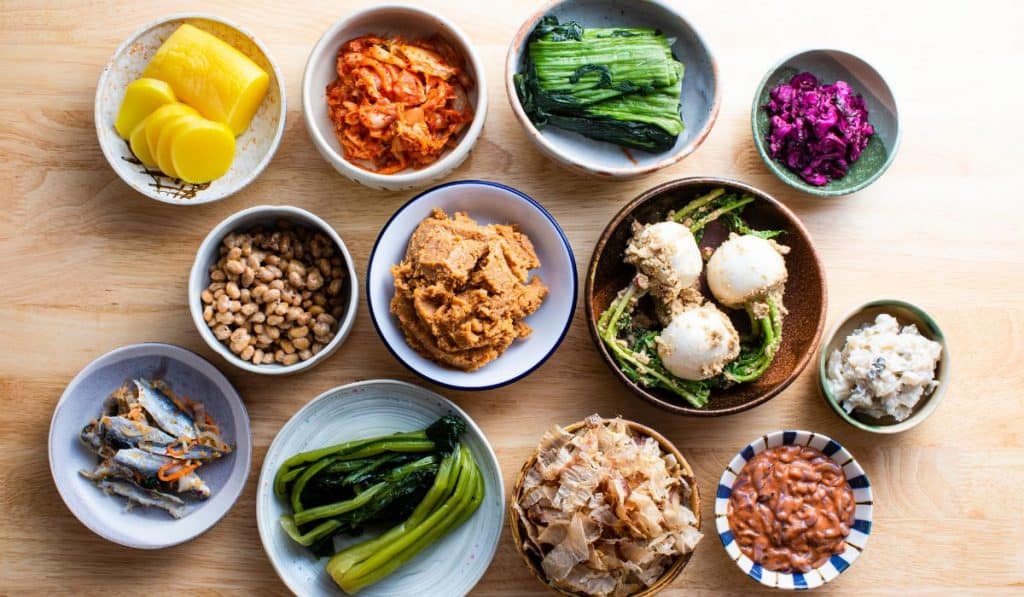
Fermented foods contain probiotics that are living microorganisms with several health benefits. These foods contain an abundant supply of these healthy bacteria, making them a very beneficial addition to your everyday diet. Many foods can be fermented, providing a variety of flavors so your meals will never be bland.
According to research, traditional fermented foods can do amazing things for your body. These foods will help you digest better, restore your gut microbiome after taking antibiotics, improve your immunity, and fight the harmful bacteria in your body, among many other benefits. Fermented foods include kimchi, yogurt, kefir, kombucha, sauerkraut, and many more.
Like everything else, moderation is key, and heavy consumption of fermented food will not be ideal for your body. Here, I’ve outlined nine fermented dishes that are excellent for your health, along with some precautions to take when you experiment with fermented food.
9 Fermented Foods that Are Excellent for Your Health
In a controlled environment using yeast, bacteria, or similar microorganisms, the food components will convert into fermented ones through an enzymatic reaction. Fermentation has survived for generations and continues to thrive in the current trends of the culinary world.
NOTE: Experts suggest that fermented food can be incredible for your health, and the claim is also backed up by science.
Here is a list of nine fermented foods that are excellent for your health:
#1: Kefir
For those who love dairy, kefir is more than an ideal nutritious option to include in your meals. It’s rich in vitamins and probiotics, being a cultured dairy item. It’s also very beneficial for your stomach and helps with digestion. Besides, it’s also arguably more useful than yogurt.
Kefir is usually made by fermenting cow’s or goat’s milk and combining kefir grains (read my post here about mixing different kefir grains), which contain bacteria or yeast colonies and look similar to cauliflower. The mixture will be dense, and you’ll get a tangy drink that tastes like yogurt.
NOTE: Consuming 200 milliliters of kefir every day will result in a noticeable decline in inflammation, which contributes to heart disease and other chronic diseases.
Research shows that kefir is safe to consume by lactose intolerant people, and it also helped with their digestion. People with lactose intolerance have trouble digesting the sugar in dairy products, which can cause:
- Bloating
- Cramping
- Diarrhea
Kefir helps to make lactose digestion easier since there is less in kefir than in milk. When you mix kefir grains with milk, the grains can break the lactose down and ferment it.

Additionally, kefir can also improve:
- Bone health
- Allergies
- Sensitive immune systems
You can find kefir grains online (I like these milk kefir grains and these water kefir grains from Amazon) or at most health food stores. If it’s your first time making kefir, my guide to making water kefir should help you get started! Check it out here.
QUICK TIP: You can add kefir to smoothies, milkshakes, or other blended drinks in small amounts or drink it independently.
#2: Natto
A staple in Japanese cuisine, natto is made with soybeans. Natto has an unusual consistency and intense flavors that are loved by many! With a sticky, slimy texture and a startling scent, some suggest that natto is an acquired taste. Like other fermented foods, it’s packed with nutrition and fibers that promote good health.
Traditional natto is topped with soy sauce, mustard, and other seasonings, and is typically served with rice. To make traditional natto, soybeans were boiled and wrapped in rice straw which contains bacteria on the surface naturally.

Today, instead of rice straws, natto is made in Styrofoam boxes which contain a different kind of bacteria that helps with the fermentation process. Natto is rich in probiotics and superior to boiled soybeans, with these important nutrients:
- Manganese
- Iron
- Copper
- Vitamins
- Calcium
- Potassium
- Selenium
The fibers present in natto boost the digestive system and can:
- Relieve constipation.
- Reduce the risks of osteoporosis in postmenopausal women.
- Provide enzymes that help with blood clots and blood pressure reduction
NOTE: Natto is a popular breakfast option served with rice that helps with digestion.
#3: Kombucha
Another popular fermented beverage is kombucha, which is fizzy in nature and deliciously tangy in taste. Green tea or black tea is an active ingredient to make kombucha. Scientists have studied the effects of kombucha on animals, and the findings suggested that consuming kombucha might reduce liver toxicity from poisonous chemicals. (Check out how to make kombucha in my article here).
FUN FACT: Kombucha is also called “mushroom tea†because the strain creates a film resembling a mushroom on the tea surface—acetic acid results from this fermentation procedure with a trace amount of alcohol and other acidic components, although there are actually no mushrooms involved!
Kombucha originates from Japan, and specific bacteria or yeast strains are needed to make it. Since it possesses a large portion of bacteria, kombucha is an excellent source of probiotics.
Probiotics can help with:
- Weight loss
- Digestion
- Inflammation

Kombucha also has antioxidant properties that fight against free radicals. When you use green tea to make kombucha, you’ll benefit from both the green tea and the probiotics together.
Additionally, kombucha can kill the harmful bacteria in our bodies and fight against infections because it has antibacterial properties. This effect makes undesirable microbial growth without affecting the beneficial bacteria.
Research also suggests that kombucha can possibly:
- Reduce the risk of heart disease
- Block cancer cells from spreading
- Reduce blood sugar
- Reduce LDL cholesterol
- Reduce triglycerides
Kombucha is a trendy drink that can easily be made at home with the necessary precautions, purchased from your local health food store, or even bought online (I really love this brand on Amazon).
#4: Kimchi
South Korean cuisine has become very popular recently, and kimchi is one of the most well-known dishes. It has a delicious sour taste and is usually served as a side dish.
Kimchi is made by fermenting vegetables together like these:
- Carrots
- Radishes
- Cucumber
- Brussels sprouts
- Cabbage
- Other vegetables
NOTE: Traditionally, Napa cabbage is the most active ingredient for making kimchi.
Additionally, kimchi contains several seasonings, such as:
- Sugar
- Onions
- Garlic
- Chili peppers
- Salt
- Ginger

Kimchi is also loaded with these vitamins and nutrients:
- Vitamin A
- Vitamin K
- Vitamin C
- Vitamin B6
- Sodium
- Iron
- Niacin
- Fiber
- Folate
Kimchi contains many green vegetables like celery and cabbage, making it an excellent nutrition source.
Like every other fermented food, kimchi also contains essential probiotics. The Lactobacillus breaks the sugar down into lactic acid, giving kimchi its sour taste. It is known to help prevent certain kinds of cancer, constipation, allergies, and heart disease as well as promote good mental health.
It’s also exceptionally beneficial for diabetic patients as it can decrease insulin resistance. Additionally, it can also lower cholesterol and promote healthy weight loss. Eating kimchi regularly will also boost your immune system and reduce inflammation. The probiotics in kimchi can help to prevent a yeast infection.
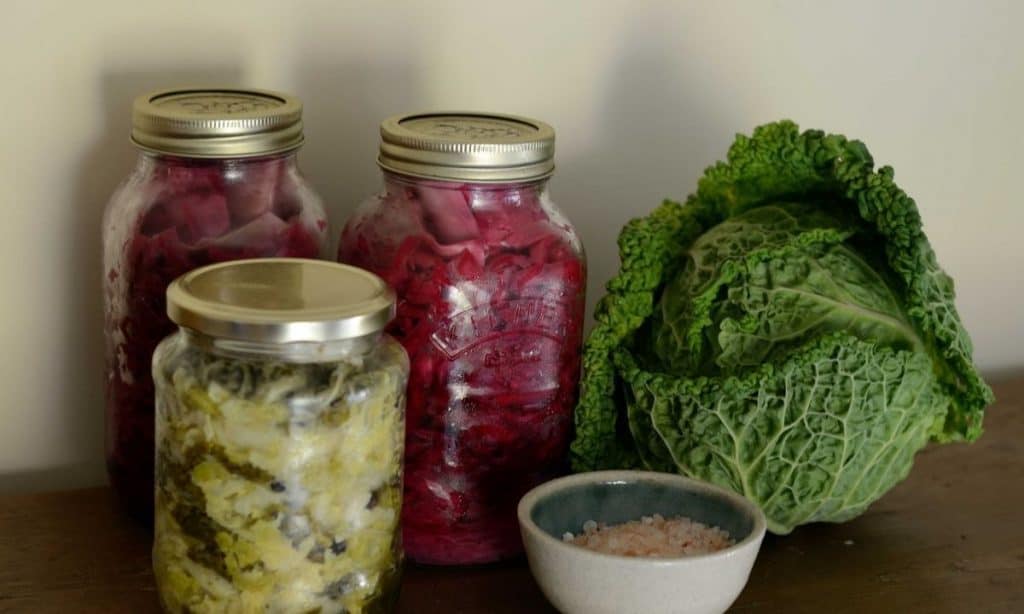
#5: Sauerkraut
Among fermented condiments, sauerkraut tops the list. It consists of shredded cabbage, and lactic acid ferments it. Like every other fermented dish, sauerkraut is rich in fibers and low in calories. It is also full of probiotics and antioxidants.
Sauerkraut originates from China and dates back more than 2,000 years ago. This tasty and healthy historical ferment is typically served as a side dish. Making your own sauerkraut at home is easy. This fermentation starter kit from Amazon includes everything you need.
Sauerkraut is a healthy no fat dish that is rich with:
- Vitamins
- Manganese
- Iron
- Copper
- Folate
- Potassium
- Sodium

Our gut is home to a trillion microorganisms that help the digestion process. The probiotics in sauerkraut enhance nutrient absorption, making it better than raw cabbage and coleslaw. It also acts against harmful bacteria and improves your health overall.
Including probiotics in your diet can:
- Promote bacterial balance
- Prevent diarrhea
- Reduce gas
- Reduce constipation
- Reduce allergies
- Reduce bloating
- Help cancer cell reduction
- Help with stress reduction
- Helps to maintain overall brain and heart health
If you consume unpasteurized sauerkraut, you’ll get the most benefits because it eliminates the useful bacteria. A great way to do this is to make your own at home!
#6: Yogurt
Yogurt has been a favorite fermented food for hundreds of years. Made by fermenting milk, consuming yogurt regularly will ensure a boost to your overall health. Yogurt culture is the bacteria used to ferment the milk, which produces lactic acid that makes the milk proteins curdle, giving yogurt its flavor.
Commercially produced yogurt often has sweeteners and sugar in them, which make it less healthy. However, plain yogurt and unsweetened yogurt have many health benefits. Besides being rich in nutrients, yogurt strengthens the immune system and gives protection against osteoporosis.

Yogurt is an excellent source of protein that’s rich in probiotics. It can help maintain bone health through its key nutrients:
- Calcium
- Protein
- Phosphorus
- Potassium
Literature from 2015 suggests that yogurt is also linked with lower body weight and a smaller core. As it is high in protein and calcium, it enhances the hormones that reduce appetite keeping your weight in check. Research also suggests that yogurt consumption decreases the risk of obesity.
If you’re thinking about adding yogurt to your daily diet, make sure to get those without artificial colorants, flavoring, and sweeteners. If you’re lactose intolerant, there are many non-dairy yogurt options. Look for brands that contain probiotics as an active ingredient.
#7: Miso
Miso is a condiment like sauerkraut, which is especially prevalent in Asia. It’s a fermented dish of soybean paste, salt, and koji starter made into a form of Japanese soup. Miso is very nutritious and offers several health benefits like strengthening the immune system and improving digestion.
Other kinds of beans can also be used to make miso besides soybeans.
Alternative ingredients to soy for making miso include:
- Rice
- Barley
- Hemp seeds
- Peas
- Buckwheat
Like other fermented foods, consuming miso will improve your digestive system, and decrease bloating and gas.

Additionally, research shows that miso can:
- Decreases the symptoms of inflammatory bowel disease
- Reduce breast cancer risk
- Lower stroke risk in women
- Reduce the risk of hypertension
- Help maintain good health overall
In America, you’ll find miso in Asian convenience stores. Darker-colored miso is saltier and has stronger flavors. Miso is also very easy to make at home with only a few ingredients. It’s very versatile and adds terrific flavors to any recipe you add it to!Â
Related: Does Miso Soup go Bad? Here’s How You Can Tell
#8: Pickles
If you keep cucumbers inside a jar of water and salt solution, you’ll get fermented pickles! This dish ferments organically over time and has a delicious sour and tangy flavor. Fermented pickles also have probiotics present in them that are very beneficial. However, if you use vinegar to pickle cucumbers, you won’t get the essential probiotics.

Fermented pickles are also:
- Low in calories
- Rich in vitamin K
- Have probiotic benefits
Since pickles have high levels of sodium, they can help to restore electrolyte balance and reduce muscle cramps. They can also help control blood sugar and contain antioxidants.
#9: Tempeh
Another fermented dish made with soybeans is tempeh. As it is a pressed compact, you can bake, sauteé, or steam it before adding it to a dish. Tempeh is rich in protein and can work as a substitute for meat.
- Tempeh has an impressive composition of probiotics and:
- Helps reduce heart disease risks
- Helps reduce LDL cholesterol
- Has an antioxidants
- Lower oxidative stress
- Promote overall bone health
NOTE: There aren’t alternative ways to make tempeh, so if you’re avoiding soy it’s best to stay away from this fermented dish.

Tempeh is delicious and textured and can be flavored in many ways.
Ways to use tempeh:
- As a bacon substitute
- In sandwiches
- In a gyro
- In a lettuce wrap
What Are the Health Benefits of Eating Fermented Foods?
You can already tell by now how healthy fermented foods are for you. They have long shelf lives, and the beneficial bacteria in them will undoubtedly help you live a long and healthy life. There are trillions of live bacteria inside your gut that help with digestion and probiotics add to your overall intestinal health.
Smooth Digestion and Absorption
The sugar and starch in foods break down when they ferment, which helps them digest without much difficulty. The lactose in kefir breaks down into simpler sugar molecules, so even lactose intolerant people can safely consume this dairy product.
Fermented foods also contain fibers that are excellent for gut bacteria diversity. The most significant benefit of fermentation is its exquisite composition of probiotics. If the microbiomes in your gut aren’t replenished, the composition and types of gut bacteria change.
This change creates an imbalance between the useful and harmful microbes in the gut, leading to several health issues. Additionally, it may also weaken the intestinal walls.
FACT: Consuming probiotic foods will preserve the bacterial composition, and intestinal wall strength, and improve your digestive health in general.
Immunity Boost
Bacteria that cause illnesses can enter our bodies from food. You won’t necessarily always get sick from it because your immune system will do an excellent job of protecting you.
Researchers claim that if you consume fermented foods from a young age, your immune system will deal with these foreign bodies more efficiently. It also contributes to the growth of a healthy microbiome.
FACT: Fermented food is also very rich in iron, and vitamin C, among other excellent contributors to a strong immune system. Probiotic-rich foods will help you recover faster from most illnesses.
Digestive Health Improvement
The probiotics in fermented food can help maintain a balance between the good and the harmful bacteria in your gut, and help reduce digestive problems. Research evidence implies that fermented foods are excellent for people suffering from irritable bowel syndrome.
Probiotics also promote a healthy outflow of stool and can reduce other symptoms like bloating and constipation. Additionally, you’ll also lower your chances of suffering from diarrhea, excessive gas, and allergic reactions.
NOTE: If you regularly face digestive problems, it’s an excellent idea to routinely add fermented foods to your meals.
Healthy Mind, Weight, and Heart
Researchers also claim that fermented food is beneficial for good mental health, healthy body weight, and overall heart health. Probiotic strains like Lactobacillus helviticus and Bifidobacterium longum lower the risk factors of depression and can help with anxiety.
Other studies have proven that fermented foods are also linked with having a smaller waist circumference, reducing and maintaining healthy body weight.
FACT: Foods like tempeh and kombucha reduce blood pressure and decrease the overall “bad†cholesterol.
Increases the Vitamins in the Body and Promotes Gut Restoration
The “good†bacteria in the body are also responsible for synthesizing several other necessary elements for your body and help produce essential vitamins:
- B1
- B2
- B3
- B5
- B6
- K
It’s not uncommon to see people take antibiotics and face digestive issues like diarrhea and constipation afterward. Antibiotics eliminate both useful and harmful bacteria.
FACT: Probiotic-enriched foods will do an incredible job of restoring your gut microbes to normal.
Precautions to Take while Eating Fermented Foods
Fermented foods are healthy, but they may not be everyone’s cup of tea. Here are some precautions to take if you choose to add fermented dishes to your daily diet.
You might face some side effects once you start eating fermented foods, but that isn’t necessarily a bad thing.
Follow this short guide to preventing the side effects of fermented foods:
Possible Side Effects
Fermented foods undoubtedly boost your immunity and have anti-inflammatory, antioxidant, anti-diabetic, and anti-microbial properties. However, if it’s not prepared right, you might have some side effects.
- Headaches: Fermented foods may contain biogenic amines, forming when specific bacteria break the amino acids down. Almost every food item that’s rich in probiotics may include these amines.
FACT: Histamine and tyramine are the most common amines in these foods to which some individuals may be sensitive. It might cause them to experience headaches and migraines.
- Foodborne Diseases: If fermented foods aren’t prepared correctly, unwanted bacteria may contaminate them and make you sick. It could cause food poisoning and salmonella.
- Infection: This occurrence is rare, but if your immune system is compromised, you might get an infection from probiotics.
- Resistance to Antibiotics: Consuming fermented foods regularly may make you resistant to antibiotics. Probiotic bacteria are carriers of antibiotic-resistant genes. It may pass on to other bacteria in the gut.
- Bloating: Consuming fermented foods may overwhelm your gut and cause you to bloat temporarily. If excess gas builds up after the probiotics have killed the harmful microorganisms, you might feel gassy. This side effect isn’t necessarily detrimental, but you may experience it nonetheless.
Prevention
You can use airborne cultures to ferment food if you feel unsafe using liquid cultures. Sourdough and other vegetable ferments use airborne cultures. If you’re new, you can start with a small amount of culture.

Additionally, try eating only a tablespoon or a tiny portion of fermented food every day for about a week and gradually increase the amount to get all the benefits of probiotic-enriched foods. Doing so will also let your body adjust to the microbial cultures without producing any side effects.
TIP: If you’re making fermented foods at home, you will want to follow the instructions strictly and consider experts’ help. It’s also better to avoid commercially-produced fermented food if you are sick often or face digestive issues.
Tips to Shop for Fermented Food at the Grocery Store
Grocery stores are a good place to get fermented food if you don’t make it at home. The quality of the fermented food is important, some companies surpass others in terms of delivering the best probiotic benefits.
First, you’ll want to look out for words like “live cultures†and “probiotics†on the packaging. It means that the product contains live bacteria or cultures that will guarantee the benefits of probiotic foods.
TIP: Other products that don’t have these bacteria may or may not have the live microorganisms. So you’ll need to choose the ones that specify it on the package.
Second, as probiotic bacteria are very delicate, they’ll most likely do their best under refrigerated conditions. Fermented foods that undergo pasteurization and other treatments involving heat lose the live bacteria. These processes are done to make the food safe to eat and prolong the shelf life.
For kimchi, sauerkraut, kombucha, and other similar foods, you will want to look for packages that mention that they’re raw and unpasteurized. For dairy products, the probiotics are added after, and you should look for pasteurized ones.
Finally, you’ll want to choose fermented foods that have the lowest composition of sugar and salt. It’s okay if the salt composition is high because fermentation typically doesn’t have many salt alternatives. But as sugar consumes the probiotic bacteria, you’ll want to check the package label that has the least amount of sugar comparatively.
Conclusion
Fermented dishes are an incredible choice if you want to start consuming probiotic-rich foods instead of supplements. These foods can lower the risk of particular cancers, hypertension, cholesterol, inflammation, digestion, and weight loss. They also add zest and tangy flavors to your diet, making them excellent for a healthy meal every day!
You might also be interested in:

How to Ferment Cabbage for Maximum Probiotics in 10 Easy Steps
Fermented foods have been popular for thousands of years. Not just because of their unique taste, but also for improving your health by supplying good bacteria and probiotics to your gut. Fermented cabbage, which is also known as sauerkraut, is one of those foods. And homemade sauerkraut is always preferable to store bought ones, due to their freshness and unforgettable taste.
To make sauerkraut, all you need is cabbage, salt, and a jar. Then follow these 5 simple steps:
- Shred the cabbage
- Mix the cabbage with salt
- Put the cabbage in a jar
- Ferment for at least three days
- Check the taste of your sauerkraut after 3 days; ferment for longer if desired
Sauerkraut is commonly fermented for between 14 and 21 days in order to develop better flavor and health benefits. But it can be fermented for up 3 months if desired.
It can be eaten plain, or with burgers, wraps, salads, etc. and is known for its probiotic and nutrient content. And in this article, I’m going to go through how to ferment it in order to get the best probiotic and nutrient profile, as well common mistakes to watch out for when making, and things to bear in mind…
How to Make Sauerkraut at Home: 10 Easy Steps
Sauerkraut is an easy DIY project, so long as you have the right knowledge. There are hundreds of ways to make sauerkraut, with variations in ingredients, flavors, and preparation methods.
This article has all the information you’ll need to make delicious homemade sauerkraut. This recipe is very basic, with only cabbage, salt, and water needed.
What You Need To Make Sauerkraut
Ingredients:
- 1 medium-sized cabbage
- 12-15 sea salt
- Other herbs or vegetable e.g., carrot, garlic, mustard seeds, etc.(optional)
Kitchen Tools:
- Cutting board
- Sharp knife
- A large bowl
- Mason jar
1. Weigh The Cabbage
The weight of the cabbage you’re using for the sauerkraut will determine the correct amount of salt you need to use.
Place the cabbage on a digital scale and record the total weight. You may want to do get the weight in grams for accuracy.
This kitchen scale from Amazon is a great tool to keep handy if you’re planning to make fermenting food a hobby. It’s made of stainless steel and tempered glass and it has four built-in high-precision load sensors for quick and accurate weight readings.
2. Measuring The Salt
When making sauerkraut or fermented foods, it’s important to understand that what matters is the percentage of salt to the weight of the food, not the volume of salt.
REMEMBER: Too much salt will kill the beneficial bacteria and stop your sauerkraut from fermenting properly!
Sea salt is typically better to use in fermented foods. The key is that you add just the right amount and it’s best to use a digital kitchen scale to measure accurately. As much as possible, avoid using iodized salt because iodine can inhibit fermentation.
3. Shred The Cabbage
Trim the cabbage and remove the outermost leaves. You can save these for later when you need something to hold the shredded cabbage down inside the jar.
Make sure the cabbage is shredded finely. You can do this by hand or by using a mandoline (here’s a great one on Amazon) or a food processor that has slicing capability like this one (Amazon link).
TIP: The smaller the pieces, the easier it will be for the bacteria to ferment the cabbage. Plus, the smaller the pieces, the more surface they have for the beneficial bacteria to grow. It will actually help your cabbage to ferment faster! Check out my article here if you’d like more tips on getting a faster ferment without compromising quality.
4. Add Salt and Spice
Put all your shredded cabbage into the fermentation crock or mixing bowl and sprinkle salt on it. Mix the shredded cabbage and salt intermittently as you fill the bowl up.
5. Knead and Squeeze
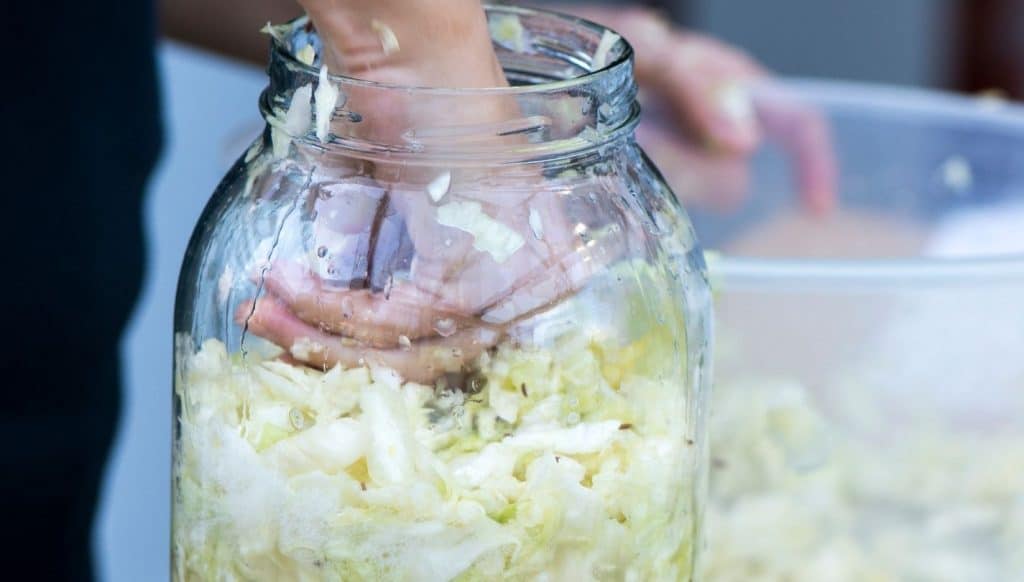
Squeeze and knead the cabbage and salt mixture for about 5 minutes, over the course of about 15 minutes to allow the cabbage to release more brine. (You can use your hands, but if you like, the end of a rolling pin like this one on Amazon works great too!)
It’s important that the brine doesn’t evaporate so you may want to cover the mixture while it stands. You can use any lid or plastic wrap.
Depending on how much brine your cabbage mixture makes, this process could take 1-4 hours until you have enough brine that would cover all the cabbage when you compress it in a mason jar.
At this point, feel free to add spices like caraway seeds or juniper to add a more German or Alsatian flavor to your sauerkraut. Plain with nothing but salt works great too though!
FUN FACT: When salt is in contact with the cabbage, a chemical reaction begins breaking down the cabbage walls to start the fermentation process. This means that if you simply added salt, and skipped the kneading and squeezing step altogether, it would still produce brine! (you’d simply let it sit for longer).
6. Put Your Mixture In a Jar
Once your cabbage has enough brine, you can now transfer it to a mason jar. During the fermentation process, contents of the jar will bubble up, and gases will be produced that need space to expand, so make sure not to pack the jar too full. You’ll need a third of the jar as empty space (or at the very minimum an inch) to avoid overflowing or worse, a cracked jar.
I really like wide mouth mason jars like these on Amazon for fermenting, because you have a good amount of space to add the ingredients and secure it down with weights. I’ve found that it can get a little tricky with traditional narrow mouthed jars.
7. Weight It Down
Compress the cabbage inside the jar as this helps bring the brine up, covering all of the cabbage. It would be best to have the brine go up about an inch above the cabbage. This will ensure that none of the cabbage will come up above the brine.
QUICK TIP: You can use the outer cabbage leaves from earlier to cover up the cabbage and keep it submerged in the brine. In addition, using weights (like these on Amazon) is a great way to be sure the ferment remains submerged and mold free.
8. Add More Brine If Needed
On some occasions, depending on the cabbage you used, you won’t be able to squeeze out enough brine from the shredded cabbage. This is when you have to make extra brine.
On a side note, I’ve never had to do this. As long as you let it sit for long enough, I have found that the brine eventually increases enough. But if you need to, then here’s how to make extra brine…
Here are the 3 simple steps to make extra brine:
- Fill a cup with water
- Add the right amount of salt, which is 2 grams for ever 100 grams of water
- Mix the saltwater and pour it to the mason jar until all the cabbage is covered
9. Seal And Store Your Sauerkraut Jar in a Cool and Dark Place
Perfectly seal your jar of sauerkraut and keep it in a cool and dark place. A good temperature for a sauerkraut to ferment properly is around 65 to 70°F (18 to 21°C).
Aside from temperature, light also affects food over time so if you’re using clear mason jars, make sure that they are kept in a dark or shady area.
10. Waiting Time
In 2 or 3 days, lactobacillus becomes the dominant microbe in your sauerkraut and you will observe some bubbling and fizzing.
It would be wise to put your jars, especially the ones that are filled to the brim, on a tray as they may leak at some point.
The first phase of the fermentation process will settle down after a week. During this time, you can open your sauerkraut jar and do a taste test if you wish. The alternative is to keep it fermenting for a longer period of time, especially if you want more probiotics and nutrients in your sauerkraut.
How Long Should I Ferment Sauerkraut for Maximum Probiotic Benefit?

For maximum probiotic benefit, the sauerkraut should be left to ferment for a period of at least 2 months. Prior to that, there will still be plenty of probiotic goodness, but 2 to 3 months of fermentation will ensure the probiotic profile will reach its peak.
However, do bear in mind that the longer you ferment it for, the stronger the flavor becomes too. So its important to balance it according to what you like eating. After all, there is no point fermenting it for 3 months if it is then too strong for you to enjoy!
Do bear in mind that you can get used to the stronger flavor over time too. I now happily leave my sauerkraut to ferment for 3 months and love the flavor it produces and enjoy the benefits of having a maximum amount of probiotic ‘bang for your buck’, but as a beginner, this flavor profile would have been too strong for me.
Things To Keep In Mind While Your Sauerkraut Is Fermenting
If you’re new to fermenting foods, there a few things to bear in mind to ensure a successful ferment. Here’s a list of things to make note of:
- Opening a fermenting jar increases the chance of mold, so make sure that your hands and the utensils you’re using to taste the food are clean.
- In the event that you notice mold on your jar, simply wipe it off.
- If the shredded cabbage is starting to emerge above the brine, simply push it down until it’s soaked again.
- If you notice that there seems to be not enough brine in the jar anymore, simply make more brine with the same formula mentioned above and add it to the jar.
It’s super important to make sure the cabbage is always submerged fully under the brine (more on this later).
In 3 weeks, you can do another taste test and your sauerkraut should already taste sour during this period. You can decide to let it ferment for another 3-6 weeks and then taste again.
It’s also a good idea to move your sauerkraut jars to the fridge at this point. The high acidity and cold temperature will then slow the fermentation process here and you can decide whether its time to eat them or you want to keep fermenting for an even longer period of time.
Most Common Mistakes When Fermenting Cabbage
Even though the recipe is easy, a few mistakes can still be made, especially by beginners who are trying fermenting food for the first time. Some small mistakes can botch the entire recipe, so here are some helpful tips to keep in mind for a successful first DIY sauerkraut.
Mistake #1: Using the Wrong Salt
The quality of salt used in fermenting food like sauerkraut is of utmost importance. Using the wrong kind of salt can inhibit the growth of beneficial bacteria in your sauerkraut.
Avoid using iodized salt and other salts that contain additives. (e.g. table salt is iodized). These kinds of salts have been stripped out of all their minerals and put under high temperatures and chemicals during processing. They also contain anti-caking agents and other additives that can negatively affect the fermentation of your sauerkraut.
A better choice of salt for fermentation would be:
- Natural sea salt
- Himalayan/pink salt
These salts are processed in a much more natural way, without added chemicals/anti-caking agents.
Mistake #2: Letting Air Access The Fermentation
Air, to be more specific, oxygen is the greatest enemy of Lacto fermentation. It’s important that the sauerkraut jars are perfectly sealed to make sure that no air comes into the container.
Removal of oxygen in fermented food stabilizes ascorbic acid, preserves the color of the vegetables, and prevent microbial contamination.
Now this doesn’t mean you have to vacuum pack the jars, it simply means the cabbage MUST REMAIN UNDER THE BRINE, so that it doesn’t get access to the oxygen in the jar. This is one of the biggest reasons mold develops too.
Mistake #3: Not Waiting Long Enough
Although you can start eating sauerkraut after 3-4 days of fermentation, it is recommended to give your sauerkraut more time to ferment. It takes at least a month to be fully fermented. The more fermentation, the more nutrients.
If you don’t want to wait that long, ferment it for at least seven to ten days. Or follow this helpful guide I wrote about the different ways you can ferment food faster.
Things To Watch Out for When Making Sauerkraut

Here some of the fundamental things to watch out for throughout the process:
Temperature
You will see in many recipes; the proper temperature is not given enough importance. It is because the room temperature is good enough.
But it’s worth knowing in case the environmental temperature is too hot or too cold. Remember that the temperature shouldn’t be more than 80 degrees Fahrenheit and less than 60 degrees.
Below 60 degrees, the cabbage will not ferment. Above 80 degrees, the texture will be spoilt.
Insufficient Brine
Shredded cabbage is very lightweight. So, in time it will be lifted off the salt brine. While many people know that it should be pressed down to remove air pockets, many are oblivious about the importance of salt brine. Don’t be afraid to add more brine if needed.
Using Late Cabbage
Choice of cabbage plays an important role in making sauerkraut. Cabbages that are cultivated late in the season usually have fewer sugars to be fermented.
This doesn’t mean that you can’t use them at all, but it’s better to use cabbage with high sugar content for better results. Try looking for early and fresh cabbages.
When it comes to fermenting food, simple changes can make great differences and these small changes can make or break your homemade sauerkraut project.
Conclusion
If you’ve been looking for a way to get more probiotics in your diet, or you want to try a delicious fermented food, making sauerkraut is an easy and tasty way to do it. It’s an excellent beginner friendly choice. It’s the first food I ever fermented and it started me off fermenting all sorts of foods thereafter!
Fermenting cabbage is one of the easiest ways get your daily dose of probiotics that helps support a healthy immune system. I hope this article inspires you to start this process in your home.
Fermenting food is a process that is a little different from a lot of other food preparation, but once you get the hang of it and notice its many health benefits, you will love it!

Can You Mix Different Kefir Grains?
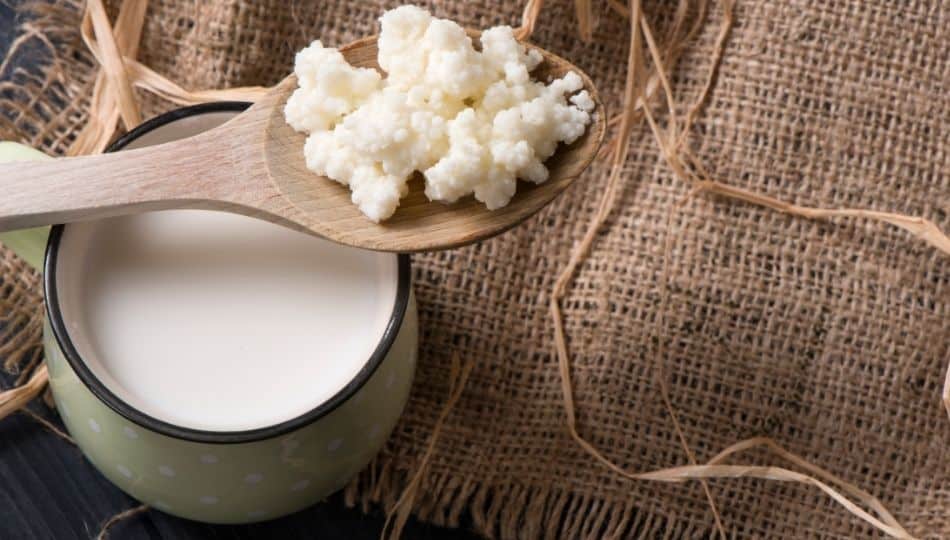
Fermenting and fermented products are an important aspect of homesteading and healthy living. Milk kefir is one of those products that have gained popularity in recent years because of its health benefits. Kefir grains can be sourced from different locations, so if you get kefir grains from different suppliers, you may wonder if you can mix them together.
Mixing kefir grains from different sources is totally okay. The primary micro-organism in kefir will always be Lactobacillus. The different sub-species and species of yeast in the new kefir will not ruin the mixture. It may, however, change the flavor profile of the final fermented product.
Kefir grains are an ancient source of healthy bacteria and yeasts, and the products have been used since ancient times to promote a healthy gut. However, you may wonder if all the bacteria and yeast are the same mixture of types and species, even if they come from different locations. If this is the case, let’s see what happens we we mix these kefir grains from different sources.
Can You Mix Different Kefir Grains?
As we’ve said, mixing kefir grains from different sources is not a problem and will not cause any particular problems to your kefir grains or the different colonies of bacteria living on them.
The kefir grains and their associated colonies of micro-organisms will acclimatize to living in the same environment, but there may be some changes in quantities and species of these tiny creatures.
The micro-organisms will compete for resources, and the weaker colonies may well be outcompeted and thus may decline in numbers, and after a few cycles, they may disappear completely from the symbiotic colony.
This does not pose any particular health risk to you or your family, and it will not cause the final product to spoil or change any chemical composition of the final kefir product.
There will, however, be one possible change that may occur in your kefir when you mix grains from different sources. This change may or may not be one that is to your liking, so we offer some ways that you can test the products before you merge the two different grains.
What Changes When Mixing Kefir Grains?
Mixing kefir grains, as we have stated, does not pose any health risk, but it can bring about a potential change to the final kefir product.
The aspect of the kefir that could change can be the flavor of the final fermented product. The mix of micro-organisms in a particular kefir colony imparts subtle, unique flavors to the final fermented kefir.
When you introduce different micro-organisms and yeasts to the mix, it may change the final flavor profile of the kefir.
Certain micro-organisms will flourish in the mixed environment while others may die out, and the resulting balance of the micro-organisms will change the final flavor.
You may like this new flavor, but then again, it may not be quite to your liking if you enjoyed the original flavor that your own kefir grains produced.
How To Test Your Kefir Grain Flavor
To make sure that you are not going to get a subtle flavor that you don’t like in your kefir, you may want to try this method before you mix the new grains with your original batch.
Ferment a batch of milk with your new grains, even though it may be a small batch if the kefir grains are smaller in size.
Once this batch has fermented for the normal duration that you like, try tasting the kefir to see if you enjoy the flavor profile.
If you like the flavor and there is no hint of additional flavors that you can’t tolerate, then it is safe to add the kefir grains to your original grains.
If you dislike the flavor of your new kefir grains, don’t mix them in with your original batch of grains.
QUICK TIP: If the flavor is slightly different but not something you don’t like, try making other products from the batch of kefir that you would normally make, such as yogurt or cream cheese and see if the flavor works in those products!
If your ferment didn’t go as planned, you can always use the products in many other ways. An example of this is in this article I wrote about what to do when your kombucha over-ferments.
What Are Kefir Grains Composed Of?
The gelatinous, cauliflower looking structure that we call the kefir grains is simply the medium that the good bacteria in kefir adhere to as the biofilm on which they grow. This biofilm is made up of glucose and galactose in equal proportions.
The main bacteria that are responsible for starting the fermentation process in the milk are Lactobacillus kefiranofaciens in conjunction with Saccharomyces turicensis, upon which the biofilm is built.
A symbiotic community of a wide range of bacteria develop on the surface of the grains and assist in bringing a unique flavor to the final kefir product.
These micro-organisms can include yeasts, acetic acid bacteria, and a whole myriad of the Lactobacillus family of bacteria.
The primary component of kefir grains will always be Lactobacillus, but the proportions of other micro-organisms will vary from region to region.
Why Is This Important When Mixing Kefir Grains?
The regional differences in the concoction of micro-organisms and yeasts in kefir grains will impart a specific flavor to the final kefir product.

The kefir that is produced in each of these regions has a particular flavor due to variations in the Lactobacillus species from the different regions that added to the flavor in those regions.
How To Multiply Your Kefir Grains Without Mixing
One would assume that your intention of mixing kefir grains from different sources would be to boost your kefir production capacity.
If this is your intention, then you do not need to introduce kefir grains from a different source, simply go through the process of multiplying your own kefir colony.
We all know the propensity that bacteria have to flourish when they are given the right environment that is conducive to their multiplication.
Kefir grains are no different. If you give them a prime environment, they will multiply, and the kefir grains will get larger and larger. Once you have enough, you will need to slow their growth.
To get your kefir grains to multiply, follow this strategy to give them optimal growing conditions.
- Keep them at a constant, optimal temperature – Kefir grains prefer a temperature within the range of 68F to 85F or 20 Celsius to 29 Celsius. If you can keep the temperature constant within the middle of this range, they will be encouraged to multiply.
- Feed them the right food – Unpasteurized milk, whether goat’s milk or cow’s milk, is the best food for your kefir grains. If you are uncomfortable using unpasteurized milk, then you can use pasteurized milk, but their growth will be slower. Ultra-pasteurized milk is not suitable food for the kefir grains and will not cause them to flourish.
- Feed the kefir frequently – The kefir grains will consume the lactose in the milk, and as the lactose is used up, there will be less food for them to eat. Topping the milk up with fresh milk twice a day will give them more food. Just make sure the milk you add is at room temperature so that you do not chill the kefir by adding it directly from the fridge.
- Stir the grains – Give the grains a gentle swirl by swirling the jar, or give them a gentle stir with a wooden spoon. Never use metal objects to stir your kefir. The reaction of the metal in the acidic environment can kill your grains surprisingly quickly.
Following these steps will give your kefir grains the optimal environment to grow and multiply. Once they have grown to the point that you desire, you can slow their growth by placing them in the refrigerator overnight.
Mixing Kefir Grains Is Okay
It is completely acceptable to mix kefir grains from different sources, and it will cause no complications to the final kefir product other than possibly altering the final flavor profile of the kefir.
While this does not pose a health issue, it may pose a taste issue if you do not like the new flavor profile.
If you want to increase your kefir production, you will need to increase your original colonies by giving them an optimal growing environment rather than mixing kefir grains from different sources.
You may, however, find that mixing the grains will create new subtle flavors that you enjoy!